
Sesame-Pecan Salmon with “Avocado Goddess” Salad
Posted: March 30, 2012 Filed under: Fish, Gluten Free, Main Dishes, Salads, Uncategorized, Vegan Options | Tags: avocado, fish, salads, salmon, salmon salad, vegan, vegetarian 5 Comments If I were to find out this morning that I had to host a dozen execs for lunch today, this is the recipe to which I’d turn. It makes a beautiful and amazing-tasting one-bowl dish. Served with some warm crusty bread, it is all you need to impress your guests.
I invented this recipe when I married my husband eight years ago. Greg is from the great Northwest and adores salmon. I grew up in Texas cattle country with a mother who thought all fish tasted like cat food. Needless to say, I never developed a fondness for food with fins. If I were served fish sticks as a kid at school, I’d peel the breading off, eat that, leaving the meat for the disposal. Sad, I know.
It was for the love of Greg, and Greg only, that I determined to figure out how to cook, eat, and hopefully, love fish. This is the recipe that started my love affair with salmon. I served it to my pastor, Hugh Halter, and he scraped his plate cleaning, calling it “praline fish.” The coating isn’t quite like candy, but it is just as hard to resist. Truly this recipe was my gateway drug to the pleasures of fish, and as I continue to blog my favorite recipes, you’ll discover this landlubber has come to embrace the fruit of the sea with gusto.
The salad is easy, too, with a dressing that just adds 3 ingredients (avocado, fresh lime juice, pepper) to your favorite Ranch salad dressing.

Becky's Sesame-Pecan Salad with "Avocado Goddess" Dressing
Becky’s Sesame-Pecan Salmon
Serves 2
2 pieces fresh salmon, skin removed
1/2 c. thick teriyaki sauce (teriyaki sauce often has soy sauce in it that is made from wheat. Gluten free folks may want to make their own. Here’s one gluten free recipe.)
2 T. sweet Thai chili sauce
1/4 c. toasted sesame seeds (these are cheaper and come in larger containers on the Asian aisles of most grocery stores)
1/4 c. pecans, chopped to about the consistency of Grapenuts in food processor or blender
1 T. olive oil
Preheat oven to 350 degrees.
In one shallow wide bowl mix teriyaki and Thai chili sauce. In other similar bowl, mix sesame seeds and ground pecans. Coat both pieces of fish with sauce on all sides, then do the same with the seed-nut mixture. Carefully lay in a square glass baking pan that has been generously coated with olive oil. Pour any left over sauce and nut-seeds over all.

Bake for 10 to 15 minutes or until fish is done. (I prefer mine slightly opaque and moist in the middle.) I also like to broil the fish (watching carefully) for just few seconds to give the topping additional thickness and crunch.
Avocado Goddess Salad
Ingredients:
1 bunch Romaine lettuce, chopped
1 avocado, peeled and cut into thirds
1/2 c. Ranch dressing, any kind you like
1 T. fresh lime juice
1 t. pepper
Directions:
Put about 1 to 1 1/2 cups of chopped Romaine into each of two large salad bowls. (I use big wide pasta bowls.)
Take 2/3 of avocado and cut into slices, arranging evenly on top of the two salads.
Mash the other 1/3 avocado in a small bowl. Add Ranch dressing, lime juice and pepper to this and stir.

Avocado Goddess Dressing
Using a wide spatula, carefully lay one piece of the cooked salmon on top of each salad. Drizzle “Avocado Goddess” dressing over all.
Vegan Options: You could easily make sesame-pecan tofu with slices of pressed tofu marinated in the teriyaki Thai Chili sauce mixture instead of fish and simply substitute vegan ranch dressing to make the Avocado Goddess dressing. This is a great dish for serving both vegans and non-vegans since it wouldn’t take much extra work at all to make both versions.
Chicken Option: You can use this same technique with chicken tenders if you prefer.
Roasted Cauliflower and Kale Curry — Easy Enough for Curry Cowards Like Me
Posted: March 29, 2012 Filed under: Main Dishes, Uncategorized | Tags: cauliflower, coconut, curry, kale, lentils, main dish, roasted garlic, vegan, vegetarian, veggies 2 Comments
I’m a curry coward. It’s exotic. It’s bright yellow. It has a long ingredient list.
So last night I decided to come up with a simple curry that even a curry coward like me can manage to make. I took the easy route and bought a can of curry powder instead of buying ten different spices and making my own. The first batch I made had lots of veggies and chickpeas, but I decided that three ingredients really stood out from the crowd — cauliflower, kale, and roasted garlic. So I made it again for breakfast this morning while the baby was napping. The life of a food blogging mama! This time I just used those two veggies and a whole bulb of roasted garlic. Much easier. Much better.
I don’t know if brown sugar is a classic addition, but I found it really balanced the strong curry flavors nicely. Curry powders can vary from brand to brand, so you may want to taste the seasoning as you go to see if it needs adjustments. Here’s the kind I used.

Roland Pure Indian Hot Madras Curry Powder (I didn't think it was spicy at all)
Are you intimidated about making your own curry too or was I the only curry coward?
What other dishes would you love to make but haven’t because they seem to complicated or overwhelming?

I watched Michael Symon on The Chew sharing tips on plating food and I thought I'd give it a try. Professional, eh?!
Rachel’s
Roasted Cauliflower and Kale Curry
Serves 4
Ingredients
1 bunch of Kale, ribs removed, washed & dried well
1 head of Cauliflower, chopped into “trees”
1 bulb of Garlic
3 tbs Olive Oil, divided
~ 4 tbs Curry Powder, divided
4 tsp Brown Sugar, divided
1 tsp Salt, divided
1 can of Coconut Milk
16 oz Lentils, prepared per package instructions
Directions
Preheat oven to 350 degrees. Cut off the top of the garlic to reveal the top of each clove. Put the bulb on a piece of foil, drizzle olive oil on top, and wrap the clove tight with the foil. Put in the oven (directly on the rack is fine until you get the cauliflower in).
In a large bowl, toss the cauliflower “trees” with about 1 tbs olive oil. Tossing as you go, gradually add 1 tsp curry powder, 1 tsp brown sugar, and 1/2 tsp salt until evenly coated. Place on a large baking sheet sprayed with nonstick spray and put in the oven. (Move the garlic onto the baking sheet at this time.) Set the timer for 20 minutes.
In the same large bowl, toss the kale with 1 tbs olive oil, using your hands to massage it into the leaves. Tossing as you go, gradually add 2 tsp curry powder, 1 tsp brown sugar, and 1/2 tsp salt. Put the kale on a large baking sheet sprayed with nonstick spray. It will be crowded, but that’s okay, we aren’t looking for crisp kale chips so it can be a little crowded. Add the kale to the oven, leaving the garlic and cauliflower in too. Cook everything for 20 more minutes. You might want to give the cauliflower and kale a shake every now and then.
In a small sauce pan, heat 1 tbs olive oil on medium heat and add 3 tbs of curry powder. Stir and cook for about 2 minutes. Add 2 tbs brown sugar and 1 can of coconut milk. Stir.
When the timer goes off, turn the oven off and remove the garlic. You can leave the kale and cauliflower in the oven to stay warm while you finish up the sauce. Carefully (it will be really hot) take the garlic out of the foil and squeeze it into the curry sauce. You can just stir it in if the garlic is really oozy or put it into the blender for a few seconds to evenly incorporate it.
Serve veggies on a bed of lentils and top with curry sauce.
And just like that I’m over my fear of curry and you can be too!
Killer Chipotle & Roasted Pepper Salsa (with a Side of Relational Advice)
Posted: March 28, 2012 Filed under: Appetizers, Uncategorized | Tags: chipolte, dips, hatch peppers, Mexican Food, picante sauce, roasted peppers, salsa, tortilla chips, vegan, vegetarian 2 Comments Sometimes life is funny, and sometimes, not so much. “Mama said there’d be days like this,” and for days like this you need three things: a good friend, some good clear-the-air advice, and some comfort food. Then, before too long, life can be funny again.
A single girlfriend and I were talking this morning about toxic relationships. Particularly we were pondering the differences between normal friends who are in a temporary season of pain who deserve and need our empathy, patience and compassion; versus toxic friends whose problems are unending and sap all the energy and joy out of every minute we spend with them, like an Emotional Hoover.
We came up with the 3 B’s that signal it might be time to Back Away from a Relationship. Red flags, we decided, are:
1. Belittling — when a person makes you feel small, talks down to you, uses superior tones
2. Blaming — when the person’s default mode is always to blame someone else and never takes any responsibility for their part in bad situations. If someone is constantly blaming others or the universe or God for their problems, it won’t be long before they are blaming and attacking you.
3. Black-Hole — normal people have seasons of neediness and self-focus following tragedy or during illness or stress; but toxic people are walking black holes of ever-growing, never-ceasing, and always-changing need
Having discussed relationship sticky-wickets to our mutual satisfaction, we turned the conversation to comfort food. In fact, we discussed the perfect food for washin’ a crazy-making friend or a bad day right out of our mind. In her book, Eat, Pray, Love, Elizabeth Gilbert quoted someone’s grandmother as saying, “There’s no trouble in this world so serious that it can’t be cured with a hot bath, a glass of whiskey, and the Book of Common Prayer.” I agree with the hot bath and Book of Common Prayer, but my preferred comfort beverage would be a frosty margarita alongside a big bowl of spicy, chunky, smoky, colorful homemade salsa and chips.
And it just so happens that I make the best chunky smoky salsa in the universe. (Ditto on the margs… but that is for another post, another time.) When my daughter Rachel had her baby this past summer, I made salsa day after day because her husband Jared loves salsa and chips like only a Texas boy can. This gave me a chance to perfect my recipe, and this is the best of the best!
So come to Mama for the recipe, then whip up a quart of this brain-cleansing salsa, grab some chips and your fave margarita, find a spot in the sun, chill out and let the stress fall away.
Life is hard enough, your salsa should be easy. This version is oh so forgiving, allowing lots of variations to the basic recipe.
Everyone I serve this to asks for the recipe, so be prepared to share! (Also usually makes enough to send some home with your grateful guests.)

Becky’s Killer Chipotle & Roasted Pepper Salsa
Ingredients:
Makes about a Quart of Salsa
Into a food processor or blender put:
*I put three small peppers on my gas flame (set to high) and roast them while I’m tossing the rest of the ingredients into the blender, turning as they blacken. Simply scrape off most of the blackened skin (I use a damp paper towel for this job), seed them and pop in the blender. You can also halve them and broil them if you don’t have a gas burner.

Roasting small tri-colored peppers on a gas burner
** Here’s what a can of chipotle peppers in adobe sauce looks like. These babies are strong, and I often only use one or two, so I pop the rest (along with the sauce) in a small freezer bag and store them in the freezer. When I need one I just cut off what I need.

Marinated Portobello Burger
Posted: March 27, 2012 Filed under: Main Dishes, Uncategorized | Tags: dairy-free, meatless, mushroom burger, mushrooms, onions, portobello burger, portobellos, sauteed veggies, spinach, vegan, vegetarian, veggie burger, veggies 3 Comments
Marinated Portobello Burgers
When I was about 12, I went on a ski trip with my family. While hanging out at the base, some older teens hollered out to me and my brothers “Hey, you want some shrooms?”
I giggled and naively said, “Those guys must be on drugs or something. Why would they think we want some mushrooms while we are skiing?”
My big brothers busted out laughing.
I didn’t know how right I had been until they finally stopped laughing to explain to me what the “shrooms” those dudes spoke of were.
Lucky for me, I didn’t like mushrooms and would have turned down the offer even if my big brothers hadn’t been there to fill me in.
Nowadays, I might be in trouble if someone hollers out and offers me some shrooms, though.
It turns out after more than 25 years of hating mushrooms, I’ve discovered I actually love a good shroom!
The first time I ordered a Portobello Burger was shortly after going vegan. It was the only thing on the menu I could eat, so I figured I’d give it a try. It was thick, chewy, flavorless and spongy. I stayed away from portobellos after that and eased my way into the land of shrooms with baby bellas sauteed in evoo and garlic.
Recently we were at the new plant-based cafe in Dallas, VSPot, and I decided to try their marinated portobello burger. Some people at the neighboring table were raving about it, so I thought I’d give the portobello one more go. It was so succulent it almost melted in my mouth. The mushroom was cooked down really thin so you would never have guessed you were biting into a thick spongy portobello cap.
Tonight I made my own portobello burger and I have to say, it was awesome. The flavors are quite different than the one we had at the VSpot and I didn’t manage to get it quite as thin, but it will definitely hold me over until our next visit!
Wanna shroom?

Rachel’s
Marinated Portobello Burger
Serves 4
Ingredients
4 Portobello Mushrooms, stems removed and gently wiped clean with a damp sponge
4 Buns (I used Whole Grain Ciabatta Sandwich Rolls from our store’s bakery)
1/4 cup Apple Cider Vinegar
1/2 cup of Braggs Aminos (or soy sauce)
1/4 cup Olive Oil
1/4 tsp pepper
1/4 tsp sugar
1/2 tsp crushed red pepper
Topping suggestions: sauteed spinach, caramelized red onions, roasted red peppers
Mix the marinade in a bowl. Pour into a gallon sized zip top bag and add the portobello caps. Shake it up to cover the mushrooms and place in the refrigerator. I let mine marinate for about 5 hours, but I think you could go as little as an hour if you’re short on time or as long as 8-10 if you want to marinate them while you’re at work.
Heat a skillet on medium heat with evoo covering the bottom. Put the mushroom caps in 1-2 at a time bottoms down and with a spatula or the bottom of a sauce pan, gently hold the mushrooms down. Don’t apply too much pressure at first or you’ll tear the edges. Turn the mushrooms over and continue applying gentle pressure. Repeat turning back and forth every few minutes for about 10 minutes until the mushroom cap is only a few centimeters thick.
I ate mine on ciabatta rolls that I smeared with Vegenaise (vegan mayo) mixed with minced garlic and toasted on a lightly oiled saute pan (this gives the bread a nice crunch), topped with sauteed spinach and garlic and caramelized red onions. I thought I was going to need a protein like some beans to add to this, but I was plenty full after one mushroom burger and a side of sauteed yellow squash and zucchini.
This was printed from: We Laugh, We Cry, We Cook
The site URL: http://welaughwecrywecook.com
The Title: Marinated Portobello Burger
The URL:https://welaughwecrywecook.com/2012/03/27/marinated-portobello-burger
© Copyright 2012 – All Rights Reserved
Pistachio and Caramelized Onion Pizza
Posted: March 26, 2012 Filed under: Appetizers, Breads, Main Dishes, Uncategorized | Tags: almond cheese, caramelized onions, flat bread, Naan bread, pistachios, pizza, vegan, vegetarian Leave a comment I have been working out fairly consistently since last August, thanks to the encouragement of my good friend Ingrid. I get up by 7:00 am (a great feat for this non-morning person) and meet Ingrid at a local gym at 8:00 where we exercise while solving the world’s problems and…often talk about great food. (Perhaps this is why the pounds aren’t just dropping off of us?)
Here’s our conversation from last week, both of us huffing and puffing on ellipticals, side by side.
“Becky!” says Ingrid. “I was visiting my friend in California who is a vegan, like your daughter. And I came up with the best recipe for a pizza.”
“Let’s hear it.”
“Well, you start with a pizza crust and then sprinkle it with almond cheese.”
“Does almond cheese tastes good? Because I think soy cheese tastes like shredded rubber bands, and I’ve been looking for a good vegan cheese to use when I cook for Rachel.”
“It does! And it melts. Then you cook some garlic and onions in a pan with a little olive oil until they just start to brown and caramelize. Put these on top of the almond cheese, top with a few unsalted pistachios and — hey, Becky, why did you stop walking on your machine?”
I looked down and sure enough, I was so caught up in Ingrid’s description, that I’d completely frozen, thinking of nothing but how those flavors might taste together, my head in a pistachio-caramelized onion pizza cloud.
“Sorry,” I said, resuming my exercise. “What can I say? I brake for food. Even descriptions of it.”
After our gym session, I didn’t even change out of my gym clothes before heading to Whole Foods and gathering the ingredients. I chose garlic Naan bread instead of pizza dough because I was in a hurry to try this feast.
Let me just say, this new pizza recipe may cost me a few extra miles of exercise.
And it will be totally worth it. You have to try this!
 Ingrid’s Pistachio and Caramelized Onion Pizza

Ingredients:
Serves Two
2 pieces Naan Bread (I love Whole Food’s Garlic Naan Bread. But it is not vegan, so if you want to be pure vegan here, you may want to use Whole Food’s pizza dough.)
1-2 T. olive oil, divided
1. c grated almond cheese (or Mozzerella cheese, but if you are a vegan and haven’t tried almond cheese, it is the best tasting vegan cheese I’ve tried thus far)

1 red onion, sliced thin
2 cloves garlic, minced
1/4 c. roasted, unsalted pistachio nuts
Directions:
Using a grill pan and a little olive oil, grill the Naan bread on both sides until it is crispy and has light golden grill marks. Set aside on a heavy duty cookie sheet or clay pizza pan.

In a skillet, saute the onions and garlic in a tablespoon or so of olive oil until onions have started to caramelize but still have a little bite/crunch to them.
Put 1/3 cup grated cheese on each piece of Naan. Top each with half of the onion-garlic mixture. Sprinkle each pizza with 2 T. roasted, unsalted pistachios.
Bake at 375 until cheese melts. (The almond cheese takes a longer to melt than does “real cheese,” and I actually ended up nuking the pizza in the microwave a few seconds to get it to “melty” consistency. It is much better than soy cheese, very good –but not as yummy as the Real Mozerella McCoy.) Cut in wedges and serve alongside fresh fruits for a light supper or beautiful appetizer to go with your next wine party!
*Besides being handy behind a stove top, Ingrid is also a social media whiz, and serves as a social media consultant for my husband’s literary agency. (Click on her name to read her most recent article on blogging tips.)
Strawberries Romanoff
Posted: March 23, 2012 Filed under: Desserts, Fruit Dishes, Uncategorized | Tags: fruit desserts, fruit salads, strawberries, strawberries Romanoff, strawberry dessert, vegan option, vegetarian, whipped cream, yogurt Leave a comment
When my daughter Rachel was about three or four, I jotted down some of the adorable phrases and words that I loved to hear her say. “Tears” were called “cwy dwips” (cry drips), and a “suitcase” was a “cuse box.” Her word for “strawberries” was “STA-biddies” which I still remember her saying, her whispy blond hair blowing around her as she bit into the ripe fruit, grinning while sweet red juices rolled down her chin.
Well, “sta-biddies” are in abundance now, and on sale today!
When I saw them overflowing the grocery display, my mind drifted to Strawberries Romanoff, a delectable concoction of strawberries served under a creamy fluff of brown-sugar cream, spiked with brandy, rum or bourbon. I first tasted this summer dream treat at La Madeleines, a wonderful French cafe, popular in the Dallas-Ft. Worth area. Whenever I visit Rachel in Texas, we do our best to go to lunch at La Madeleines and I always order Strawberries Romanoff for dessert.
Last summer, when my mom was visiting Denver, I tweaked and combined a few recipes I found online and produced this version of Romanoff cream which we like even better than the dish from La Madeleines! Mom and I sat around the kitchen counter and licked the bowl completely clean!
It only takes about five minutes to make the sauce, making this an easy, refreshing and beautiful dessert for these long Spring and Summer evenings. It looks oh so elegant, too.

Becky’s Strawberries Romanoff
Serves 6
Ingredients
1 c. whipping cream
6 T. powdered sugar
1 c. Greek Yogurt, plain (may also use sour cream)
6 T. brown sugar (Plus a T. more for garnish)
2 T. bourbon (or scotch, rum, brandy or your favorite liquor; or 1 T. vanilla or rum extract if you prefer non-alcoholic)
2 pints fresh strawberries, hulled and rinsed (You may keep them whole, or slice them, your preference. If they are tart, you may want to sprinkle a bit of sugar on them as well to sweeten them up some.)
Directions:
In a medium mixing bowl, whip cream into soft peaks, slowly adding powdered sugar to the whipped mixture.
In a separate smaller bowl, whisk together Greek Yogurt, 1/3 c. brown sugar and bourbon.
Add yogurt mixture to whipped cream and fold in until well combined.
To serve, spoon strawberries into martini glasses, about 2/3 full, place generous dollop (about 1/3 c.) of Romanoff sauce over top of each. Sprinkle a little bit of brown sugar over the sauce for garnish.
Variations: You can also layer the strawberries and sauce in parfait like fashion. Big wine glasses, or pretty bowls can also work in place of martini glasses. The powdered sugar helps the cream hold its shape so that it will keep for a couple of days in a sealed container. One of the reasons I always used powdered sugar instead of granulated when I make whipped cream.
Veganize This: Try coconut milk “whipped cream” and any of the many varieties of plain non-dairy yogurt.
This was printed from: We Laugh, We Cry, We Cook
The site URL: http://welaughwecrywecook.com
The Title: Stawberries Romanoff
The URL:https://welaughwecrywecook.com/2012/03/23/strawberries-romanoff/
© Copyright 2012 – All Rights Reserved
Baked Macaroni and Cashew Cheese
Posted: March 22, 2012 Filed under: Main Dishes, Uncategorized, Vegan, Vegetarian | Tags: cashew cheese, cashews, casserole, mac and cheese, macaroni and cheese, non-dairy cheese, vegan, vegan casserole, vegetarian 7 CommentsYesterday was our Vegan Anniversary! We celebrated by making this baked macaroni with cashew cheese, a version of one of our favorite go-to vegan dishes.

Baked Macaroni & Cashew Cheese
Two years ago Jared and I were on a Spring Break vacation at our favorite little island in Florida. Want to see how we celebrated back then? Jared is going to kill me for posting this.

Oh yes, that’s how we rolled! I believe that is a plate of barbeque pork nachos bigger than Jared’s head, a grouper sandwich hanging from his mouth, some grilled shrimp, a side of onion rings, and I don’t think that green St. Patty’s Day beverage is a tall glass of wheatgrass. Though we don’t have a photo to prove it (thank goodness!), I too helped devour this heart attack waiting to happen. Little did we know, this was one of our last meaty meals. We certainly went out with a bang didn’t we!?
On our drive back from Florida to Texas, we listened to some books on CD that I had randomly grabbed from our local library’s limited selection. One of them shared some pretty compelling information from The China Study that had us thinking twice about the dairy and meat in those nachos we’d devoured the week before. As we finished up the book, Jared proposed a challenge.
“Let’s try it. Let’s go vegan for a month and see how we feel,” he said.
A challenge I’d wanted to make myself, but would never have dreamed of proposing to my meat, cheese, and potatoes eating manly man of a man.
“Let’s do it,” I agreed!
And 24 months later, here we are with no plans of turning back.
Jared has even become quite the little vegan chef. He found the original recipe for the macaroni and cashew cheese and made it for us the first time. It was so good I asked him to make it again for both of our family’s Christmas dinners. To our surprise, even his teenage brother, the guy who has to have Kraft shells & cheese at every family gathering, liked it. We made it for my mom and Greg when they visited a few weeks ago and Greg announced “This is better than real mac and cheese.” I like the original a lot, but decided to make some tweaks to it to shake things up a bit.

Who knew you didn't need cheese to make a creamy and delicious macaroni casserole!?
Rachel’s
Baked Macaroni and Cashew Cheese
Inspired by Epicurean Vegan
Serves: 6-8 people
Ingredients
16oz small whole wheat pasta, cooked al dente (shells, rotini, elbow macaroni, or penne are all great)
1-1/4 C raw cashews
1/2 C nutritional yeast
1 tsp onion powder
1 tsp salt
1/2 tsp garlic powder
1/2 tsp white pepper
2 cloves garlic, minced
1 small white onion, chopped
2 Tbs EVOO
4 C unsweetened nondairy milk (I used almond)
3 Tbs cornstarch
1/2 C canola oil
3 Tbs Earth Balance (vegan butter)
1/8 C barley miso (any miso would probably work fine, the original recipe called for light miso)
1 cup dairy free sour cream
2 Tbs lemon juice
1 tsp Tabasco (optional)
Panko break crumbs
Smoked Paprika (optional)
Italian Seasoning (optional)
Directions
Start by boiling your pasta water and preheating the oven to 400 degrees.
In a large saucepan saute garlic & onions in olive oil with a sprinkle of salt over medium heat for five minutes.
Meanwhile, in a large food processor bowl finely grind the cashews, but don’t let them turn to a paste (or you’ll end up with cashew butter–not a bad result, but not what you’re looking for here.) Add the nutritional yeast, onion powder, salt, garlic powder, and white pepper. Pulse a few more times until it looks like a fine powder.

Process until it is a fine powder, but before it turns into cashew butter
Add the onions and garlic to the food processor bowl and pulse a few times.
If the pasta water is boiling, go ahead and drop the pasta and set your timer for 2-3 minutes less than the package recommends. You want to pull out your pasta when it is al dente because it will continue cooking in the oven.
In the same large saucepan as you used for the onions and garlic combine one cup of milk and the cornstarch on high heat. Stir constantly with a whisk until the cornstarch dissolves. Gradually add the rest of the milk, stirring as you go. Finally add canola oil and Earth Balance. Bring the mixture to a simmer then decrease heat to low-medium, cover and simmer, stirring occasionally for 5 minutes. Turn off the burner, add miso and sour cream and stir until incorporated.
With the food processor running, gradually add the wet ingredients to the work bowl. Blend for about 2 minutes or until smooth and creamy. Next blend in the lemon juice and tabasco (optional).
In a large casserole dish, pour the cashew sauce over the pasta. You want to have a lot of liquid because it will reduce as it bakes.

To avoid dry casseroles, always make sure they have have plenty of liquid before they go in the oven to bake. For best results, add a smiling bouncing baby in the background as you cook. 🙂
Cover the top of the dish with a thin layer of panko bread crumbs. I like to add a sprinkle of smoked paprika and Italian seasoning, but it would be just fine without it if you don’t have it. Bake for 30 minutes at 400 degrees or until the bread crumbs are golden. Serve immediately.

Baked Macaroni and Cashew "Cheese"
Notes: If you have leftover cheese sauce, save it and use it on the leftovers since the sauce tends to thicken over time. Add a pat of Earth Balance and a drizzle of nondairy milk to your leftovers before reheating to keep it nice and creamy. I’ve also added chickpeas and veggies to this dish before baking to up the nutritional profile and it was really tasty. It’s a very versatile casserole and hard to mess up. Though I’ve never used dairy milk, butter, and sour cream, I imagine it would work great in this too if that’s what you have on hand.
This was printed from: We Laugh, We Cry, We Cook
The site URL: http://welaughwecrywecook.com
The Title: Baked Macaroni and Cashew Cheese
The URL: https://welaughwecrywecook.com/2012/03/22/baked-macaroni-and-cashew-cheese
© Copyright 2012 – All Rights Reserved
Jalapeno Jelly & Gorgonzola Burgers
Posted: March 21, 2012 Filed under: Beef, Main Dishes, Uncategorized | Tags: beef, Blue Cheese, Blue Cheese Burgers, burgers, Gorgonzola, Gorgonzola Burgers, Gorgonzola Cheese, hamburgers, jalapeno burgers, jalapeno jelly, main dish, Mexican Burgers, Mexican Food, mustard, Spicy burgers, Worcestershire Sauce 2 Comments
Jalapeno Jelly Gorgonzola Burgers
I am married to a man who appreciates a good meal like you wouldn’t believe. He enjoys the gourmet fare I occasionally serve, but one of his favorite suppers is a simple hamburger patty, a side of corn and a tossed salad. I served this meal to him not long ago, on a day when he must have been really hungry because as I handed Greg his plate, he looked up gratefully and said, “You saved my life!”
“Really?” I asked. “Just by cooking a hamburger patty?”
“Yes. Absolutely.”
Wow, I had no idea I welded that much power with a quarter pound of ground round.
Tonight I decided to jazz up his patty a bit, by mixing the meat with mustard, Worcestershire and jalapeno jelly, then stuffing it with Gorgonzola cheese and topping it with a bit more jelly and chopped jalapenos.
He loved it. I loved it. Lots of happy flavors did a salsa in my mouth.
I now share it with you, as my small part in helping to save lives.

Jalapeno Jelly Gorgonzola Burgers
Becky’s Jalapeno Jelly Gorgonzola Burgers
Ingredients
Makes 4 juicy patties, serves 2 – 4 people, depending on how hungry they are!
1 1/2 pounds ground beef
* 1/4 c. jalapeno jelly, divided (you’ll use some for topping)
1 T. mustard (I prefer stone ground, but use what ever kind you like)
1 large clove garlic, grated
1 t. Worcestershire sauce
1 t. salt
1/2 t. pepper
4 one inch cubes of Gorgonzola or blue cheese (you can use any cheese you prefer)
4 t. chopped pickled jalapenos (you may also use fresh jalapenos, too, just expect an extra kick of heat)
* Alternate substitute for Jalapeno Jelly: Mix 3 T. of your favorite jelly with 1 T. oickled jalapeno juice, Tabasco or buffalo sauce
Directions:
In a large bowl, use clean hands to mix hamburger meat with 2 T. of the jalapeno jelly (or substitute), and the next 4 ingredients. Divide into 8 equal size hamburger patties, making them a bit on the thin side. Crumble each 1 inch cube of cheese in the middle of 4 hamburger patties as shown in the picture below.

Top the cheese covered patties with the remaining 4 patties and press to seal the edges.
Place four patties in a hot skillet (may use a little olive oil to prevent them from sticking) and brown until nice caramelization takes place on one side. Flip and turn stove temp down to medium, cook about a minute to let the other side get good and brown as well. Then lower temp to low, cover and cook until burgers are cooked all the way through, to your liking.
Remove from skillet to plate lined with paper towel to let excess fat drain off. Spread a teaspoon of jalapeno jelly over each burger before serving, then garnish each patty with about a teaspoon of chopped jalapeno.
Wonderful with corn and a green salad made with tomatoes and avocados. Or make into gourmet hamburgers with a dollop of guacamole between the burgers and buns.
This was printed from: We Laugh, We Cry, We Cook
The site URL: http://welaughwecrywecook.com
The Title: Jalapeno Jelly Gorgonzola Burgers
The URL: https://welaughwecrywecook.com/2012/03/21/jalapeno-jelly-gorgonzola-burgers
© Copyright 2012 – All Rights Reserved
Sesame Broccoli Slaw
Posted: March 20, 2012 Filed under: Uncategorized | Tags: appetizer, asian, broccoli, carrots, gluten-free, salad, sesame, side dish, vegan, vegetarian, veggies 2 Comments
Today, a new mom friend asked when she would ever feel like herself again after quitting her job and becoming a mother full time. At first I chuckled and thought about saying, “I think it will be about 30 years from now!” Then I recalled there was a moment after Jackson was born, when I first felt like my old self again.
He was about three months old and Jared and I were desperate for a night to ourselves. Money was tight, though, now that I wasn’t working and bills for the two day hospital visit were piling up. The amount we owed to doctors was growing faster than Jackson was! Despite our empty bank account, we called the grandparents and asked if they could watch Jackson for the evening. They happily obliged.
We couldn’t afford to go out to eat, but with the few groceries we had on hand and a little creativity I planned to turn our patio into the finest bistro in town. (The competition isn’t too steep in Small Town, Texas!) Before we dropped Jackson off, Jared and I prepped all the food, cleaned the house, hid all the baby gear away, and set up a table on the back patio. I got dolled up, putting on a dress and heels for the first time in months, thrilled to fit into my pre-pregnancy clothes.
When we returned to our home “bistro,” all was ready for wining and dining. It was a perfect fall evening with just the slightest chill in the air. A bowl of delicious homemade vegetable soup and a bottle of Pinot Noir kept us plenty warm while we chatted the night away.
I remember stopping mid-sentence and saying to Jared, “We are talking, like really talking, and I’m actually able to focus on what we are saying!” The newborn haze had lifted for at least an evening and I felt like my old self again. I’d forgotten how much I loved spending the day in the kitchen, and evenings together, with the first love in my life. It was in that moment I realized though motherhood will forever change me, and in ways I’m really grateful for, I still need to make room in my life for the things that inspire and energize me. I’ll be a better mother for it.
One of my favorite creations from our romantic evening was an Asian-inspired Sesame Broccoli Slaw I served as our appetizer salad. It was crunchy, tangy, sweet, and easy to make ahead so it was waiting for us when we arrived at The Back Porch Bistro.

Rachel’s
Sesame Broccoli Slaw
Serves 2 as a side salad or appetizer, probably up to 4 as a side dish.
Ingredients
2 cups Broccoli, thinly sliced into ribbons
2 cups Carrots, thinly sliced into ribbons
4 tbs Rice Vinegar
2 tbs Olive Oil
2 tbs Organic Sugar
2 tbs Sesame Seeds
1 tsp Sesame Oil
1 tsp Salt
Directions
Slice the broccoli and carrots into ribbons as thin as you can. (A vegetable peeler works great to “cut” the carrots really thin. Just start about half way up the carrot and peel, peel, peel lovely little ribbons. Then start over with the upper half of the carrot.) In a bowl, add all of the ingredients and toss. Cover and refrigerate for at least 30 minutes to let the flavors mingle and the carrots and broccoli soften up. Can be served chilled or at room temperature.
This was printed from: We Laugh, We Cry, We Cook
The site URL: http://welaughwecrywecook.com
The Title: Sesame Broccoli Slaw
The URL: https://welaughwecrywecook.com/2012/03/20/sesame-broccoli-slaw/
© Copyright 2012 – All Rights Reserved
Blueberry Raspberry Oat Nut Bars
Posted: March 19, 2012 Filed under: Breakfast Foods, Desserts | Tags: bar cookies, blueberries, blueberry bars, blueberry desserts, blueberry oat nut bars, breakfast, breakfast food, dessert, nuts, oats, snacks, treats, vegan, vegetarian 15 Comments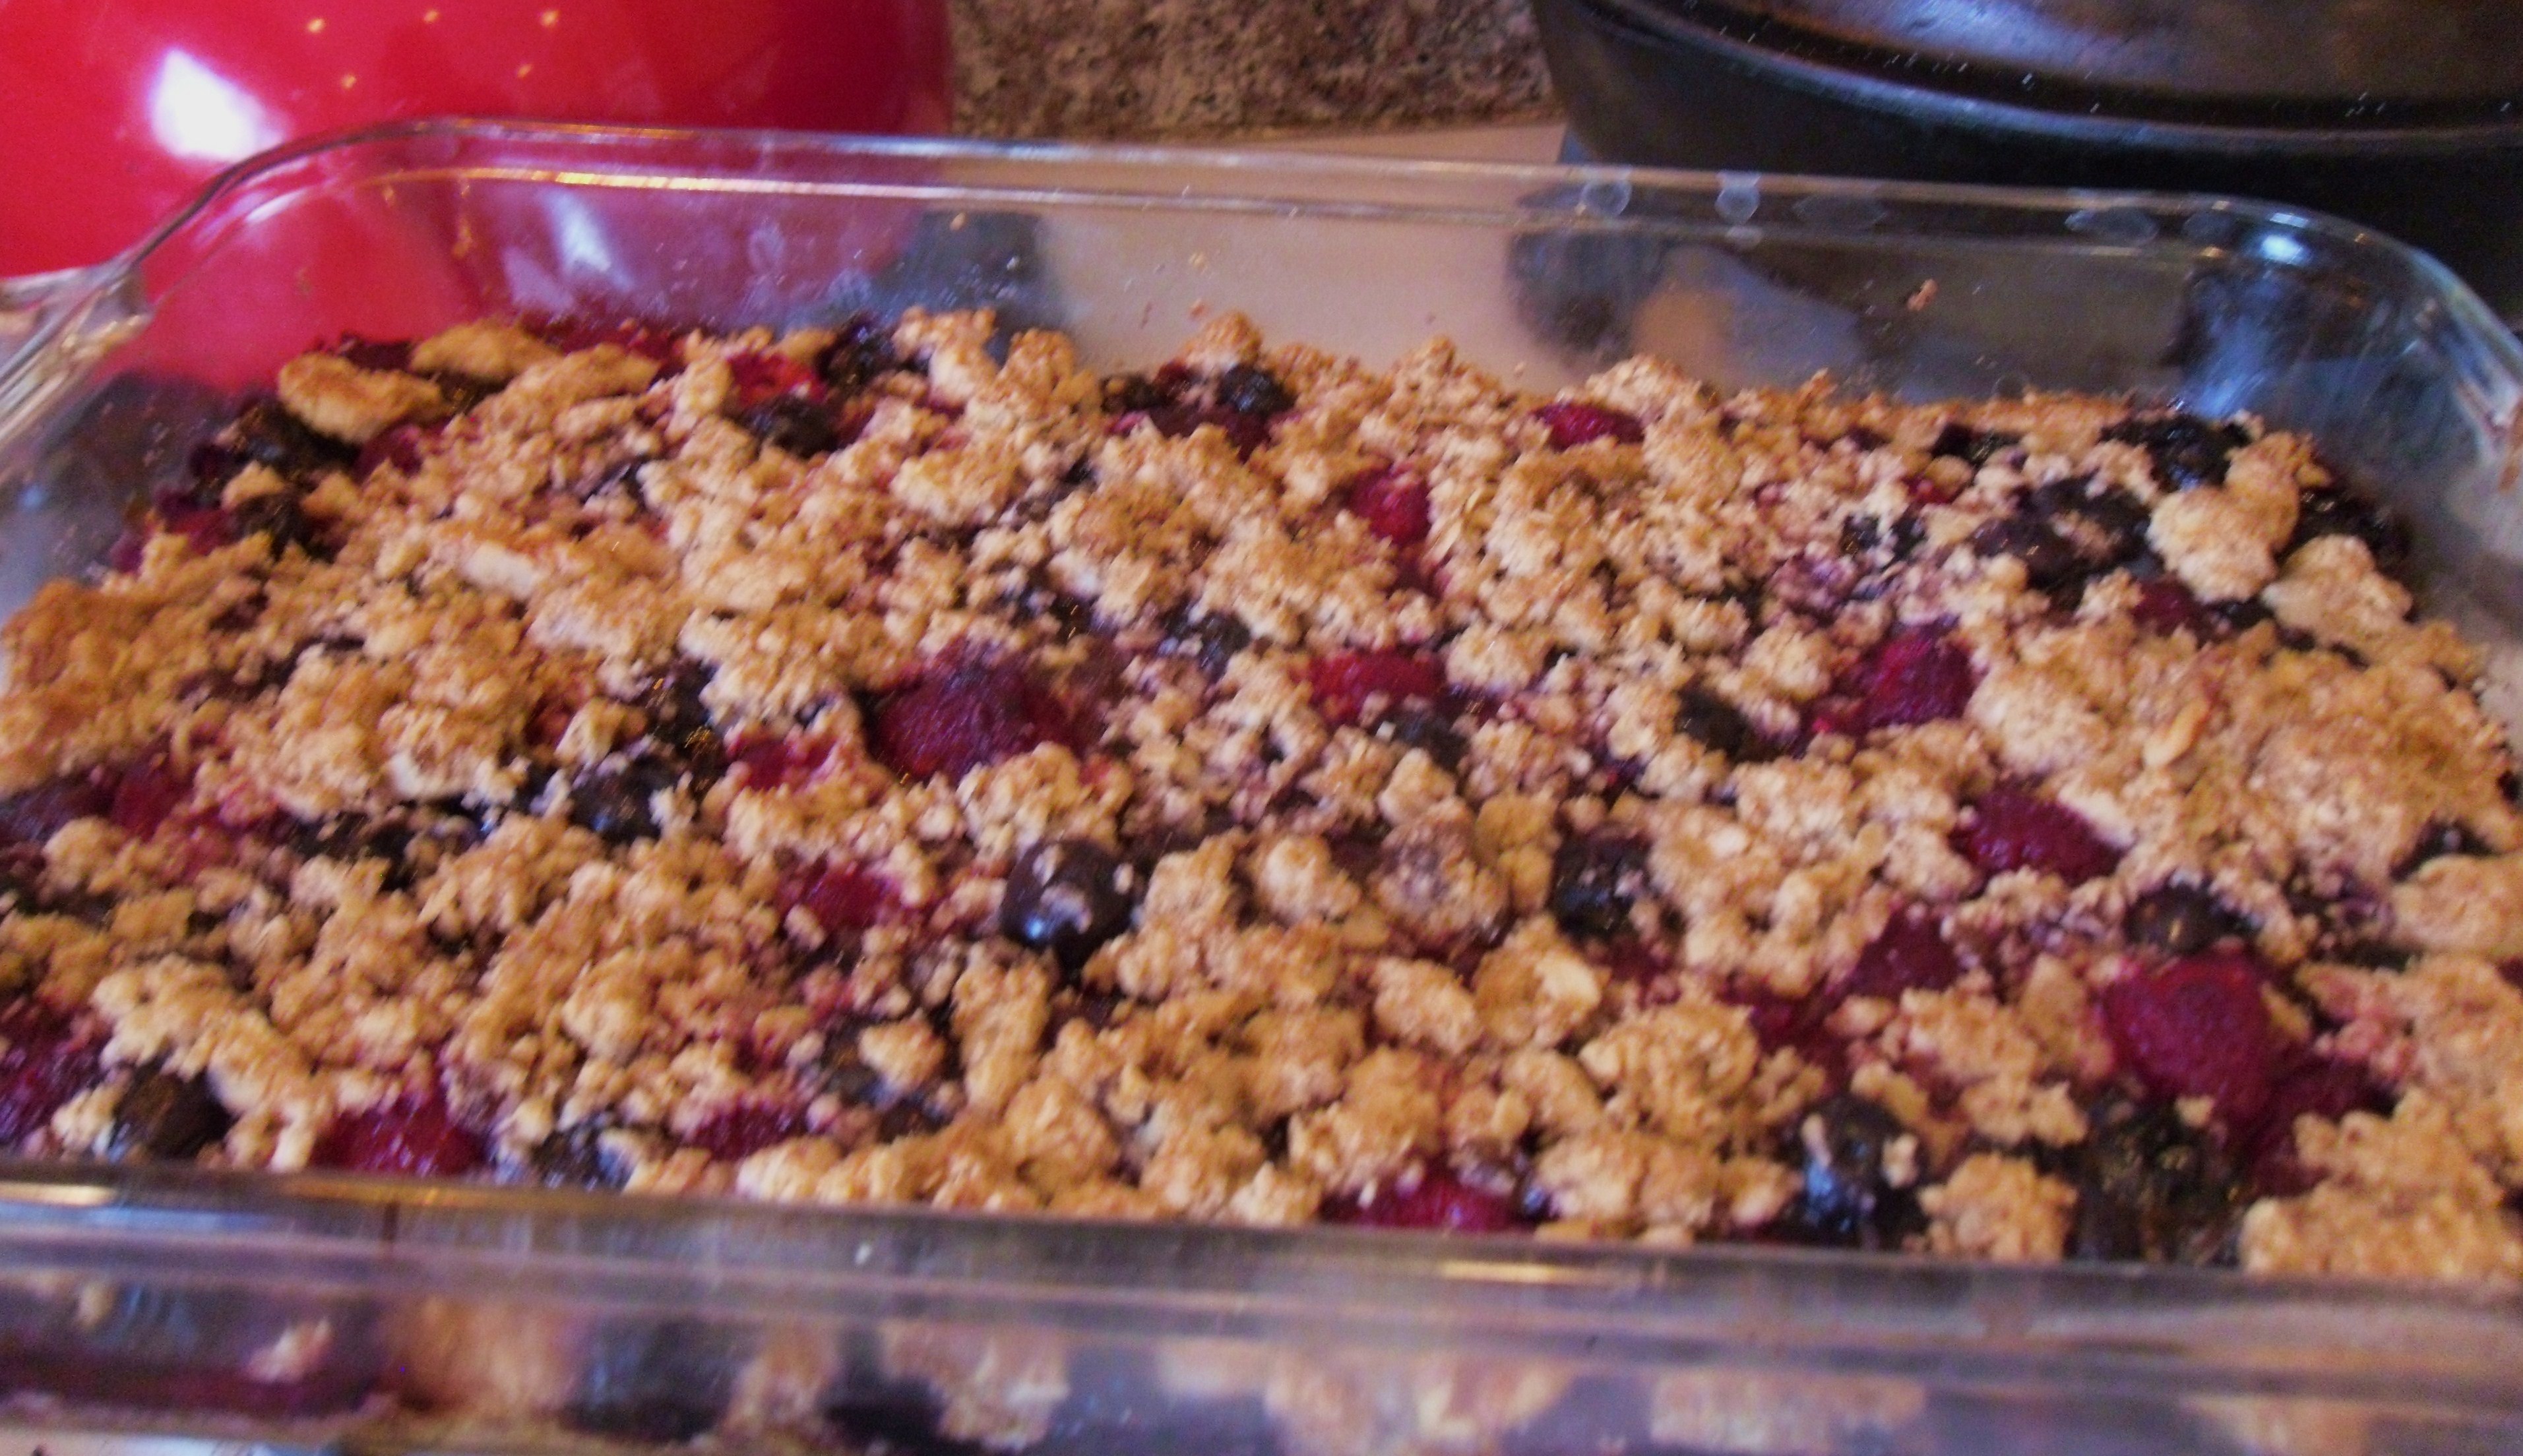 (Becky, the Mama.) This week I had a run of crazy mistakes that defy even my questionable logic. One day began by sending my husband’s business blog post, unedited, to hundreds of subscribers on the wrong day. From there it seemed every hour was punctuated by a wrong move, a major mess or spill in the kitchen, an embarrassing misspelling on social media, or a relational faux pas.
I was determined to make the next day mistake-free, and sailed through until about 3:00 pm, when I darted into a store and ran into a friend. Her face was full of compassion as she hugged me. “I read about all your latest mishaps on Facebook, bless your heart.”
I smiled and said, “Yes, but I’m having a much better day. No mistakes yet!”
She pointed to my abdomen and said, “So that big white sticker that says, ‘Citrus juicer, $5.00’ on your stomach, is that on purpose?”
Oh well, there’s “always tomorrow.”
This morning I woke feeling chipper, and posted a status on Facebook that described my excitement about going to my friend Sue’s house to celebrate her birthday with some of her good home cooking. I decided to whip up my favorite quick and easy berry bars to bring for dessert. They are a “just right” treat; not too sweet. Perfect under ice cream after dinner, but wonderful with a glass of milk for breakfast as well.
As we were enjoying our meal around their table (fabulous tenderloin steak, fresh corn on cob, and pesto pasta), Sue’s husband Jason grinned and asked, “Should we tell her now?”
“Tell me what?” I asked.
“Oh, Jason,” Sue said. “I wasn’t going to say anything. Becky had a hard week.”
“What?” I repeated.
Jason laughed. “Sue’s birthday is next week. We’d actually invited you to come for dinner next Sunday! But when Sue saw your status update, we thought, ‘Let’s just go with it. We’re free tonight, anyway.’”
I left half a pan of these blueberry raspberry bars with Jason and Sue, and hope it will remind them of how much I love them for being so patient and kind to their absentminded friend.
P.S. My daughter Rachel just wrote, “When my mom came to stay with me after Jackson was born, she made me these blueberry raspberry bars. I was a ravenous new nursing mom and let me just say, these did not last very long! They are especially delicious in the middle of the night with a glass of almond milk. Sigh…I miss those early nursing days when I could eat constantly and still lose weight!”

Blueberry Raspberry Bars
Becky’s Blueberry Raspberry Oat Nut Bars
Ingredients
Serves 12-15, depending on how big you cut the bars.
1 c. butter (vegans can substitute coconut oil or Earth Balance butter or a mixture of both)
1 c. brown sugar
1 3/4 c. flour
1 tsp. salt
1 1/2 c. oatmeal
1/2 c. chopped nuts (walnuts, pecans, almonds, whatever nut you like)
1 c. fresh or frozen blueberries
1 c. fresh or frozen raspberries
Directions
Preheat oven to 375 degrees. Dump the first four ingredients into the food processor and pulse until crumbly. Add the oatmeal and nuts, process just until blended. (You can also do this with a mixer or use clean hands for the job.) Press half of the mixture into a greased 9×13 inch pan: spread blueberries over the mixture and sprinkle with the remaining oatmeal mixture. (Like a crumb topping.) Bake about 25 minutes or until golden brown. Cool 10 minutes before cutting into bars.
If you have any leftover (and this is a big IF), I have found they stay freshest when wrapped well and refrigerated, then nuke the portion you want to eat for few seconds in microwave.
Try these with other fruits (raspberries, strawberries, cherries, pineapple, apples, rhubarb… or combos thereof).
Also works well with other flours (gluten free) and grains. Can sub wheat germ or other flakey grains for some of the oats to upsize or vary the nutritional value. You can use date sugar instead of brown sugar for sweetening, and keep it sugar free.
I love for people to find a basic recipe-method that works, then get creative with it, to make it their own. This is a great recipe to “play with,” because it is hard to mess up! (Even for me.)
This was printed from: We Laugh, We Cry, We Cook
The site URL: http://welaughwecrywecook.com
The Title: Blueberry Oat Nut Bars
The URL: https://welaughwecrywecook.com/2012/03/19/blueberry-oat-nut-bars/
© Copyright 2012 – All Rights Reserved


