
Savory Italian Pot Roast Pasta
Posted: June 12, 2015 Filed under: Italian, Main Dishes, Pasta | Tags: cream cheese, garlic, marinara, meat, Pappardelle noodles, pasta, pot roast, steak, wine Leave a comment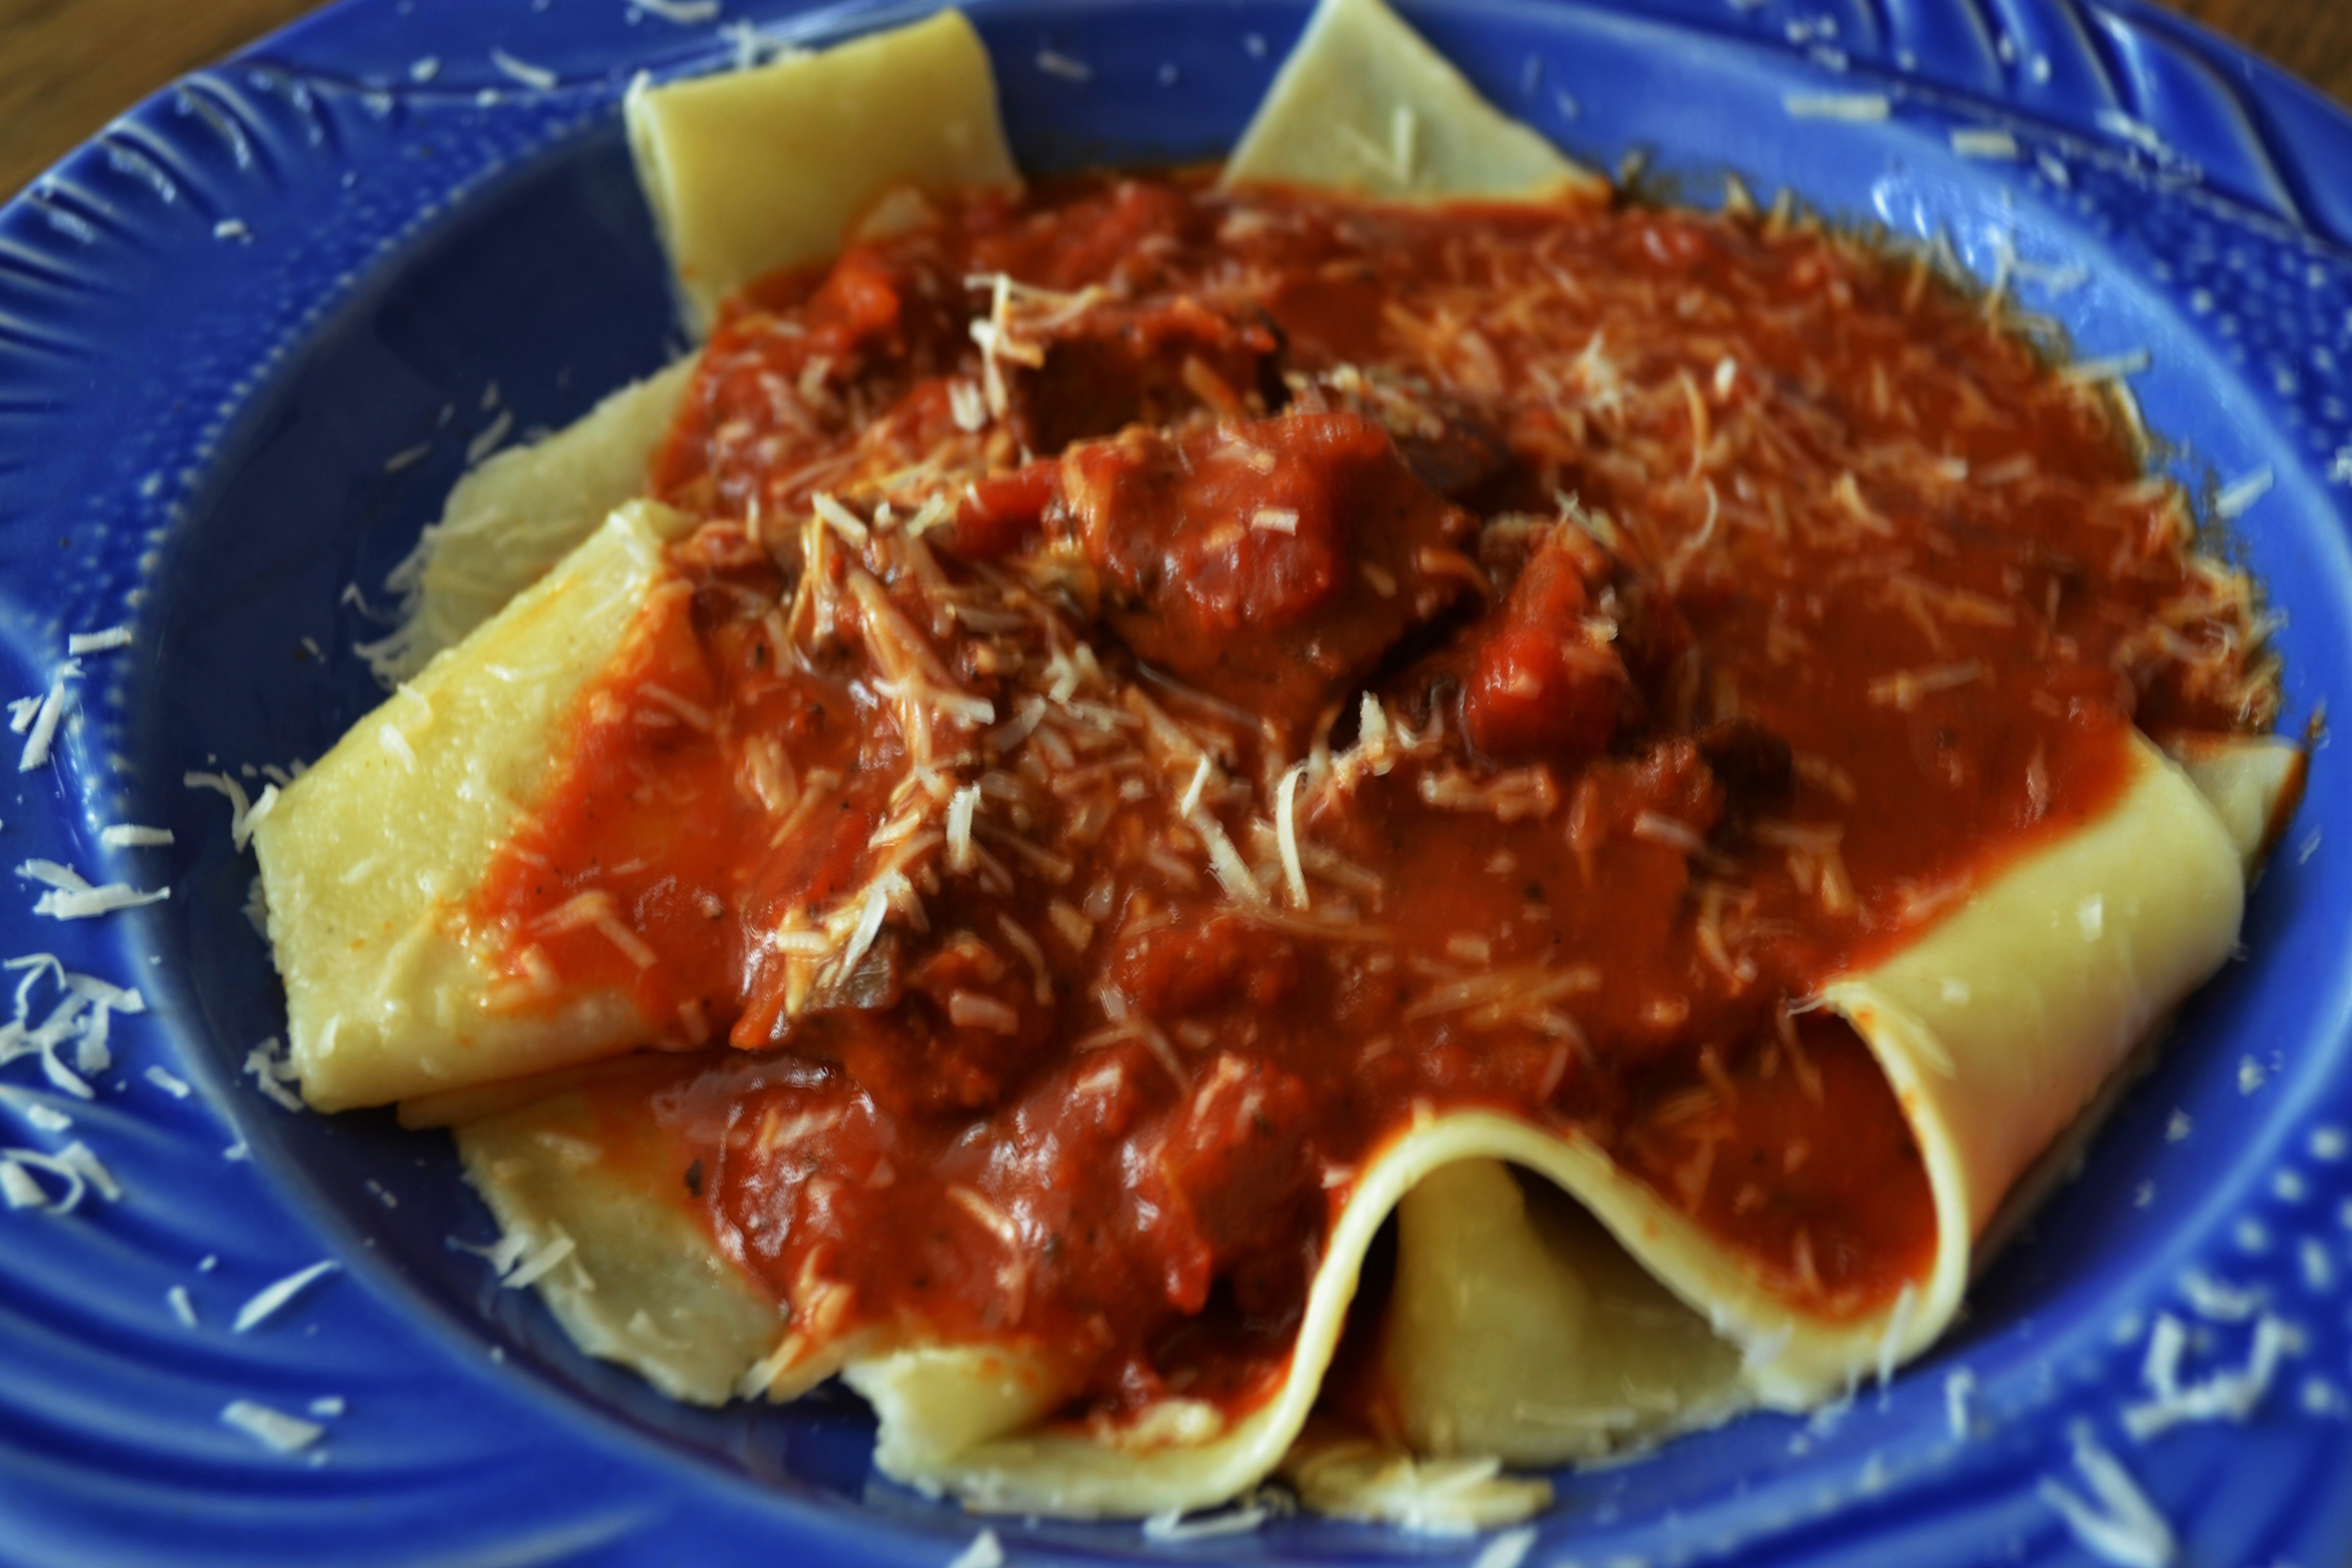
(Becky, the Mama.)
What do you get when you put two of mama’s best comfort foods — pot roast and marinara/ pasta — together?
Heaven in a bowl.
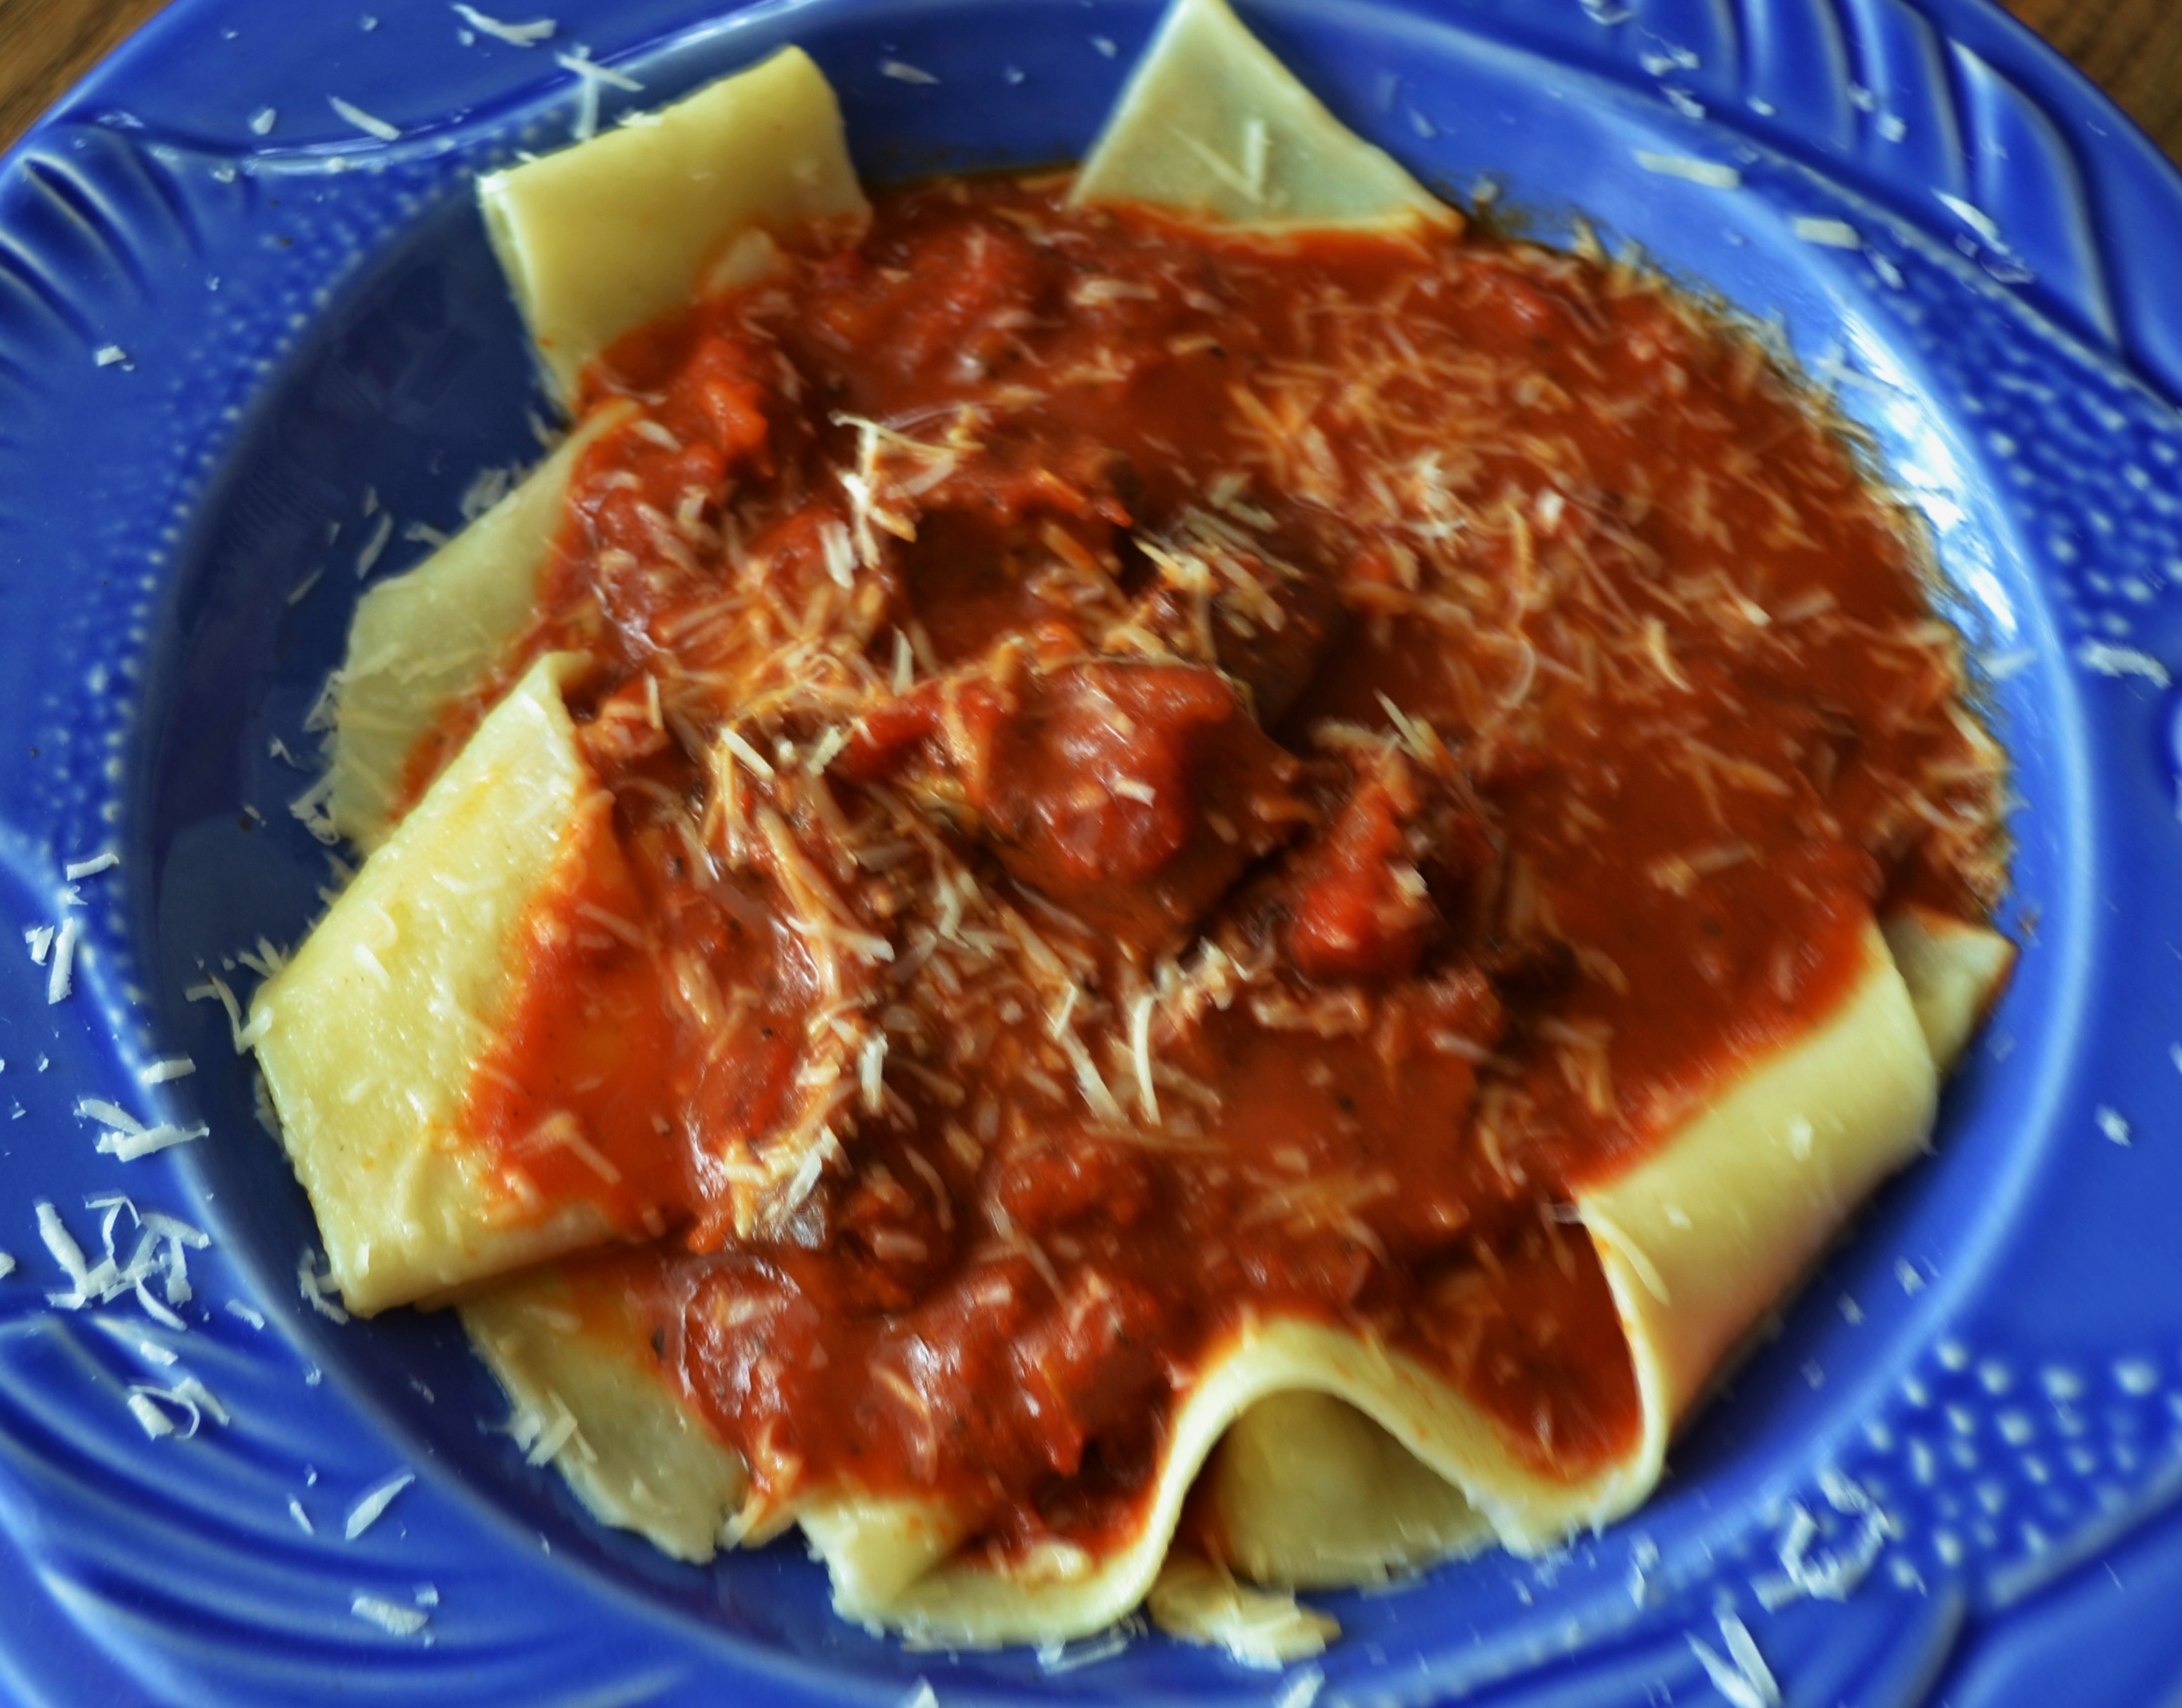
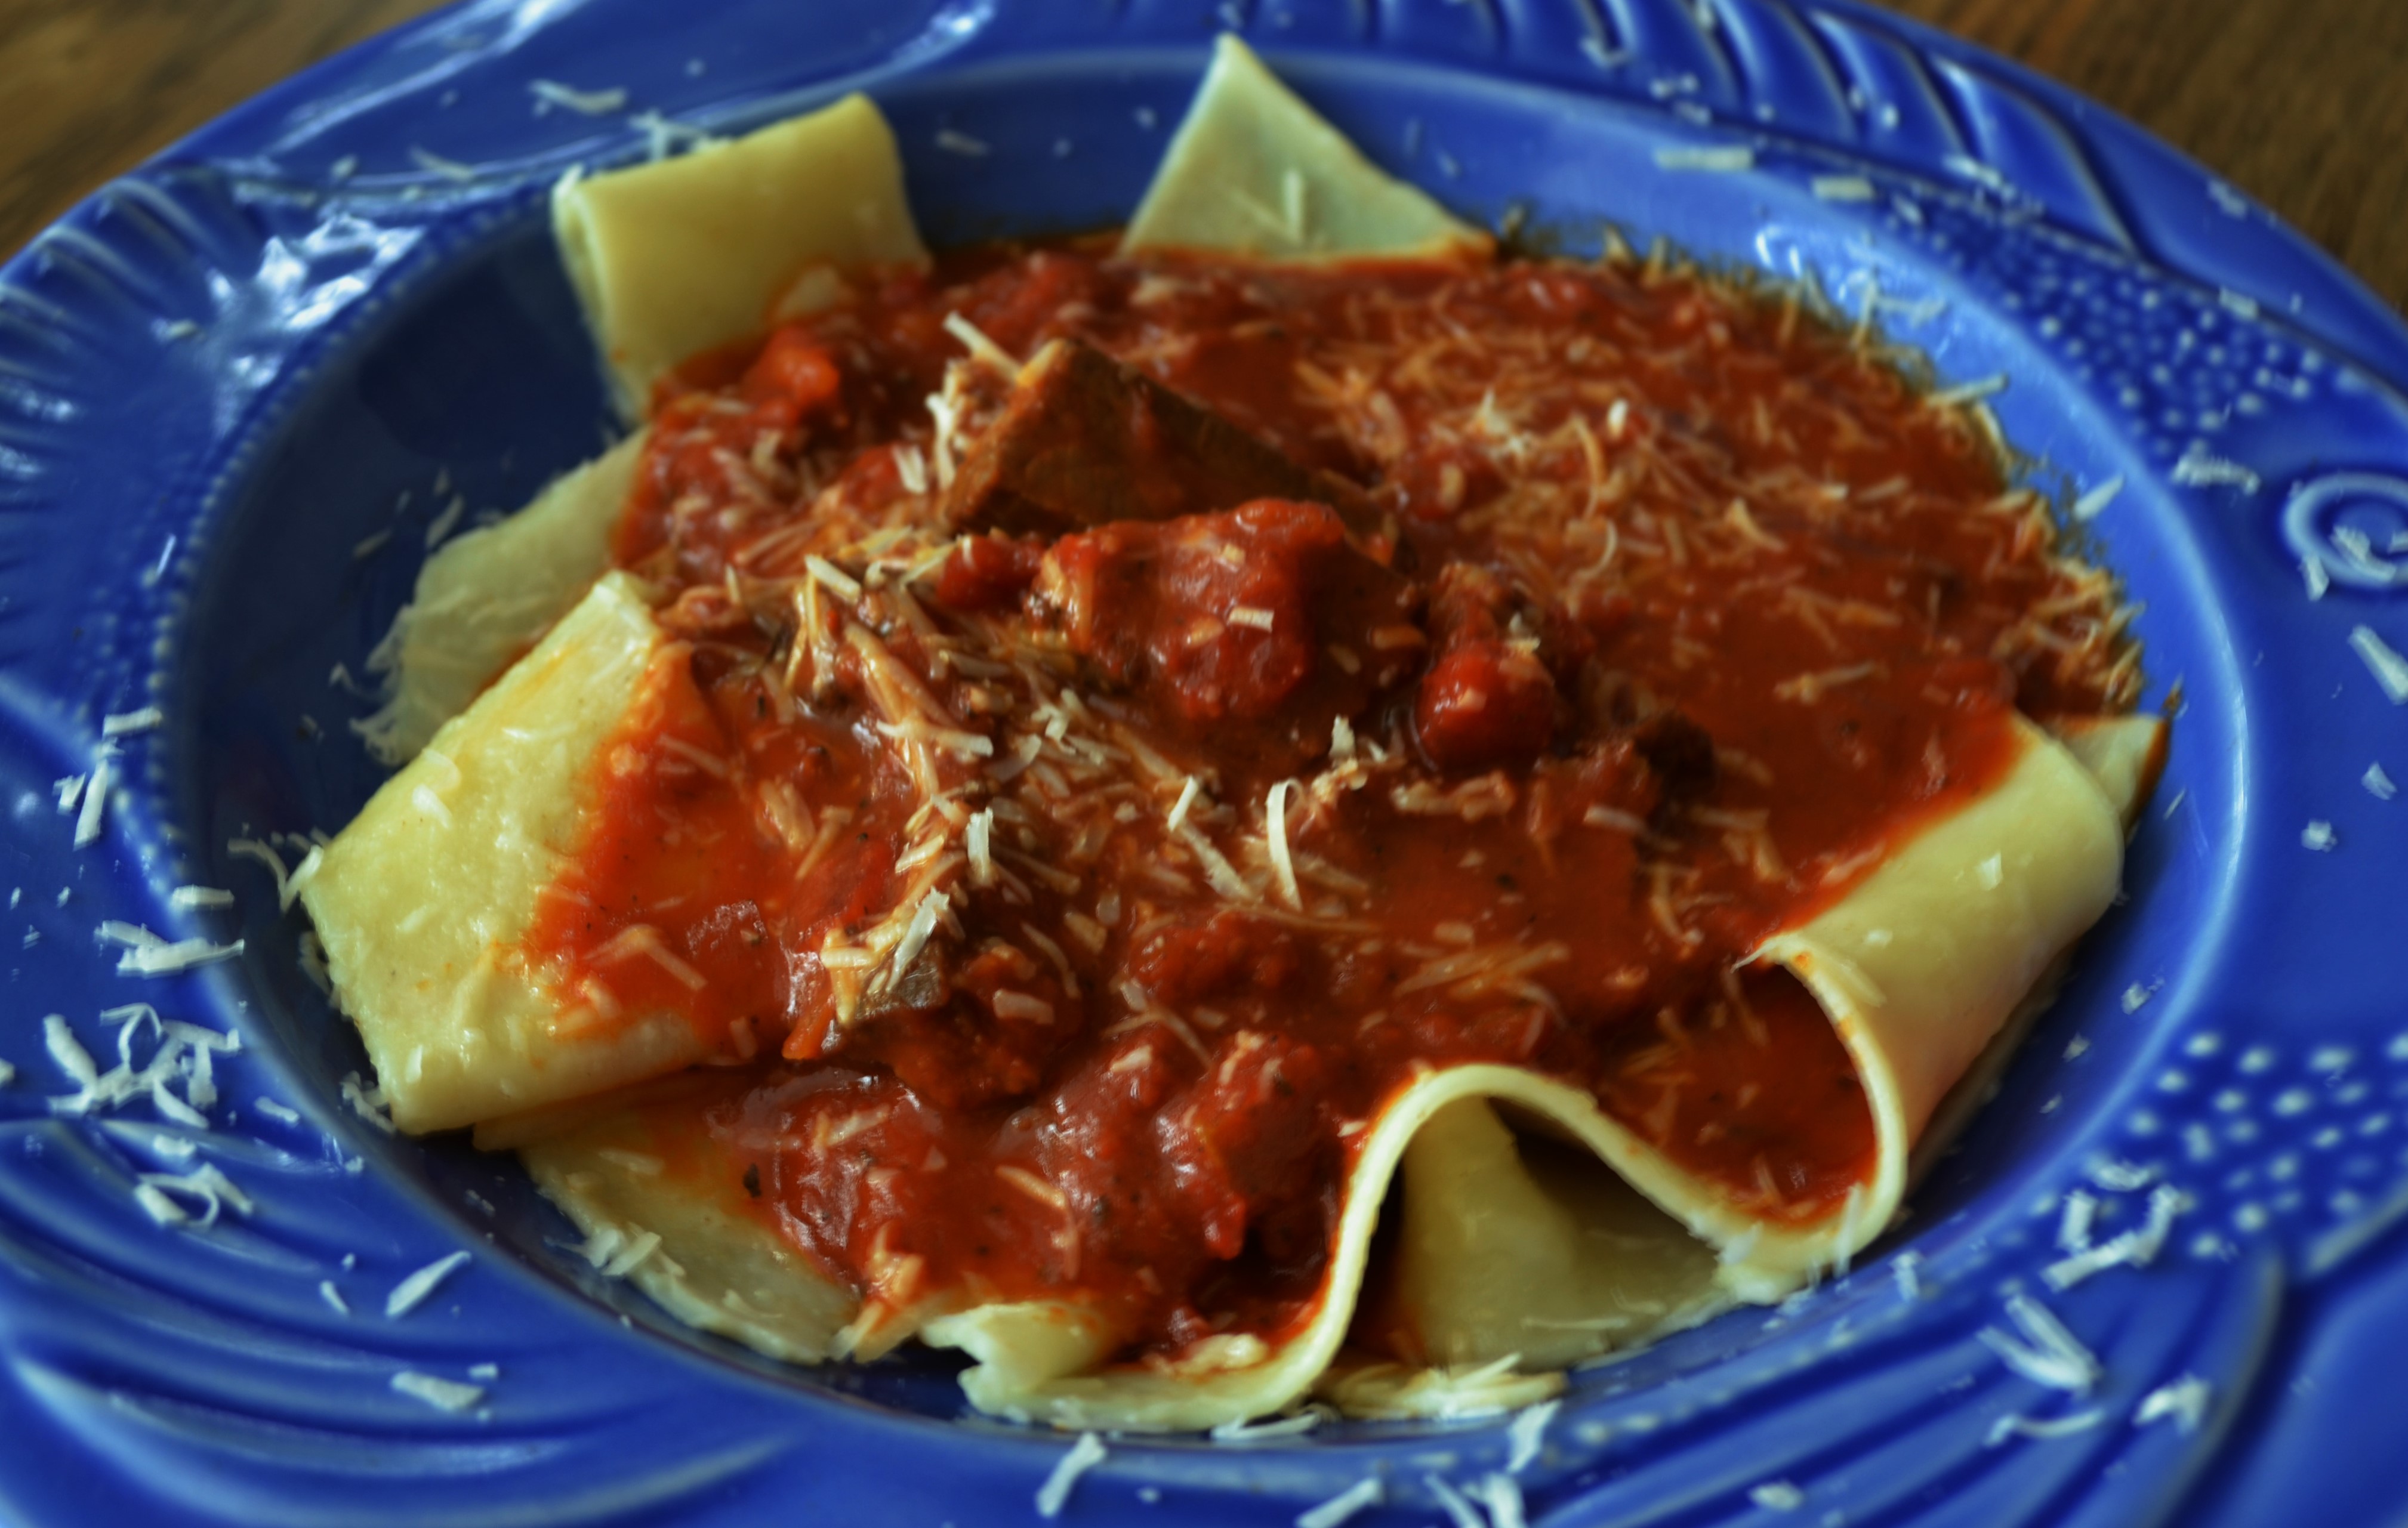
This has to be one of my all-time favorite creations using any left-over beef you have in the fridge from pot roast to steak. (I had some grilled flank steak left-over that I cut into pieces and used for this recipe. ) The addition of wine and beef broth (or Lipton onion soup, which is what I had on hand) and splash of heavy cream creates an extra layer of homey warmth to a traditional marinara. The wide Pappardelle noodles create the perfect nest for this dish.
I am about to head to my daughter Rachel’s home in Texas this weekend awaiting the birth of her second child, a little girl (!) who will be named Corabelle.

While Rachel is busy and recovering and nursing a newborn, I plan to whip up some comfort food with the help of my sous chef, Corabelle’s big almost-4-year-old brother, Jackson.

Rachel and Jared are still mostly vegans, so I will often make things like rice bowls or pasta dishes that are easy to tweak for vegans and carnivores alike. At Rachel’s house, I am going to try subbing Miso for the beef broth. (Miso is the closest thing I have found to bringing out a “meaty” flavor in vegetarian cooking. In fact, I love the butter, savory flavor that Miso imparts so much that I often add it to meat-based dishes to upgrade the richness. ) I will probably substitute my favorite vegan meat, Field Roast sausages, sliced and browned in olive oil, then sprinkled on top. (Other options: lentils; or chick peas, roasted in the oven first.) For creaminess, I will likely blend up some raw cashews with a little cashew or almond milk, or use use canned whole fat coconut milk. Either makes a nice substitute for a splash of cream!
No matter how you tweak this dish to make it your own, I think you will love it and that it will soon become one of your go-to favorites!
P.S. If you happen to be looking for some funny, uplifting, soul-and-body nourishing books to tuck in your beach bag this summer, you may enjoy one of our recent books!

Savory Italian Pot Roast Pasta
1 large 28 oz can crushed tomatoes (or crushed tomatoes with basil added)
2 large cloves garlic, minced
1 cups beef broth or 1/2 package Lipton onion soup mix with 1 cup hot water
1/2 cup red wine
2 t. brown sugar
2 t. oregano or Italian seasoning
A handful of chopped fresh basil if you have it on hand
1 cup diced beef, already cooked (such as leftover roast or steak, or even pulled pork or pork loin would work as well )
Salt and pepper to taste
1/4 cup cream
Pappardelle pasta to yield 4 servings, cooked
Fresh grated Parmesan Cheese
Directions:
Cook pasta according to package directions.
In a big skillet, add the crushed tomatoes, broth (or Lipton soup mixture), garlic, red wine, beef, and Italian seasonings and brown sugar. Bring to a low boil, then turn down the heat and simmer until it is the thickness you like for pasta sauce. Add salt and pepper to taste. Turn off the heat and add cream. Ladle over Pappardelle pasta in low flat bowls, then grate Parmesan cheese over all. I am purposely messy with the Parm cheese as I think it makes the dish look rustic and beautiful.
Variations: Add bits of cooked carrots, peas and potatoes to make this a one-bowl meal, and add to the “Sunday pot roast with veggies” feel.
Rustic Shepherd’s Pie in an Iron Skillet & Memories of Mom
Posted: August 19, 2014 Filed under: Beef, Main Dishes, Uncategorized Leave a comment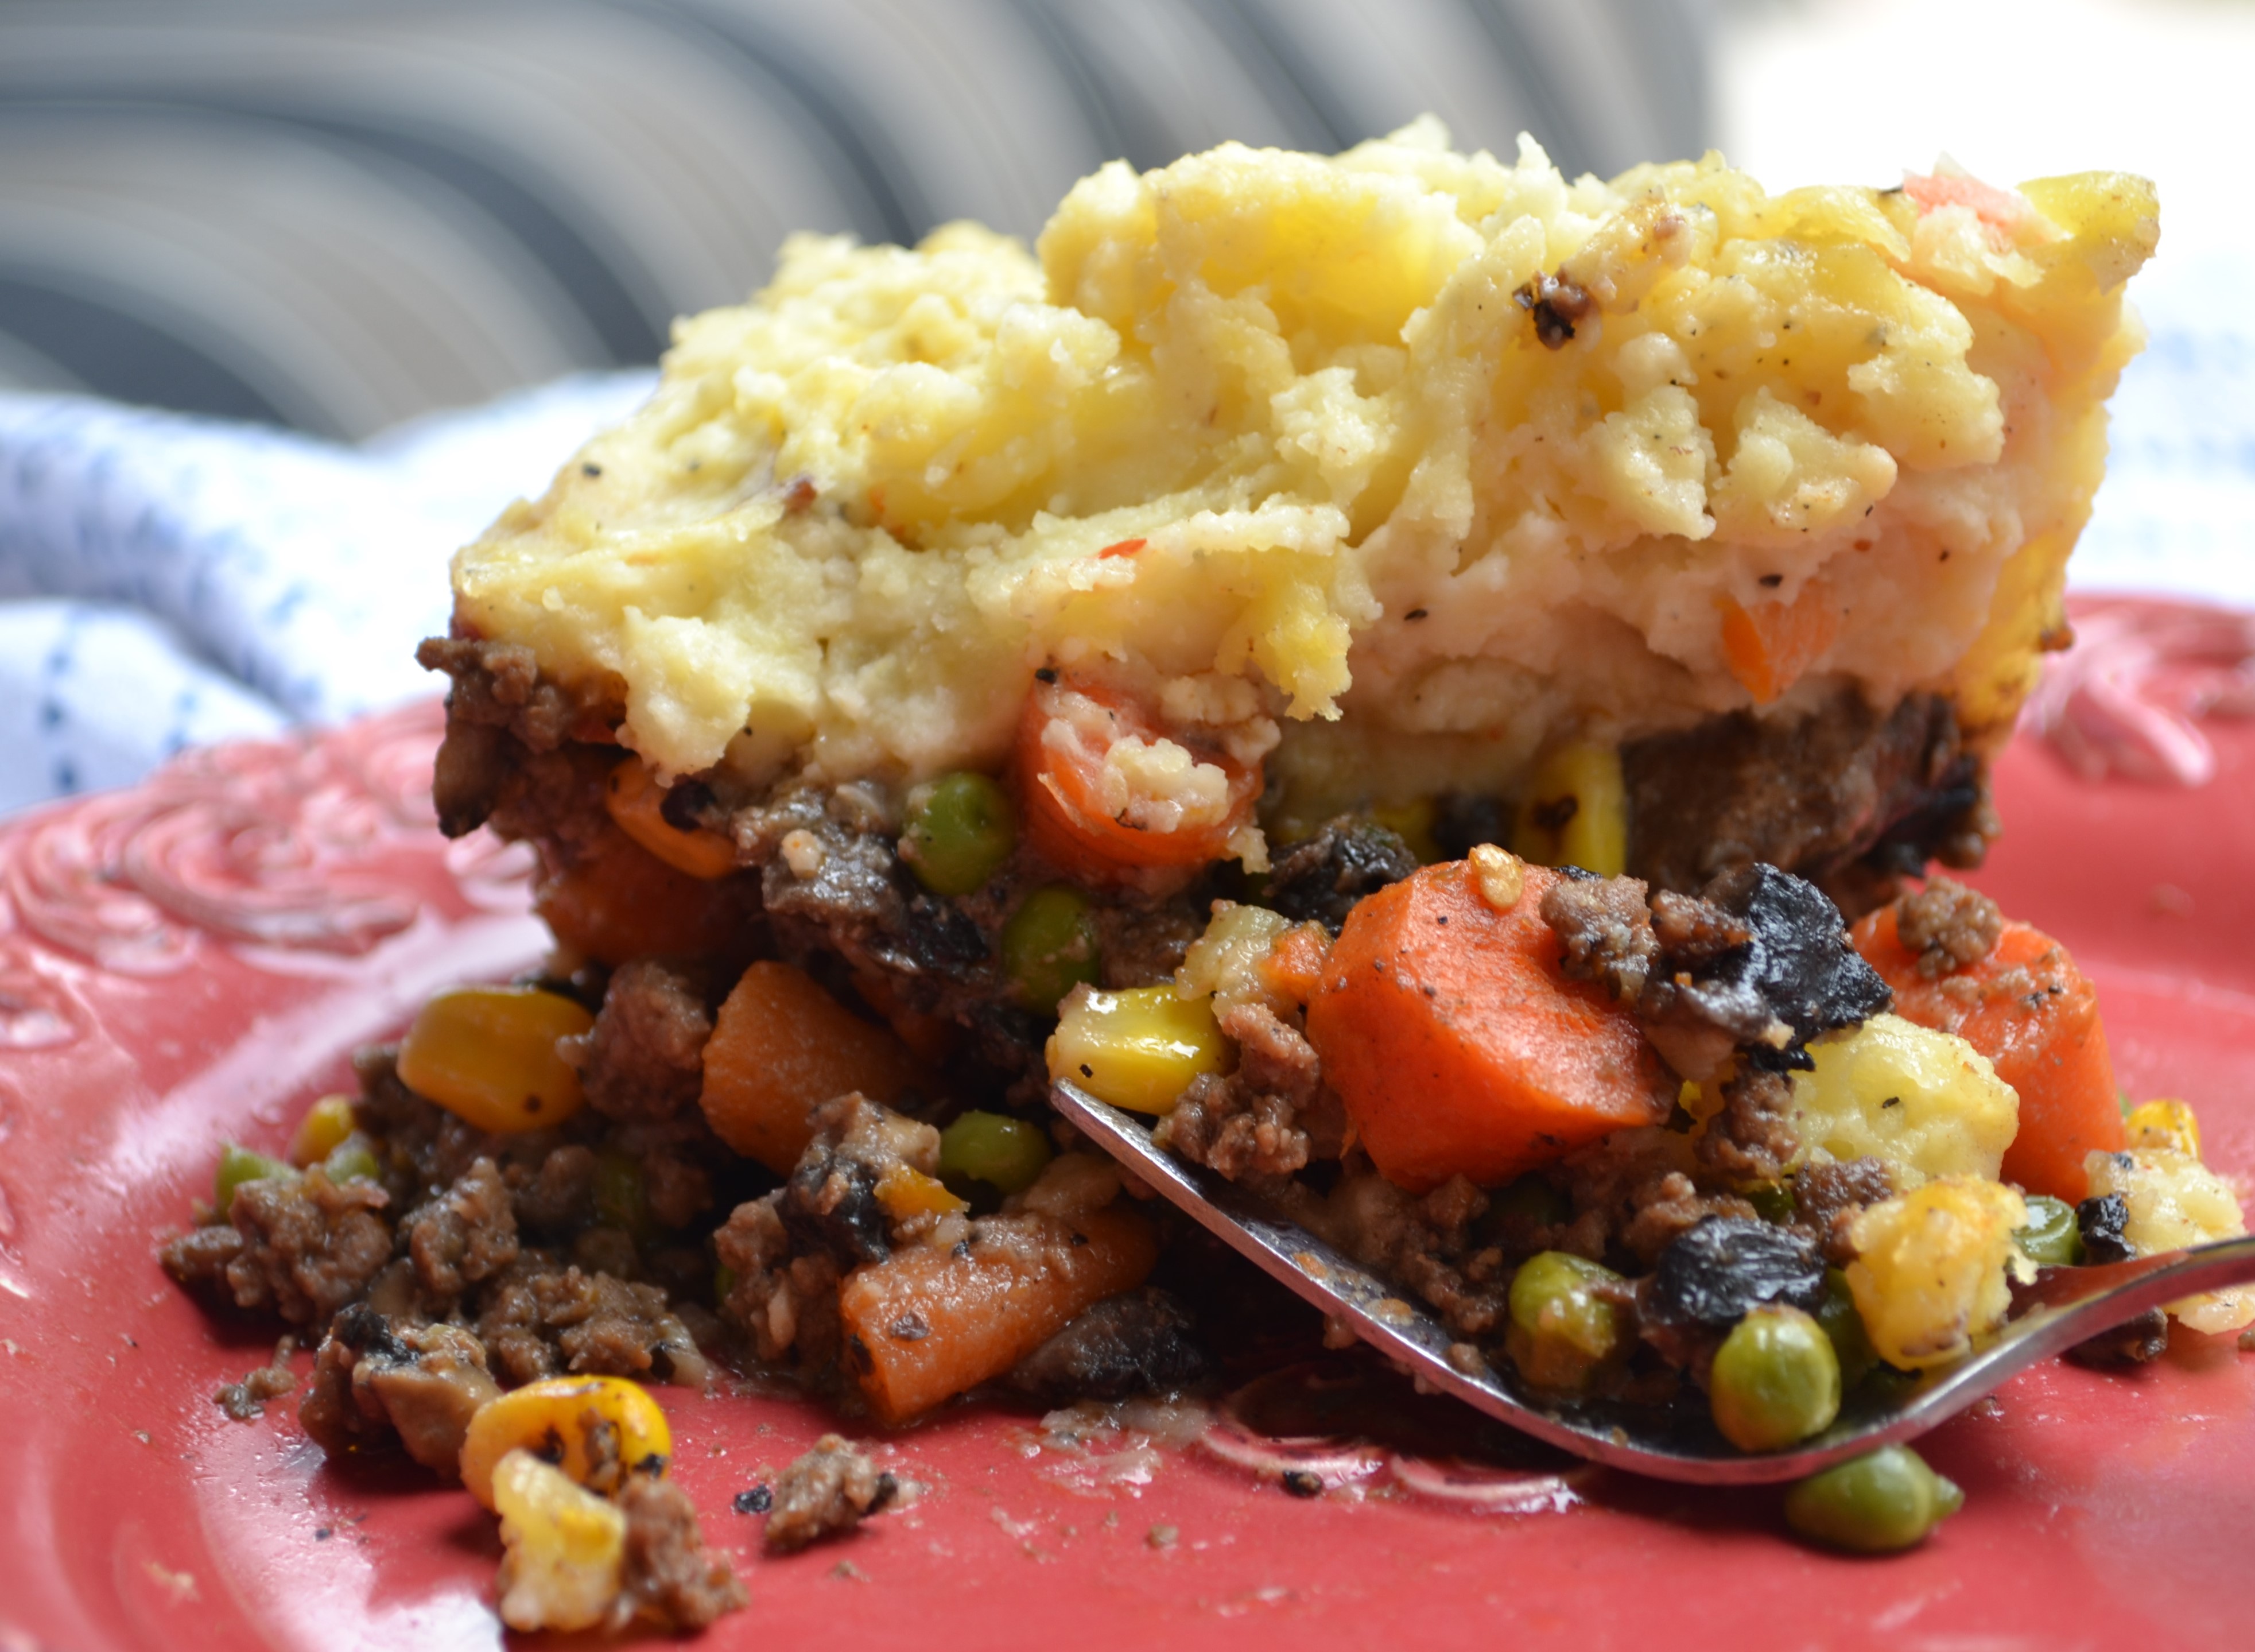
My husband Greg’s mother, Shirley, made him Shepherd’s Pie when he was a boy growing up in Oregon. As a girl growing up in Texas, I have had Taco Pie, Tamale Pie and Frito Pie — but Greg had to describe his mother’s Shepherd’s Pie to me. It took me a couple of tries, but it wasn’t long before I served him a slice of pie worthy of his mom’s memory. How I wish I had known her. Greg played me an old video of Shirley when she was about the age I am now, doing the Charleston to the delight of her kids and grandchildren. I am sure we would have loved each other! Shirley passed away much too soon, when Greg was still in his thirties. She would have been 82 years old… today. Happy Birthday, Shirley, I hope you can see how happy, kind and generally all-around wonderful your son has grown up to be, from your window in heaven.

Greg’s mother, Shirley, at age 15. Greg has her full lips, and cheerful smile. (And when he had hair, he had his mother’s red hair as well.)
You can see my husband’s feet, as he was standing like a happy, hungry little boy in the background, waiting for me to hurry up and take a picture of this Rustic-Style Shepherd’s Pie so he could carry the hot pan back in the house and enjoy it for supper:)
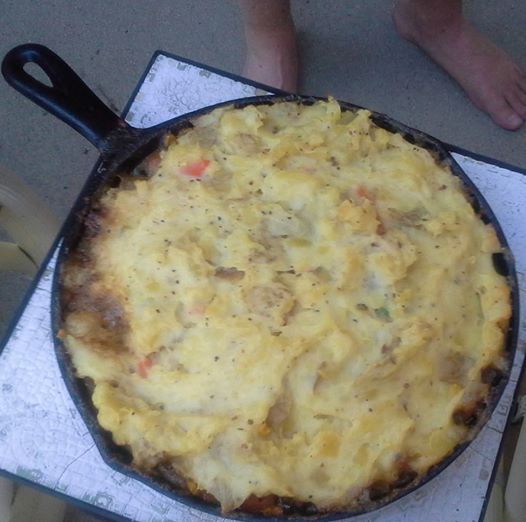
Over the years, I have simplified the recipe so I can make it faster and easier. By using Golden Potatoes instead of Idaho potatoes, I can simply “smash them” in the pan I cooked them in, without peeling them or using a mixer to make them smooth and fluffy. We like a few chunks of potato and bits of peel in this recipe. These potatoes also taste buttery without having to use a ton of butter. Finally, by baking the mixture in the same iron skillet where I cooked up the gravy, meat and veggies – you save having to wash yet another dish.
Re-creating your mate’s favorite childhood recipes is the closest you can get sometimes, to allowing them to filled “hugged again” by someone they loved as a little boy or girl.

Happy Birthday, Shirley! I am doing my best to keep your boy happy, and well-fed and well-hugged.
If you want to wear something in a pretty shade of green, may I suggest you buy a copy of our book, below, and attach it, like a little sandwich board around your neck. It is what all the cool Irish folk will be wearing on St. Patty’s Day!
 What recipe did your mother or grandmother make that brings you back to her kitchen, and happy moments?
Rustic Shepherd’s Pie in an Iron Skillet
1 ½ lb ground beef
6 fresh mushrooms, chopped
¾ cup corn, frozen
2/3 cup frozen peas
5 carrots, peeled, cooked and sliced or diced (I usually microwave these in a small covered dish with a little water)
1 T. grill seasoning (or 2 t. salt, 1 t. pepper)
For Gravy
1 T. butter
1 T. olive oil
2 T. flour
1 clove garlic, minced
1 ½ cups beef broth (if you don’t have this on hand you can mix up some dry onion soup mix with water, or use 1/4 cup miso paste and water, or a a couple of bullion cubes and water to make 1 1/2 cups.)
½ cup red wine
2 T. half-n-half (optional)
For Potatoes:
6 Golden, thin-skinned buttery potatoes (about the size of tennis balls)
2 T. Ranch dressing prepared
1 T. butter
Half-n-half or milk – approximately anywhere from 1/3 to 1 cup
Salt and pepper to taste
Directions:
Preheat oven to 350 degrees
Scrub and quarter potatoes, but no need to peel, then place in a large pot with salted water (about 2 t. salt & water about 2 inches above the potatoes).Put them on the back burner to boil and in the meantime…
In a large skillet, lightly brown the beef with grill seasoning, then drain off any extra fat. Then add the mushrooms and cook untl they are soft and have released their juices. Next add the frozen corn, frozen peas and cooked carrots. Heat through.
In a separate iron skillet, make the gravy: melt butter with olive oil on medium high heat. Sprinkle flour over the bubbling oil-butter mixture and stir with whisk to make a smooth paste. Add garlic and stir. Continue to whisk while slowing adding broth and wine, stirring and simmering until gravy has thickened. You don’t want it to be too thick… as more liquid will evaporate with baking and some will soak into veggies.
Carefully pour the meat and veggies into the gravy. Add half-n-half if you desire a creamier gravy. Taste and adjust seasonings. Turn off the heat while you smash the potatoes.
Drain the boiling water off of the potatoes when they are tender, leaving hot potatoes in the hot pan. Add Ranch dressing, butter and half-n-half or milk, ¼ cup at a time and smash (with skins on) with a potato masher. (Don’t use a mixer as there is too much gluten in golden potatoes and you’ll end up with glue.) Season potatoes with salt and pepper to taste.
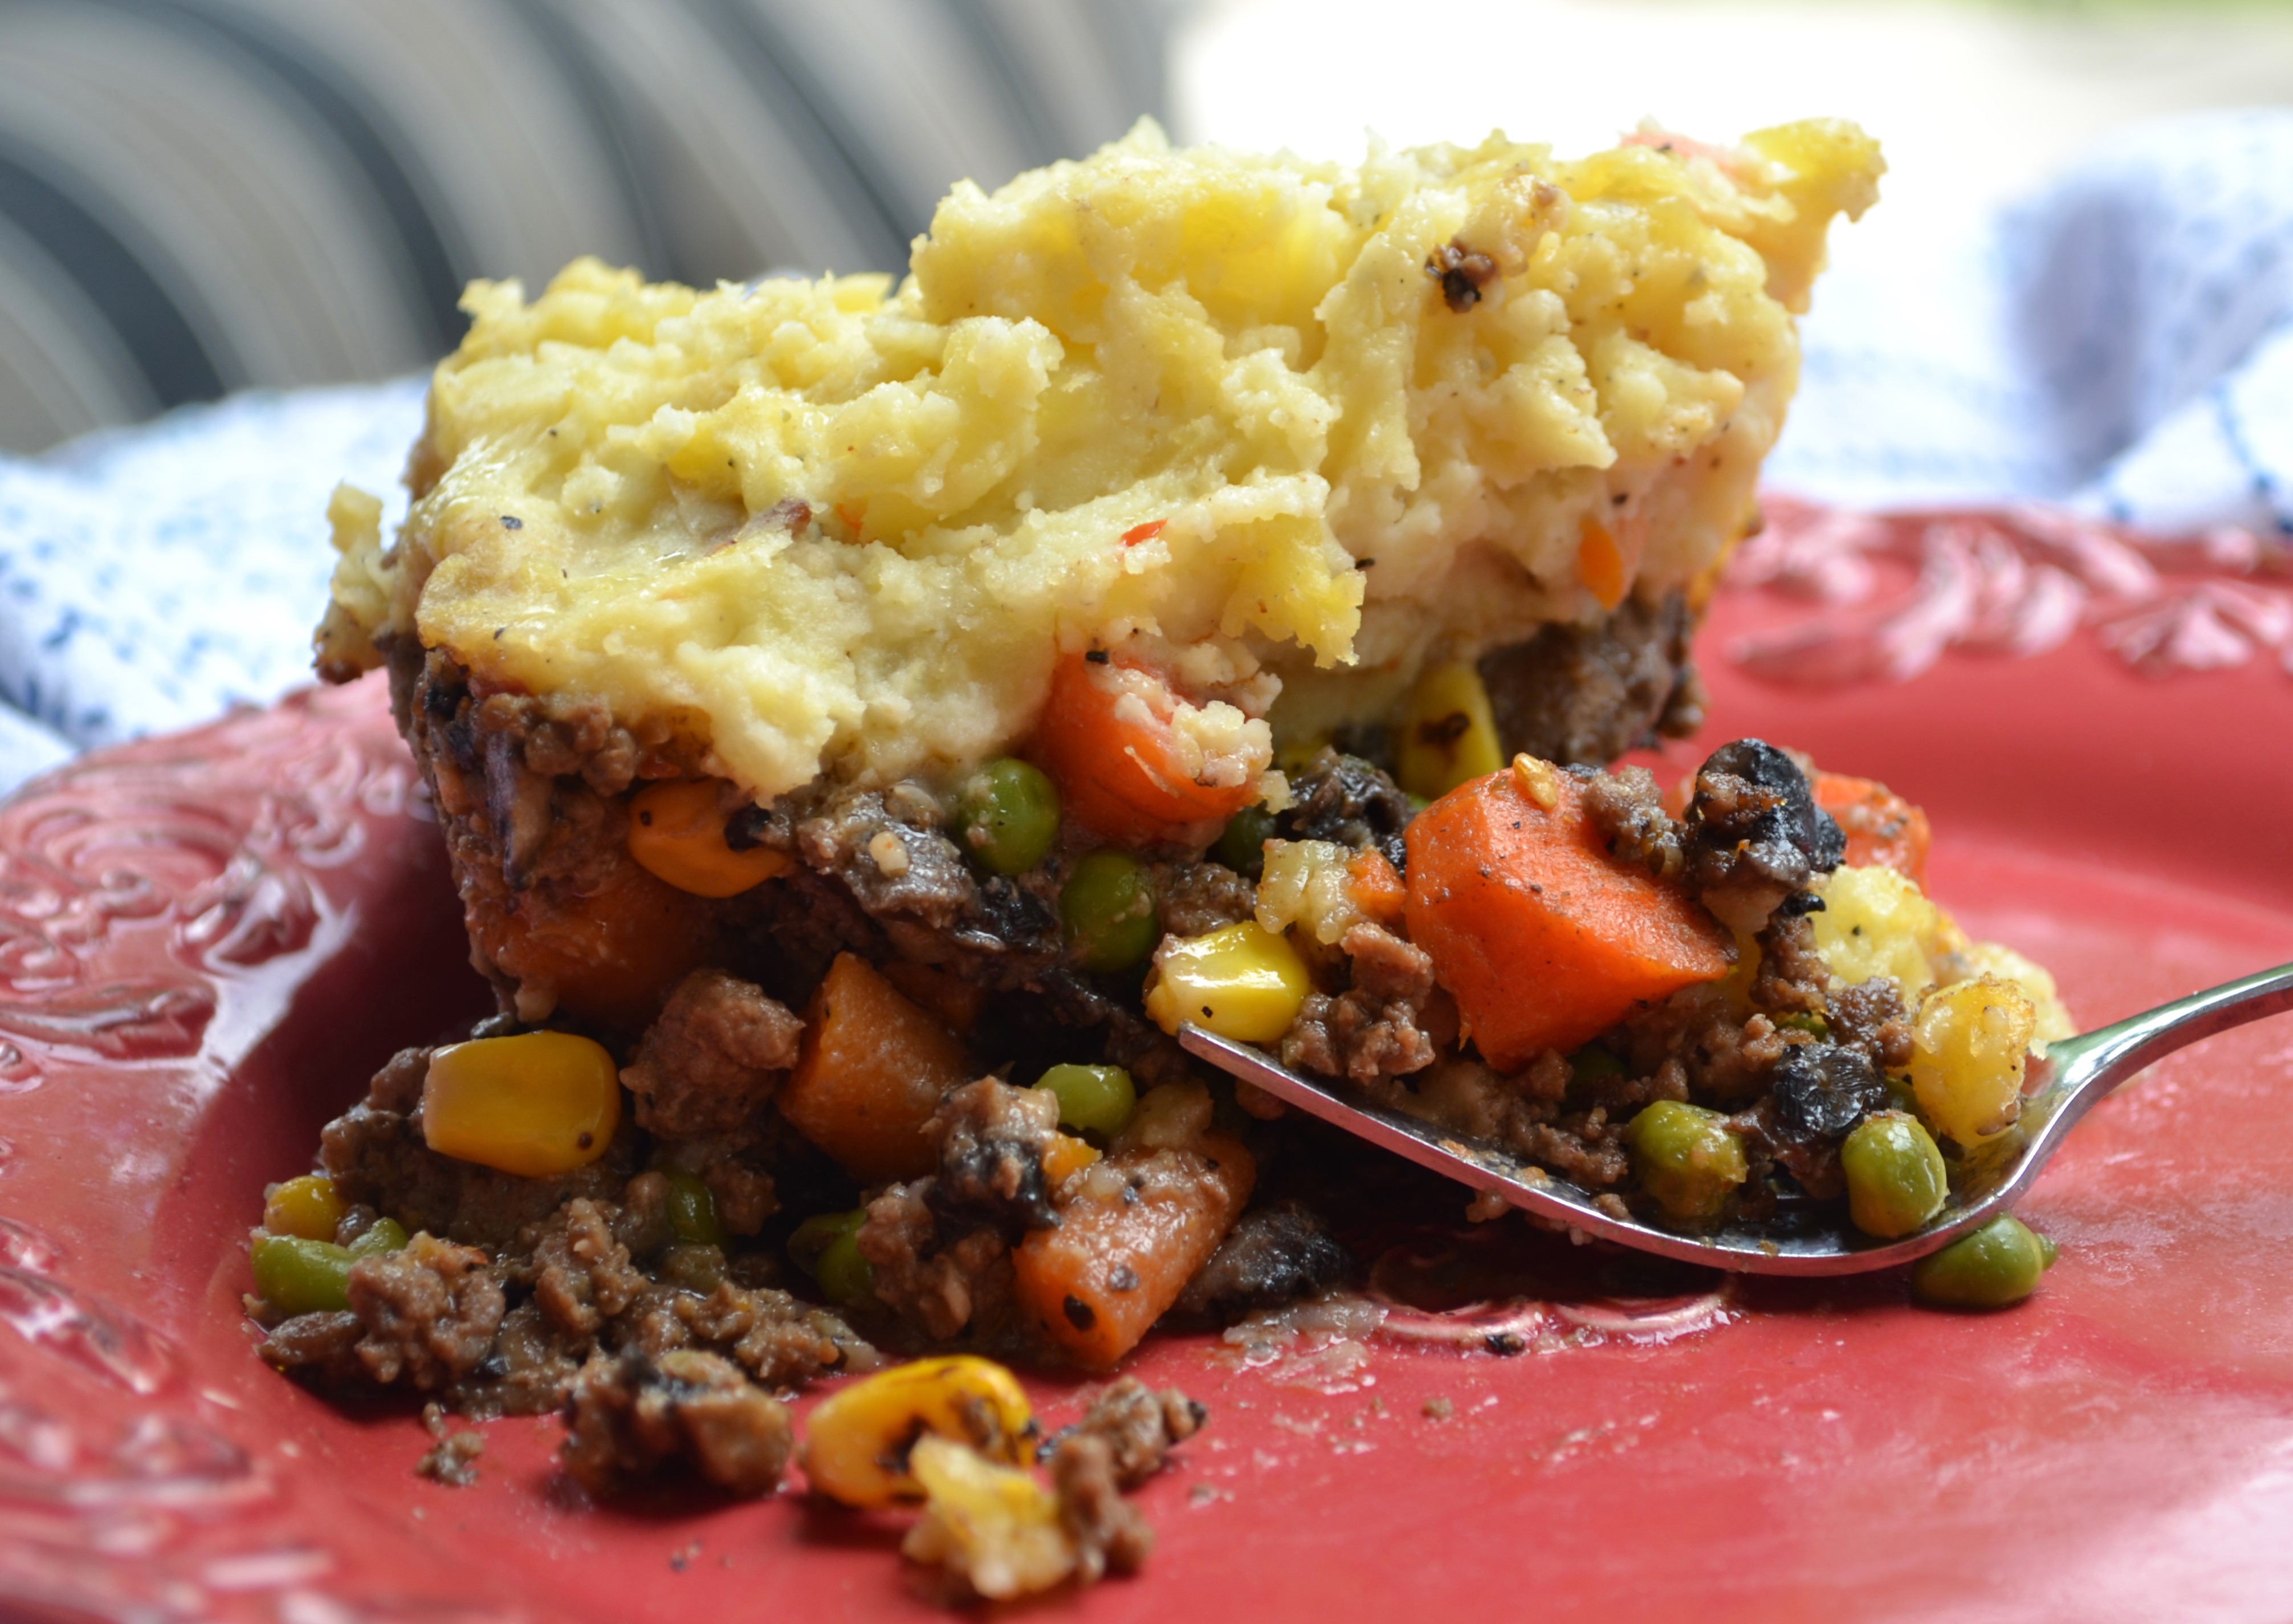
Using a large spoon, gently put mounds of potatoes over the beef and veggie mixture, and spread evenly to the edges of the skillet.
Place in 350 oven for 20 minutes or until heated through and tops of potatoes begin to get a little golden.
Let sit for 5 to 10 minutes and serve. When it is fresh and hot out of the oven it is easier to serve in wide bowls, but the next day, after refrigeration, you can slice it like pie, heat up in microwave and serve.
I like to serve a few fresh slices of tomatoes with this dish and call it dinner!
Juicy, Grilled Pineapple Teriyaki Flank Steak
Posted: April 28, 2014 Filed under: Asian Dishes, Beef, Book News, Chicken, Main Dishes, Special Event!, Uncategorized | Tags: asian, beef, flank steak, grilled, juicy, pineapple, teriyaki 5 Comments
Although it is raining today, just a few days ago this was the view from my backyard porch swing in Denver Colorado.

And yes, that probably is a yellow flower blooming from big toe — because that is just how happy I am to finally see Spring come to the Rockies.
With the coming of warm weather, I get to dust off the ol’ grill and make some of my favorite summer recipes. This easy recipe for steak marinade works just as well for chicken breasts. The longer you let the beef or chicken bathe in the bag, the happier it gets, but for the steak even four hours will do the trick.
Years ago when I had more energy, lots of kids and a big need for income, I was a caterer and this recipe for marinated chicken or steak was my number one, never fail, go-to main dish. People loved it and requested it again and again!
I am not sure why but it really does bring out the most tender flavor in grilled meat. It is not overly sweet either, as some teriyaki marinated meats tend to be — but just the right the balance. The pineapple juice adds a touch of flavor, but it is a fresh and light background note. Doesn’t cloyingly ring of pineapple.
Nothing says, “Summer is on its way!” like the smell of food on the grill, and a gathering of friends on the porch. This would be absolutely perfect to make for Mother’s Day, which is coming up soon. And by the way, if you are looking for a pretty perfect Mother’s Day Gift — something to entertain and inspire and cheer your mom (or your wife or your daughter or grandmother, or your daughter is now a mom herself), may we recommend a copy of We Laugh, We Cry, We Cook?
For any of you who may live near Alexandria, Indiana (or know someone who does), Rachel and I will be speaking and doing a food demonstration at the Annual Spring Tea, this Saturday May 13, 2014, at 11:00 at Gaither Family Resources. (Click on the link “Gaither Family Resources” and scroll down to the Spring Tea information box for ticket prices and the number to call to make reservations.) We would love to see you, hug your neck and possibly sign a book for you or your mother in person! Ya’ll come!

Add a little “happy” to your days with this funny, uplifting mom-daughter memoir. (Perfect gift for Mother’s Day, too.)

Juicy, Grilled Pineapple Teriyaki Flank Steak
1 flank steak
Grill Seasoning, about a teaspoon (or enough to season both sides of the steak)
1/2 cup white wine
1/4 cup light soy sauce
1/2 cup pineapple juice (or drain the juice from a can of pineapple rings)
1 T. olive oil
2 T. Worcestershire Sauce
2 large cloves of garlic, smashed with side of knife
Oil for grill pan, if cooking indoors
Ziploc bag
Directions:
Season both sides of a flank steak with Grill Seasoning (or salt, pepper and garlic powder). Add the rest of the ingredients to a large, Ziploc bag and carefully squeeze the contents to mix. Place the flank steak in the bag of marinade, seal the bag then squeeze and turn the bag to coat both sides of the steak. Put in fridge to marinate, turning once or twice in the process and marinate anywhere from four to 10 hours.
Fire up the outdoor grill or use a grill pan over high heat (put a little olive oil in the pan if cooking indoors). Place steak on the grill and sear one side until golden brown with nice dark grill marks. Turn over and grill the other side. Then cover the grill pan or close the grill and let it cook for another minute or two. Remove and put on a plate, cover the meat with foil and let it sit so that juices distribute throughout the meat. While the meat is sitting, lightly grill small slices of pineapple (fresh or canned), and bring the leftover marinade to a boil. Spoon some of the marinade over the steak and decorate with pineapple to show it off! When you are ready to serve, remove pineapple slices, cut the steak in thin slices across the grain, giving each person a pineapple half and a drizzle of sauce.
The nice thing about serving a big piece of steak like this is that you serve the outer slices to those who prefer their meat more done, and for those who prefer their meat more on the rare side, serve them slices from the middle of the steak.
Depending on the size of the steak, it will usually feed anywhere from 4 to six people. Delicious with rice or mashed potatoes or pasta; a green salad or steamed/roasted green veggie is tasty and beautiful.

Skinny Deli Veggie Roll Ups (No Carbs, Less than 100 Calories)
Posted: January 16, 2014 Filed under: Kids Cooking, Main Dishes, Pork, Salads, Sandwiches, Snacks, Turkey, Vegan Options, Vegetarian, Veggies | Tags: cheese, deli slices, ham, honey mustard, jalepanos, pickles, roll-ups, skinny roll ups, veggies Leave a comment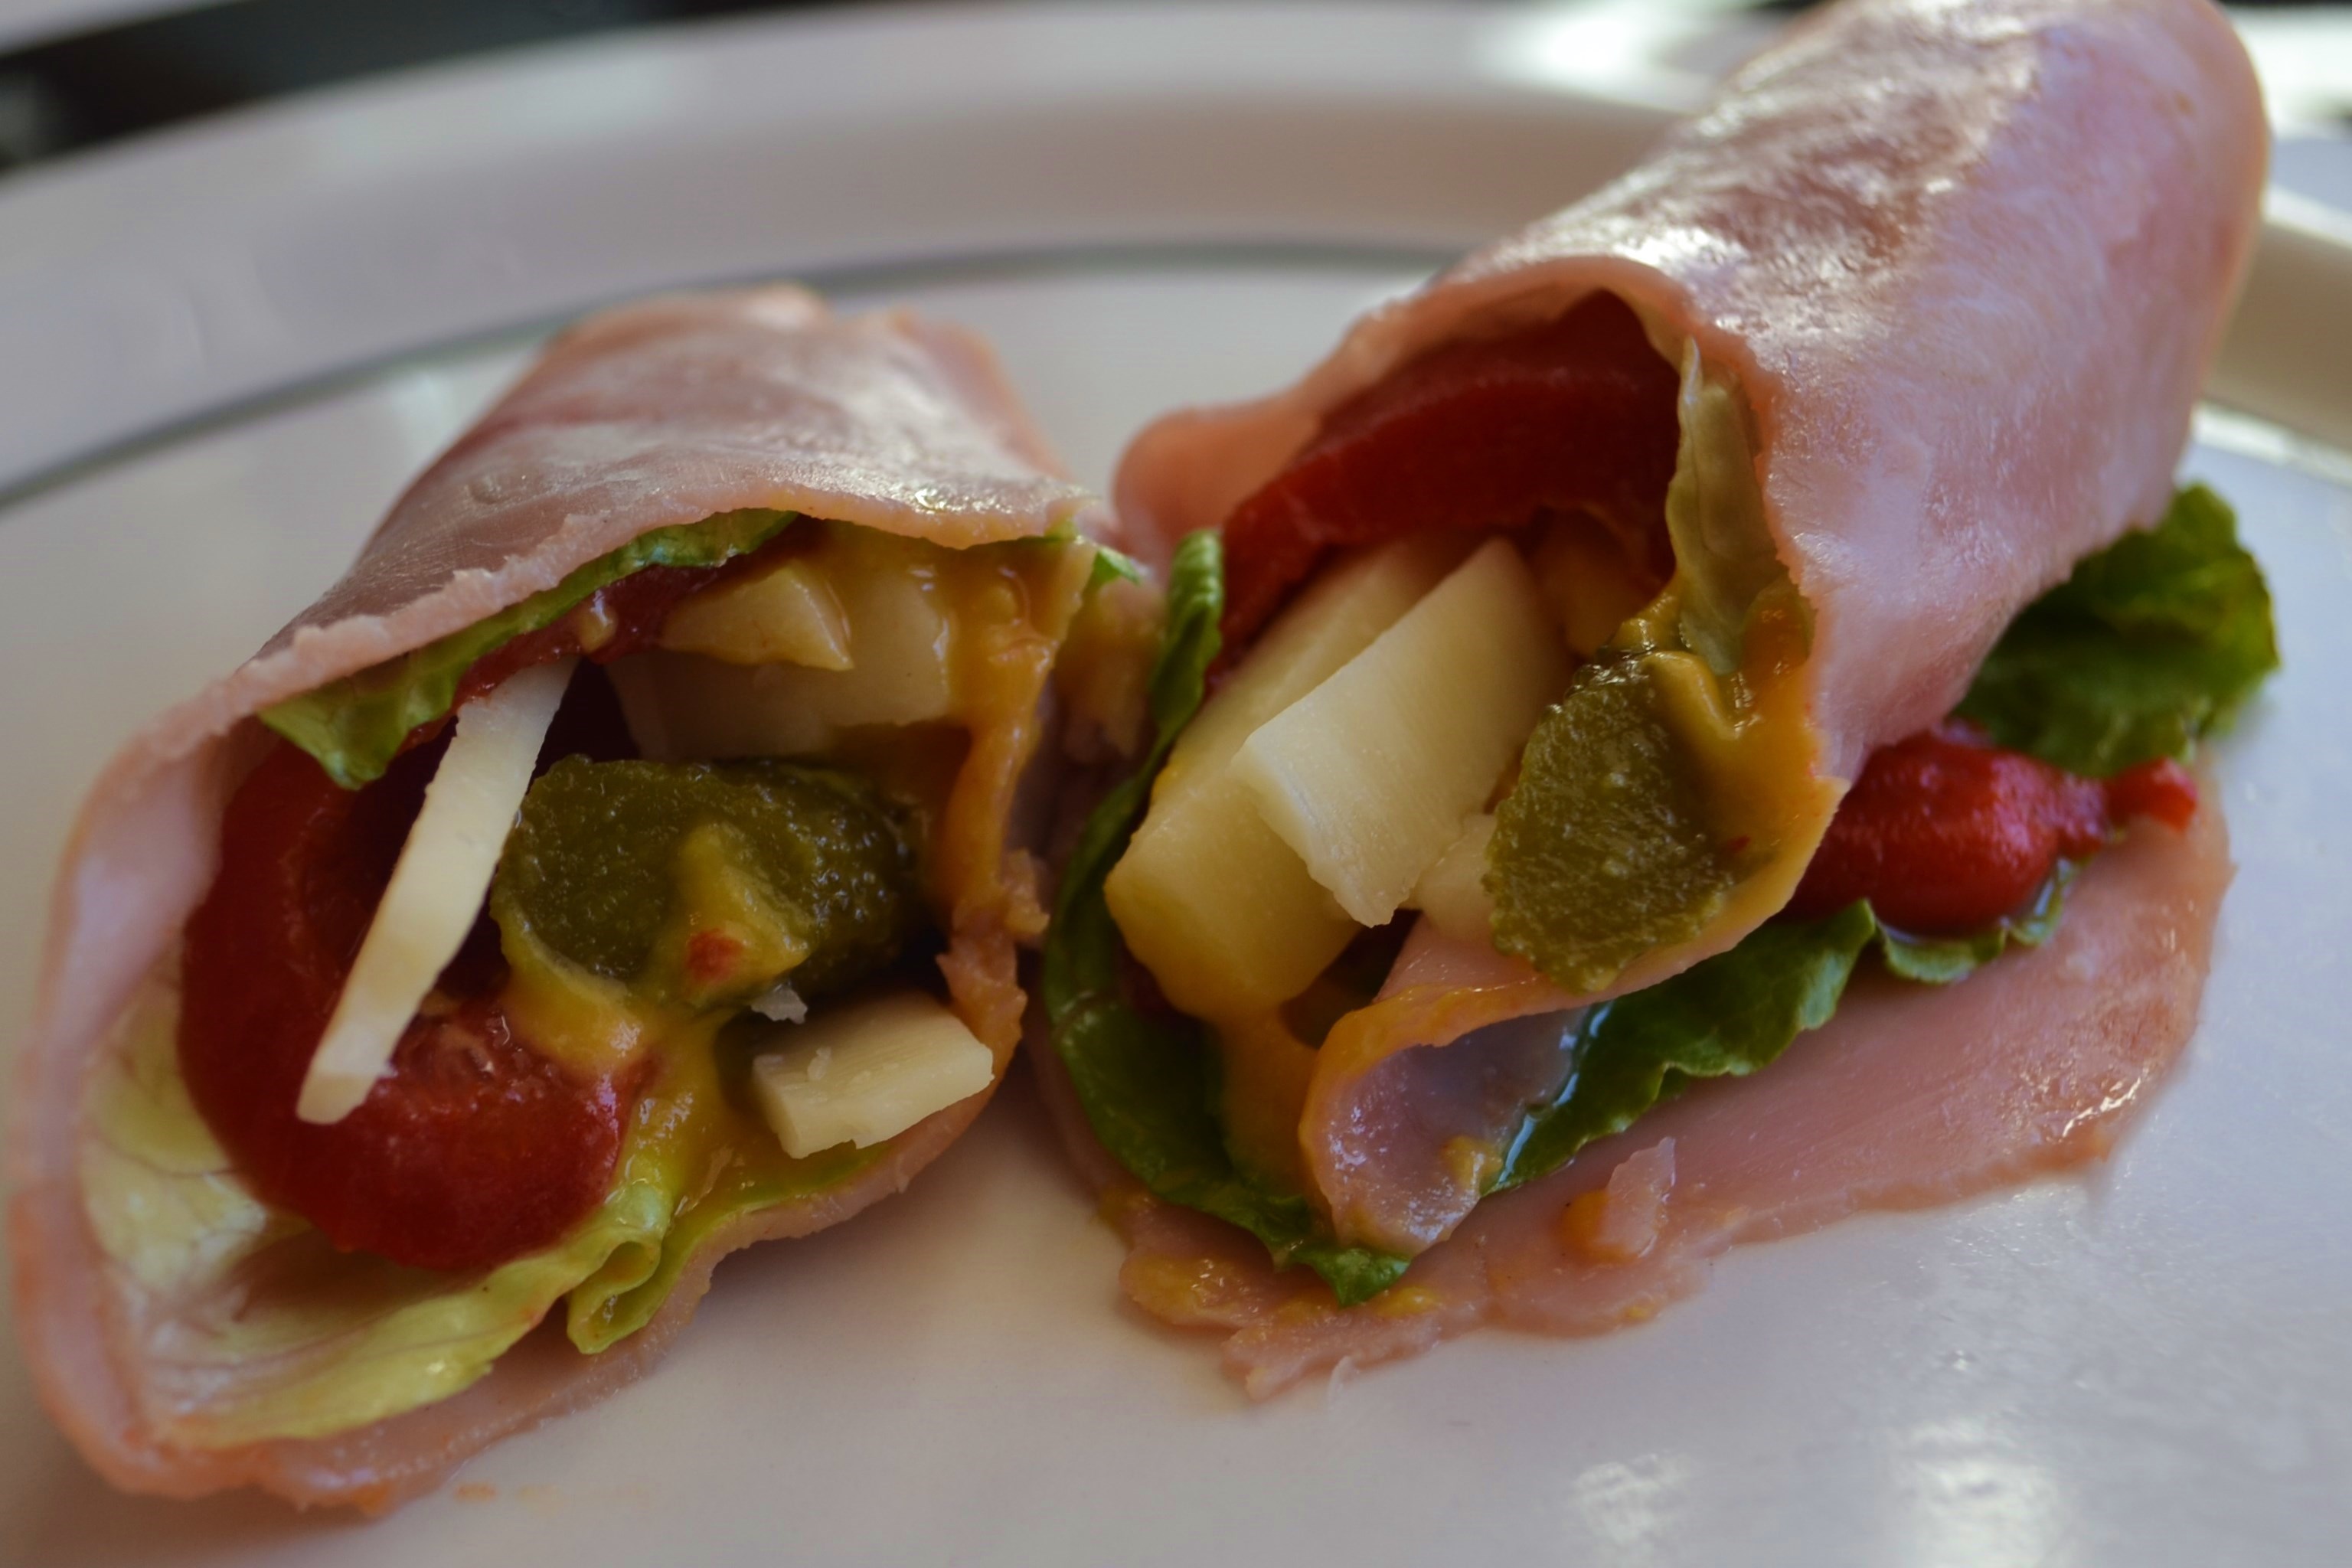
1 Skinny Roll-Up, cut in half to better show you the stuffing.(But you may prefer to eat it without cutting it in half, as it is less messy)
(Becky, the Mama) You know those times when you want “just a little somethin’-somethin’’” to tide you over to until the next meal, or give your foggy brain an energy boost? Something good for you, tasty, without lots of calories or carbs? But you want more than a few carrot or celery sticks. Or maybe you want a light lunch in a hurry, but you aren’t crazy about the idea of sandwiches or wraps with all that bread?
Here’s my favorite pick-me-up-in-a-hurry snack and it is less than 100 calories per Skinny Roll Up. No carbs. No gluten (as long as the meat and cheese you use is gluten free.) Plus there are a thousand variations to this basic “recipe”: you can choose whatever thinly sliced sandwich meat you like (or substitute a vegan version), then chose a small bit of cheese (your choice, or leave it out), whatever veggies you have on hand (cooked or raw or a combination), and any sauce that floats your Roll Up Boat from honey mustard (as I used here), to a little dollop of Ranch Dressing with Buffalo Sauce, to Teriyaki Sauce with Sriracha, to Bar-b-que sauce… and on and on. They are surprisingly filling, two of them with a piece of fruit works as a great light lunch, and the calories are such that you can enjoy another snack or small dessert with a cup of tea or coffee at mid-day and not break your calorie bank.
When your kids claim they are famished and dinner is till an hour away, you can teach your kids how to build-their-own Roll Ups, letting their imagination lead the way. Just one Roll Up will tide them over until dinner, but won’t spoil their appetite. You can also wrap their favorite “roll-ups” in Saran Wrap, leave off the sauce, and send them a little “dipping sauce” in a small container for some variety in their lunch box. (You may want to use 2 slices of deli meat for these so they are easier for the kids to handle. A half slice of American cheese also helps it “stick” and stay together better.)
Vegetarian or Vegans can substitute ToFurky Roasted Deli Slices, which have excellent taster reviews. Or skip the meat layer, use a large soft piece of lettuce instead, and spread the lettuce with humus or refried beans for the protein.
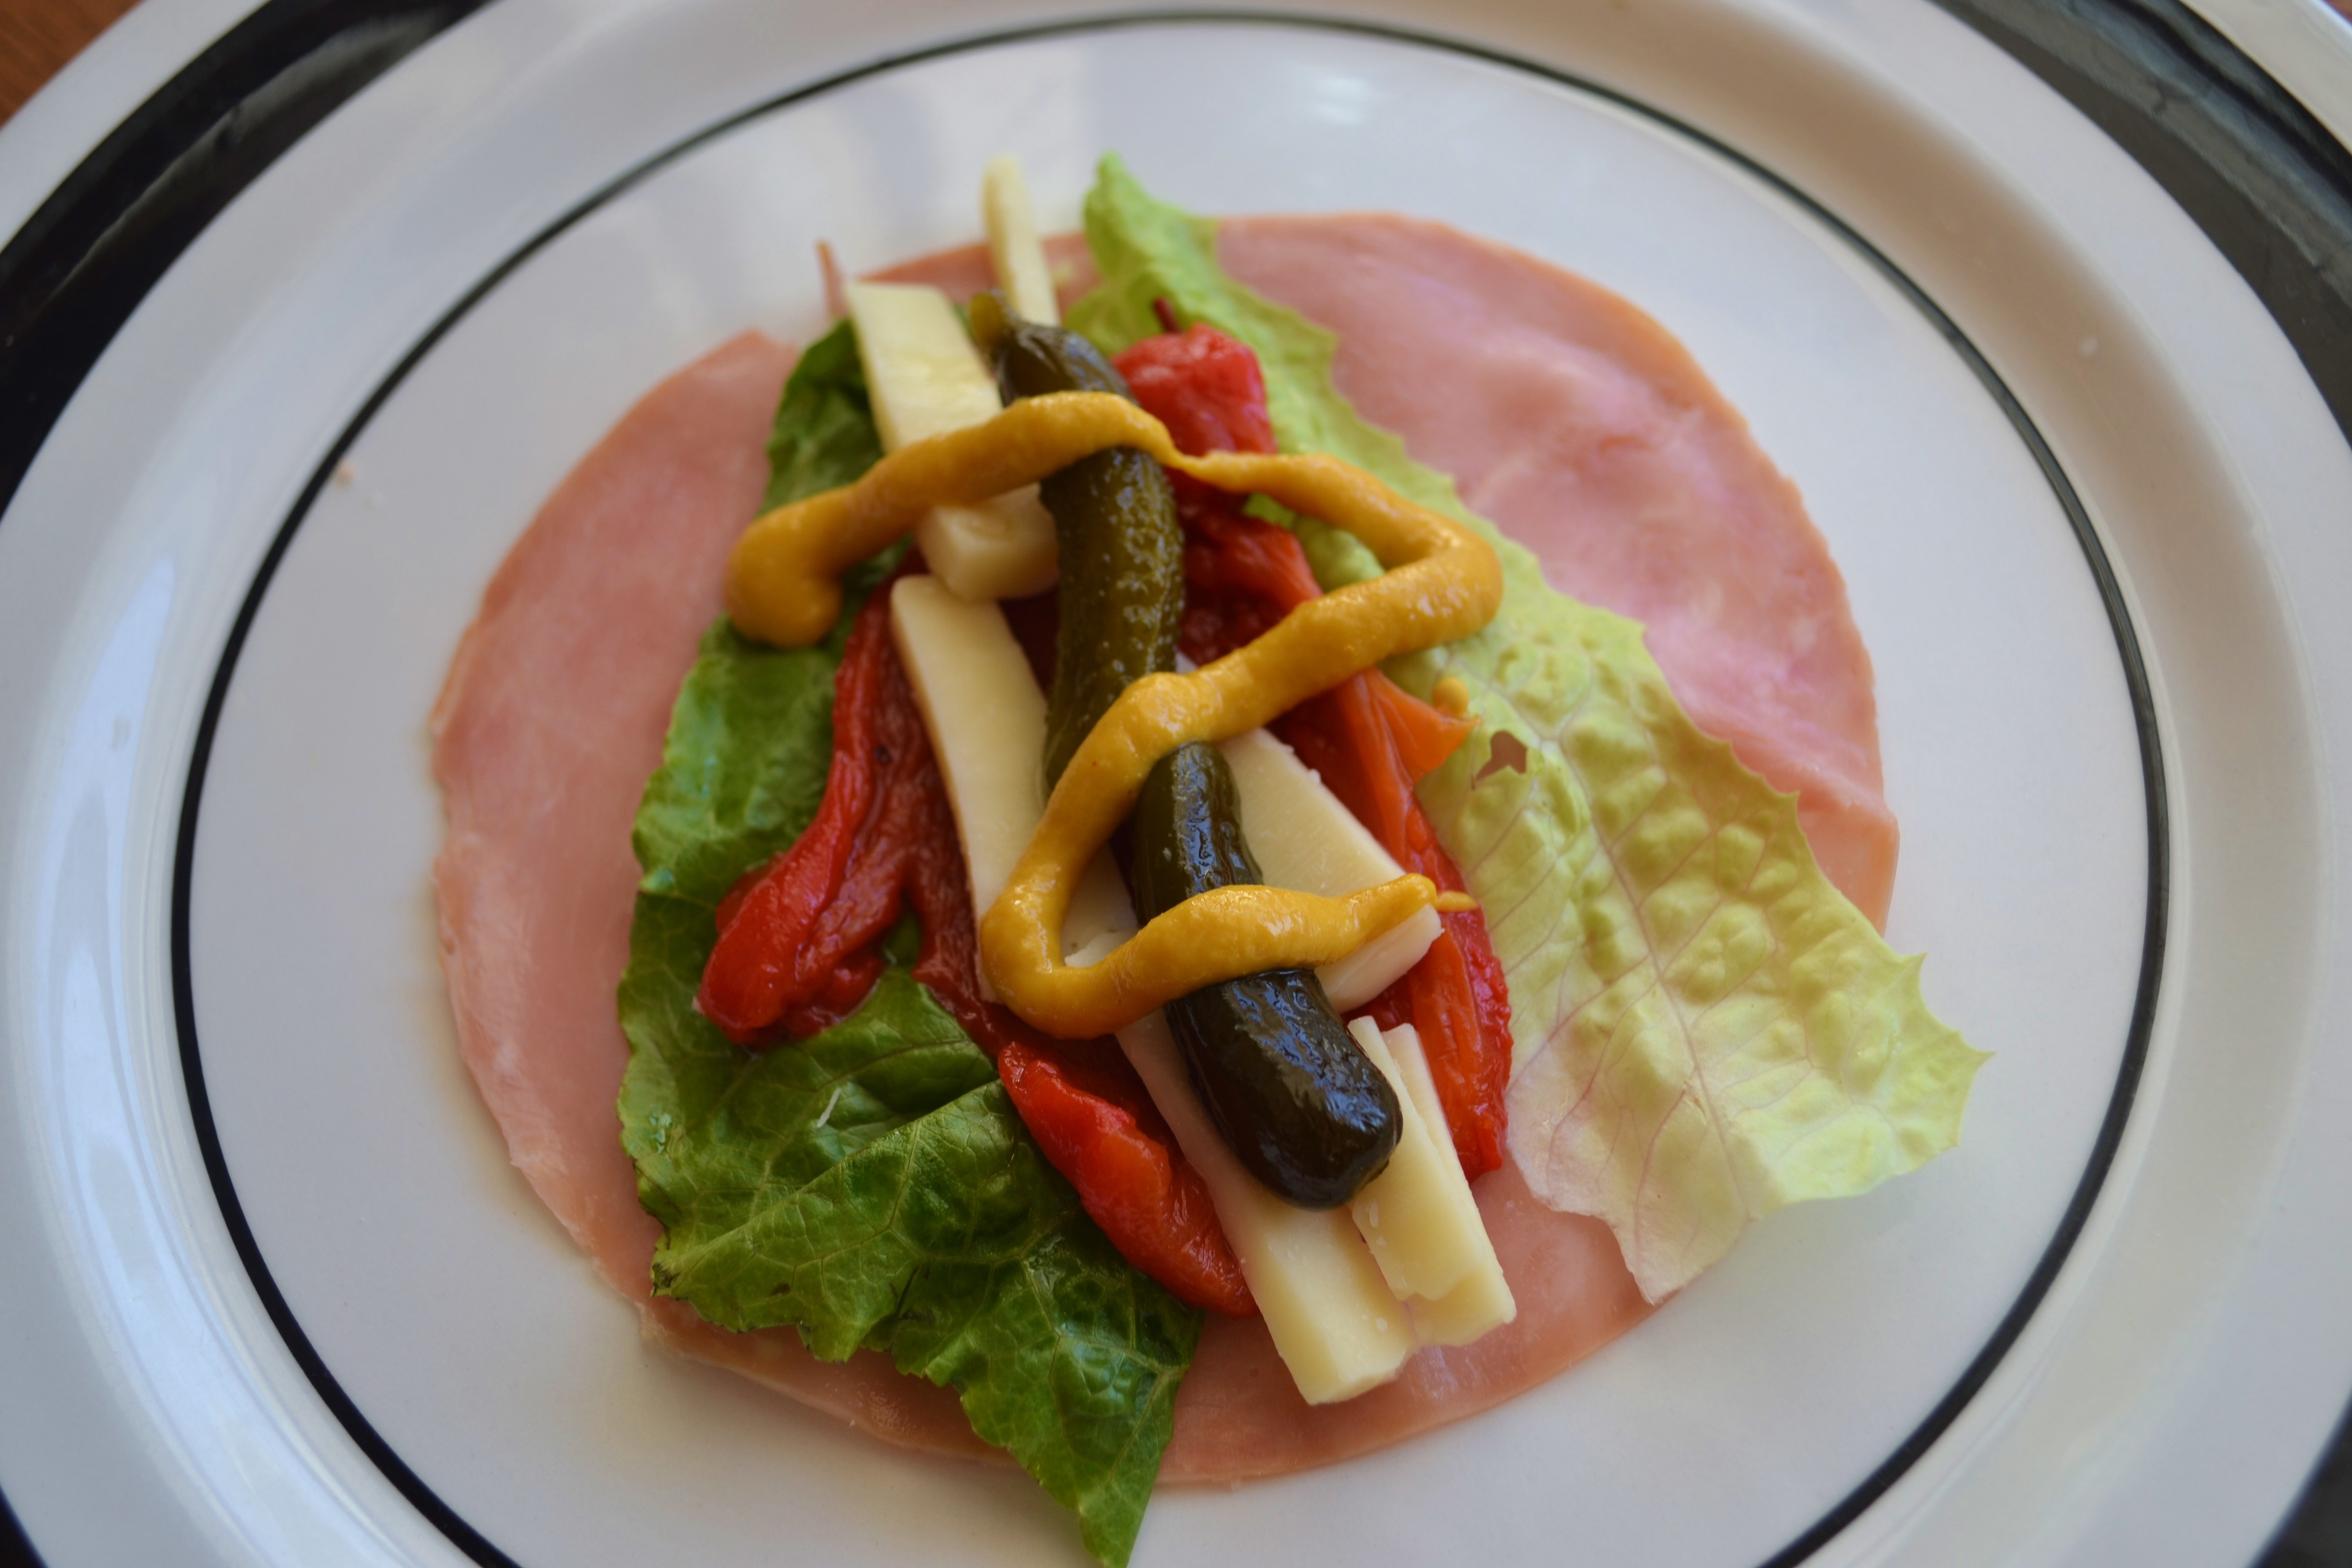
I used thin deli Honey Ham, a slice of Romaine, a slice of Roasted Red Pepper, some white cheddar cheese strips, sweet pickles and honey mustard. Yummmm….
Skinny Deli Veggie Roll Ups
Thin Sliced Deli Meat (Your choice, I used Honey Ham. Vegans can use ToFurky Deli Slices)
1 t. or more of your favorite sauce or dressing (I used Honey Mustard)
1/2 to 1 oz. of cheese, sliced or cut in small strips (1/2 slice of American Cheese, or 2 or 3 small thin strips of any hard cheese)
Small pieces l of lettuce
Pickles, Roasted Peppers (Anything pickled you like that adds a “bite” — pepperocinis, sliced olives or jalapenos are yummy too. I used midget sweet pickles)
1 or 2 T. Veggies, cooked or raw (thinly sliced carrots, cucumber, celery, tomato, avocado, raw pepper sticks, sliced green onions, mashed beans, humus or leftover cooked veggies of any kind)
Directions
Lay a thin slice of deli meat on a plate (you can double this if you want more protein and sturdiness). Stack lettuce, cheese, pickles and veggies down the middle of the deli slice. Squeeze your favorite dressing over this. Roll up like a burrito and enjoy. If making a bunch of them to serve later or to pack in a lunch, you may want to secure them with a toothpick. (Also if they are to be served later or eaten for lunch, you may prefer to leave off the dressing and keep it separate to use as a dipping sauce.)
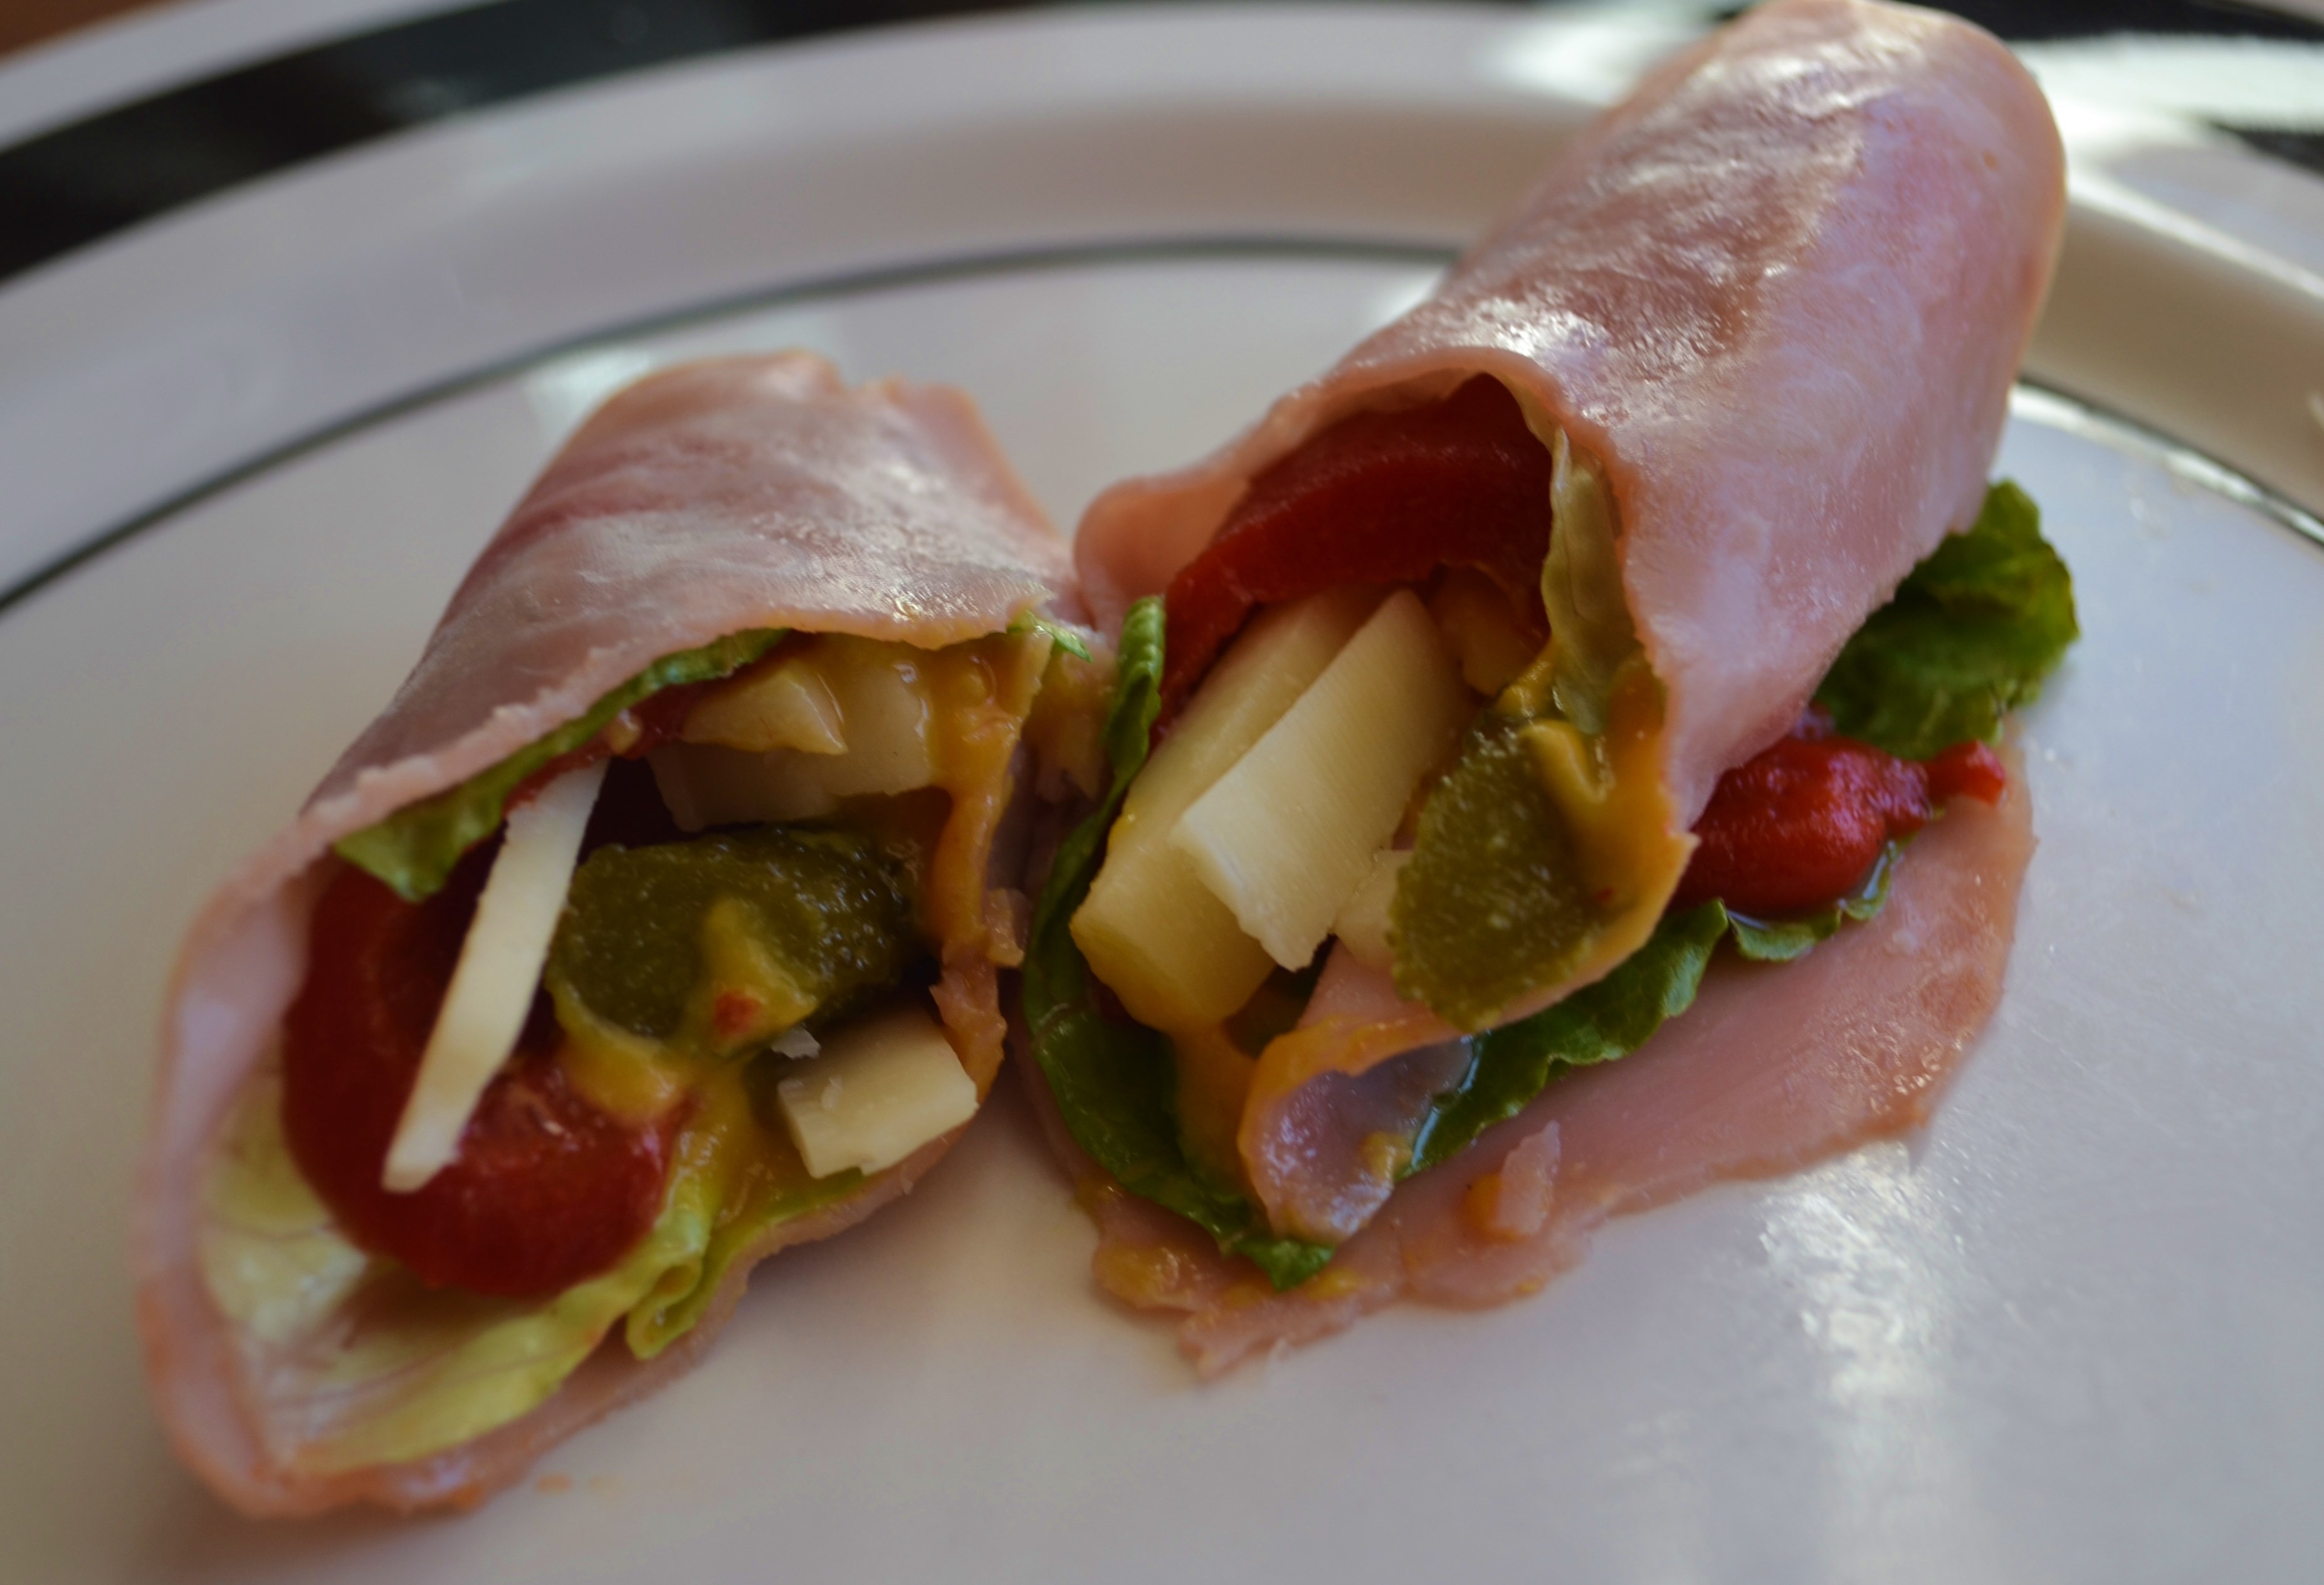
One Skinny Roll Up, Cut in 1/2 on Diagonal (to show inside stuffing)
Garlic Cashew Cream Sauce (oil-free, vegan, plant-based)
Posted: January 9, 2014 Filed under: Italian, Main Dishes, Pasta, Sauces and Dressings, Toddler-Approved, Uncategorized, Vegan, Vegetarian, Vitamix | Tags: dairy-free cream sauce, garlic cashew cream sauce, oil-free italian dish, plant-based pasta sauce, vegan alfredo 2 Comments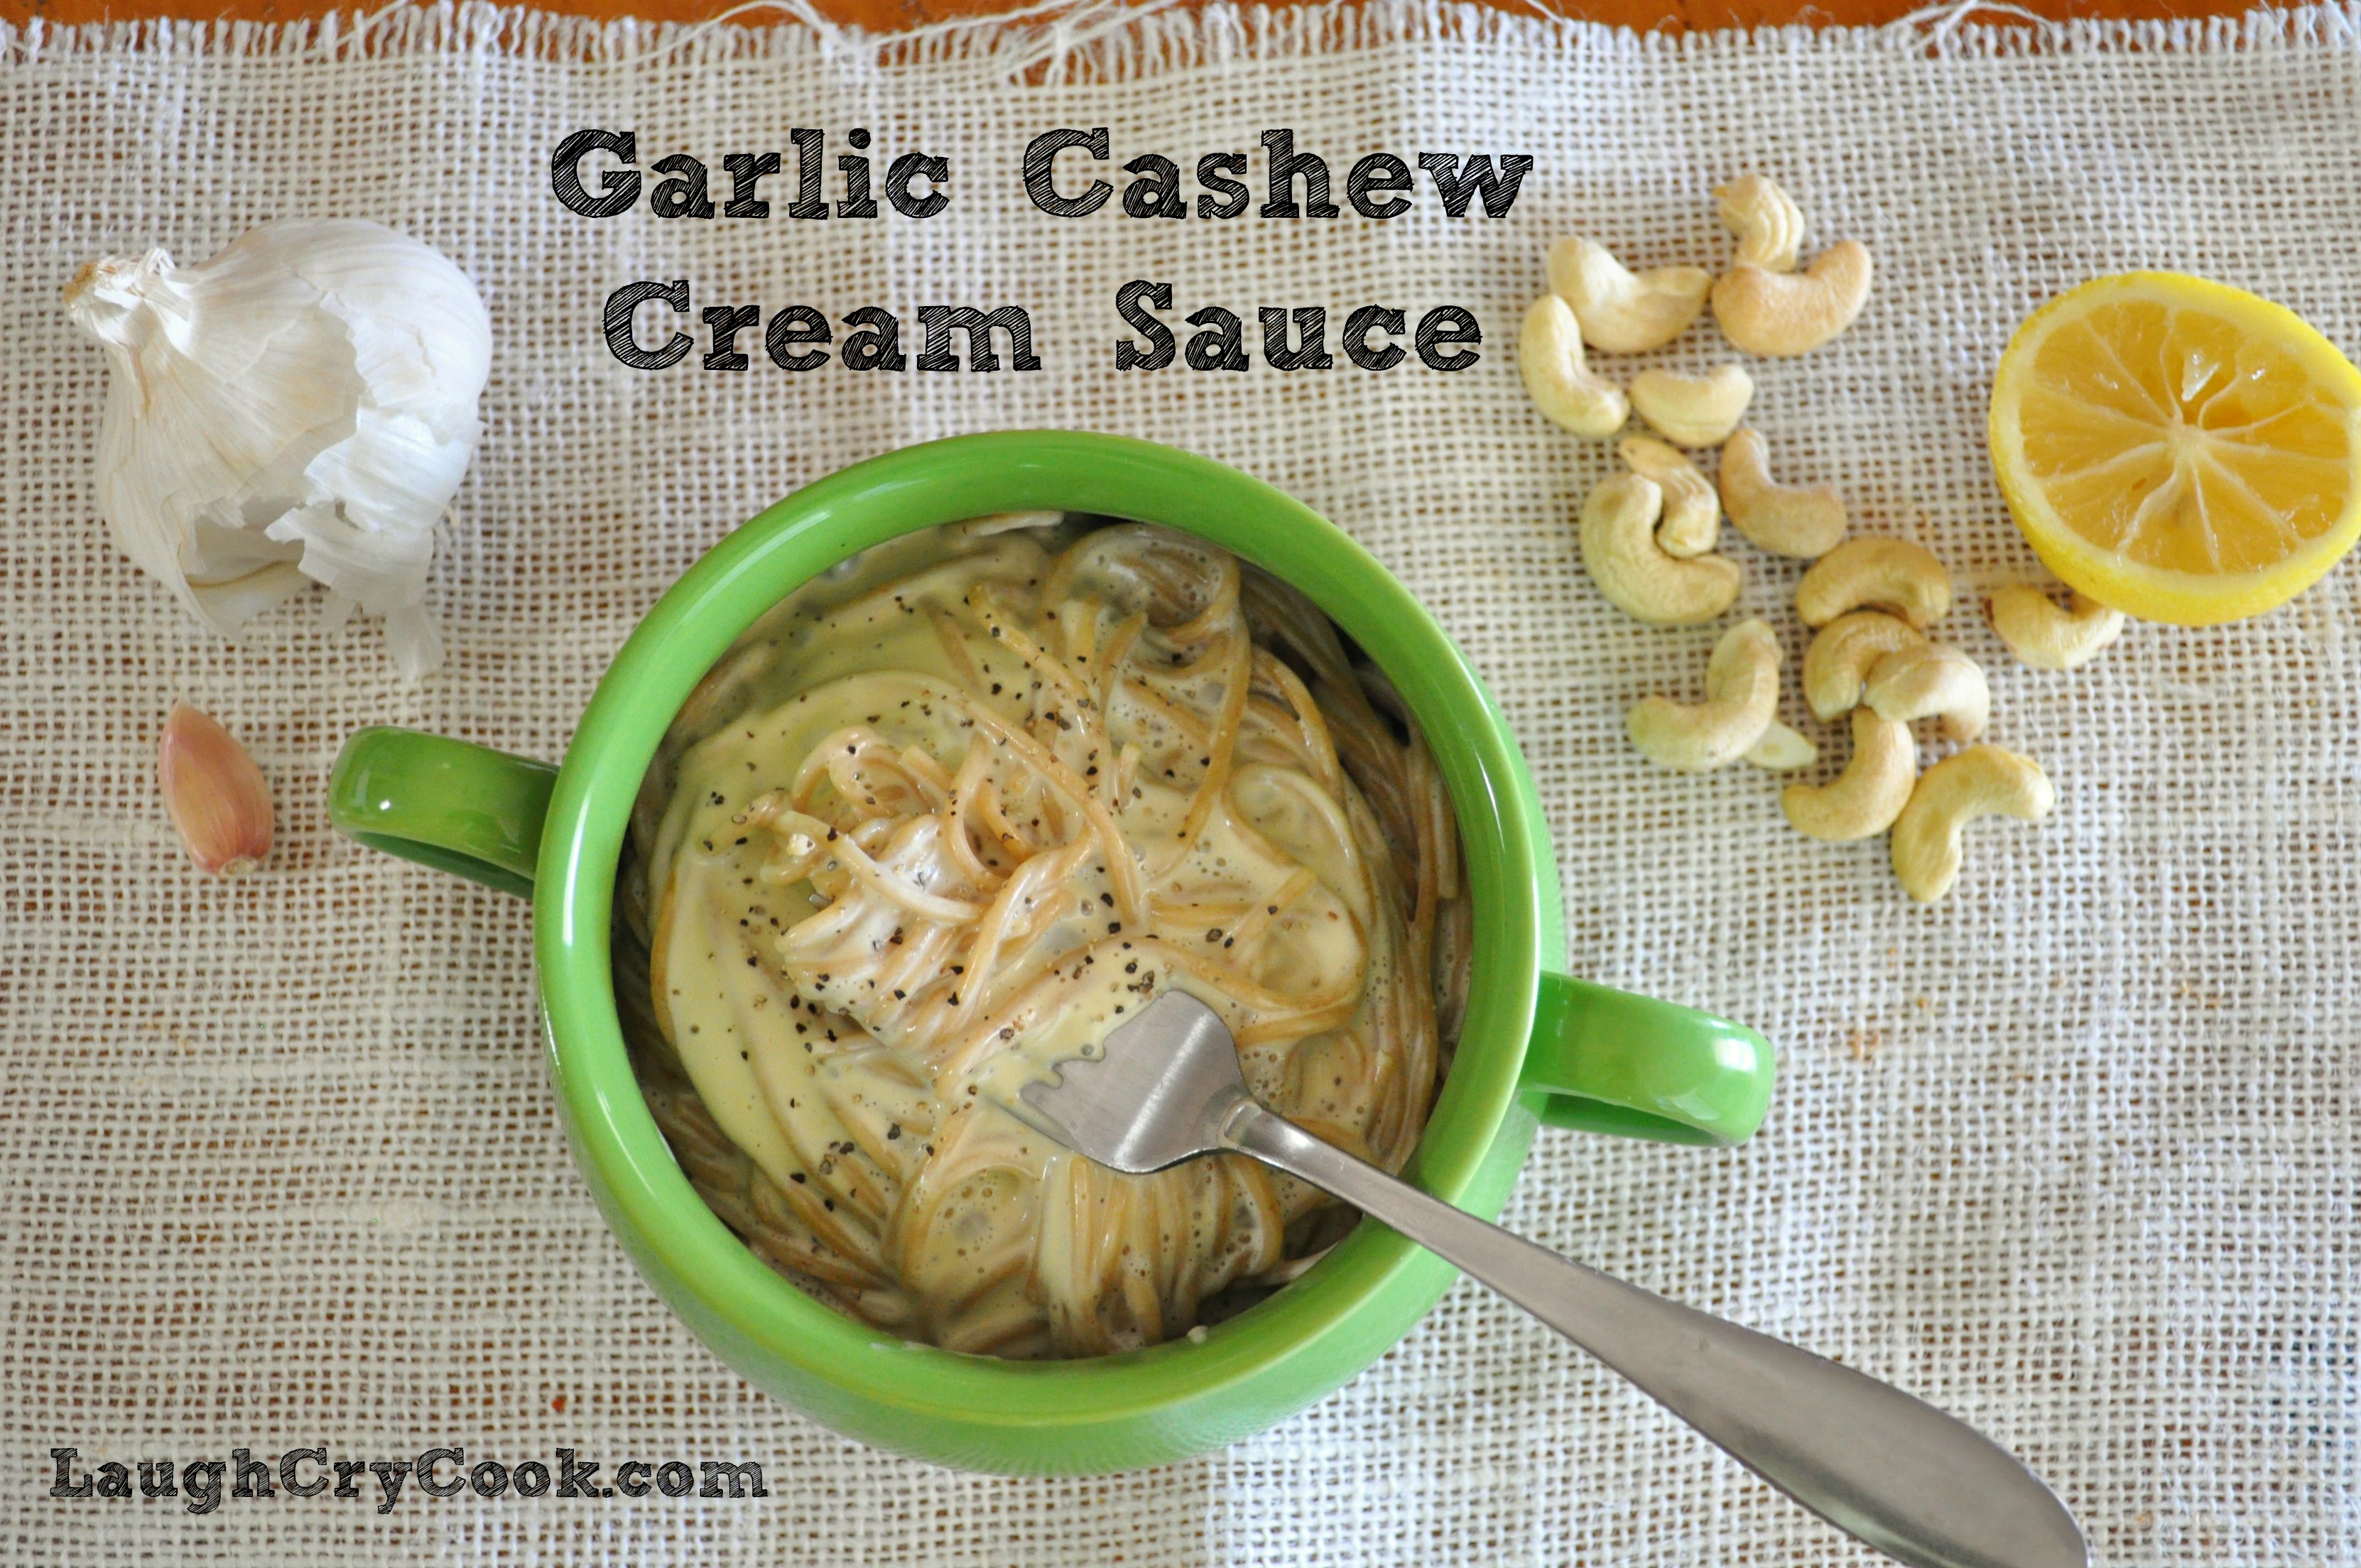
When I worked at the Olive Garden in college, the biggest temptation was the bread drawer, the place where the fresh-out-of-the-oven garlicky bread sticks keep warm until they are to be swaddled in cloth like little dough baby Jesuses and placed in a basket, then delivered to anxious guests alongside a family-sized salad with large clumsy tongs.
Here’s a little server secret: to maximize your salad and breadstick dining pleasure, don’t bother asking for extra dressing or scooping up the last bit swimming at the bottom of the salad bowl. The real indulgence comes in dipping them into a boat of alfredo sauce, it’s a combination you won’t long forget. And the only thing it will cost you is $2.50, 380 calories and 35 grams of fat! Yeah sorry….total buzz kill. But good news is ahead.
This morning, an idea for a simple garlic cream sauce recipe popped into my head. It sounded so easy that right there at 10am, I whipped it up in my Vitamix. And when I opened the blender top ten minutes later, the steaming creamy sauce brought me right back to my shifts at the OG. The smell of garlic filling the air as you opened the bread drawer and winked to the cook for a little ramekin of alfredo. The combination so naughty, yet so irresistible. Hungry servers gathered around to share the quick indulgence, all the while looking out of the corner of our eyes to make sure a manager wasn’t swinging through the kitchen door or the skinny girl with self-control wasn’t looking down on us with judgement.
Somehow this sauce captures that naughty thrilling indulgence – the taste of garlic and cream dancing on your tastebud – but it’s oh so right in so many ways. No oil, no dairy, no cholestorol, just healthy fats from cashews. And with a rich creamy sauce like this, who really needs a refined white flour breadstick to dunk in it? Serve it over whole wheat pasta or vegetables or dip your favorite toasted whole grain baguette in it and you’ll be every bit as satisfied. It’s mind blowingly delicious and the easiest cream sauce I’ve made yet. I see many spin-offs of this in my future. Add a little cayenne for some heat, roast the garlic, garnish with some basil to brighten it up for spring, maybe even add some spinach and artichokes and cook it down to a thick appetizer dip. Oh the potential!
Note: I did not pre-saute the garlic, so it has a little bit of that raw garlic bite…that will stay the evening with you. I am a sucker for garlic, but if you like your garlic a little more milder and not as an overnight guest, then you may want to mince and saute it in a touch of water or olive oil before adding it in.

Garlic Cashew Cream Sauce
Recipe from http://www.laughcrycook.com
Makes enough for 16 ounces of cooked pasta (about four large servings)
1 cup raw cashews
1/4 cup nutritional yeast (available at health markets)
1/4 – 1/2 teaspoon salt
2 large or 3-4 small garlic cloves
2 teaspoons cornstarch (flour will probably work too, but you’ll probably need 3-4 teaspoons)
2 cups milk (I used unsweetened almond milk)
4 teaspoons lemon juice
Vitamix or High-Speed Blender Directions
1. Blend cashews, nutritional yeast, and 1/4 teaspoon of salt into a powder. Scrape corners down.
2. Add garlic, cornstarch, 1/2 of milk. Blend until combined.
3. Add remaining milk and blend on high speed until hot and steamy (about five to seven minutes) and to the thickness desired.
4. Blend in lemon juice and check for seasoning. Add more salt if desired.
5. Serve over pasta or vegetables or as a dipping sauce for bread. Sprinkle individual servings with a touch of pepper.
Vitamix is having a sale on their reconditioned models this month (January 2014). I bought the standard reconditioned model in November when they had the same sale and have officially fallen into the “How did I ever live without it?!” camp. You can use the code 06-009318 at Vitamix.com to get free shipping and to help support Laugh, Cry, Cook.
Food Processor/Stove Top Instructions
1. In a food processor blend cashews, nutritional yeast, and 1/4 teaspoon of salt into a powder. Scrape down sides as needed.
2. Mince garlic finely or use microplaner to grate into food processor.
3. Stir cornstarch into 1cup of milk. Add to food processor and blend until well combined.
3. Add remaining milk. Blend again.
4. Transfer to stovetop sauce pan and heat on medium to medium high, stirring often until it is heated through and reached the desired consistency (like a thick alfredo sauce).
4. Stir in lemon juice and check for seasoning. Add more salt if desired.
5. Serve over pasta or vegetables or as a dipping sauce for bread. Sprinkle individual servings with a touch of pepper.
30 Minute AMAZING Lemon Pepper Chicken Noodle Soup
Posted: December 8, 2013 Filed under: Chicken, Main Dishes, Soups, Turkey, Uncategorized, Vegan, Vegan Options, Vegetarian | Tags: carrots, chicken, chicken broth, deli chicken, garlic, lemon pepper, mushrooms, noodle, pappardelle, peas, roast chicken, soup, veggie broth 2 Comments
In early November, Greg and I arrived in sunny Southern California for a week of much longed-for and needed vacation. I took no time in shimmying into my bathing suit (and immediately donning a cover-up), loading my tote bag with “beach reads” and a pair of sunglasses. I snapped a picture of the glistening pool, palm trees, blue sky and mountains in the distance, then posted it to Facebook extolling the joys of time away! Savored every moment of sunshine that first day of vacation, went back to the condo enjoyed a relaxing evening and fell asleep.
The next morning I woke to find that my skin was hot, my body aching, my throat swollen, my head felt about twice its normal size, and my ears seemed stuffed with cotton. Greg too had caught the bug, but he had taken the flu shot earlier in the month, so his misery was limited in time and scope. I did not get the shot, so my misery knew no bounds. There was no doubt about it: I had the flu. I don’t really remember much about the next next six days of “vacation” as I spent most of it sleeping or on drugs.
When I am sick, Greg does a fine job caring for me, truly he does. That entire week he was the one who braved getting out and going to the store, ferrying in rations of cold medicine, cough drops and canned chicken soup. But the truth is, I wish I could have a Well Me to take care of the Sick Me, because the Well Me makes a killer homemade chicken soup.
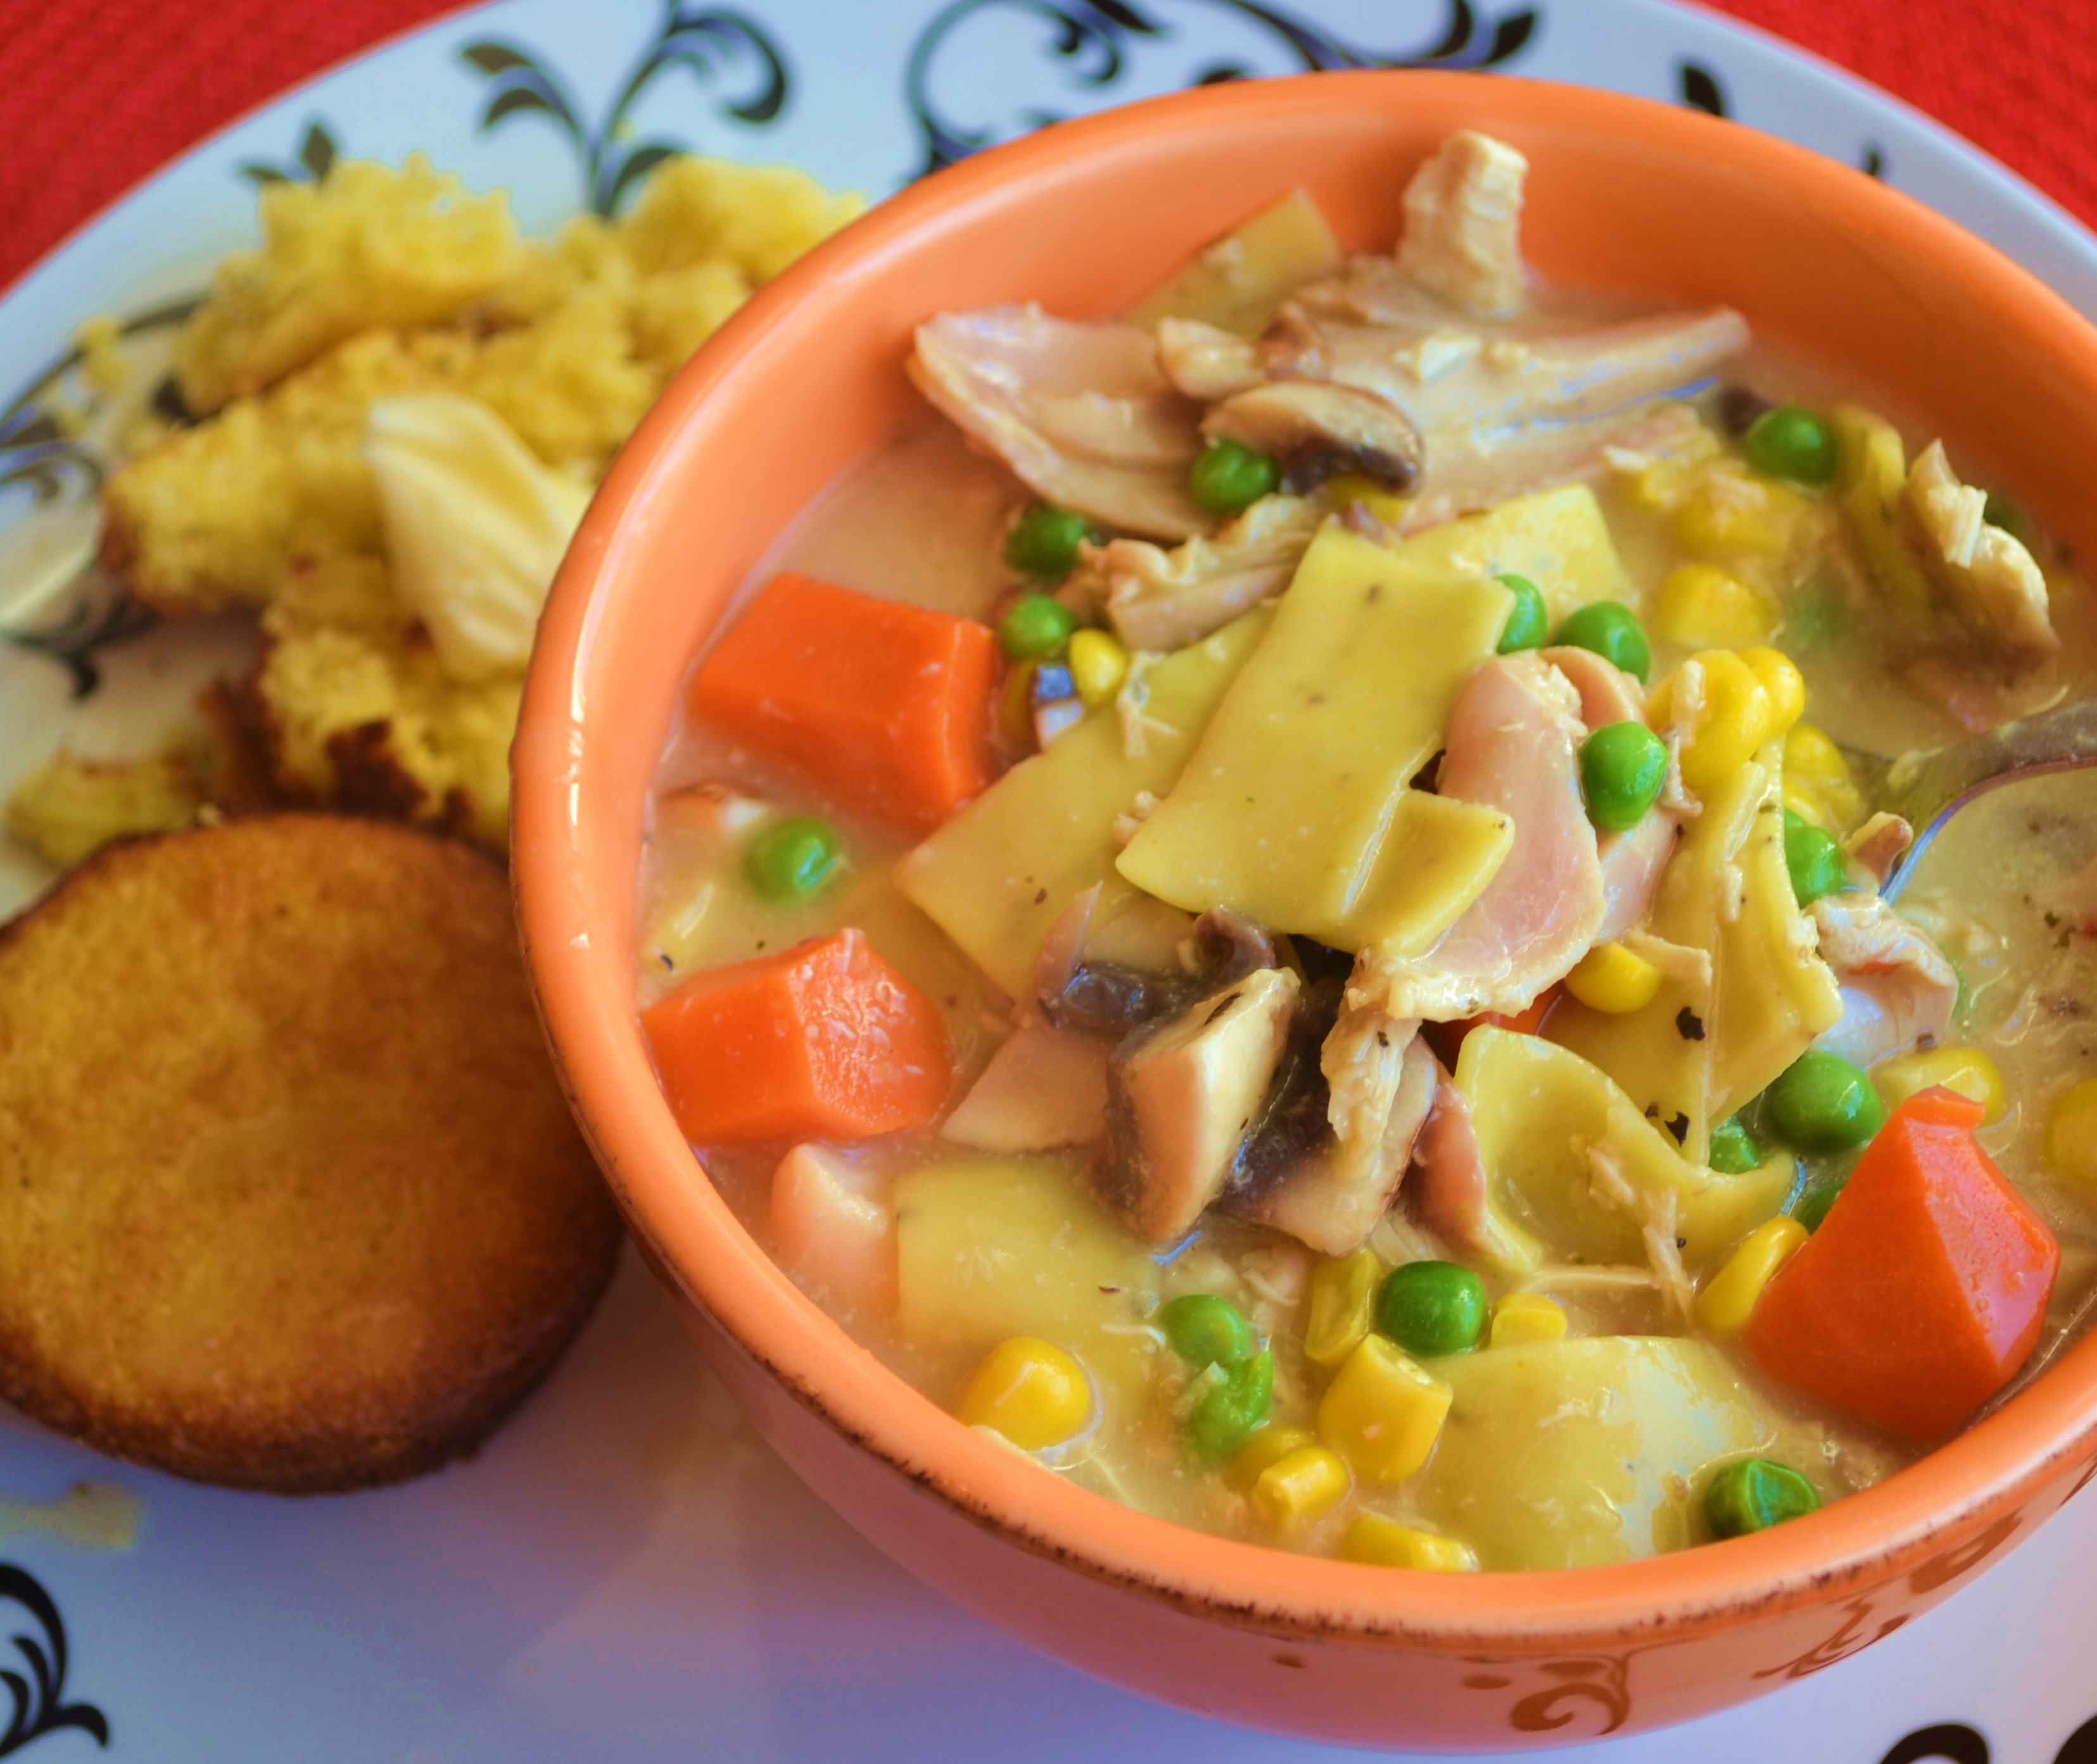
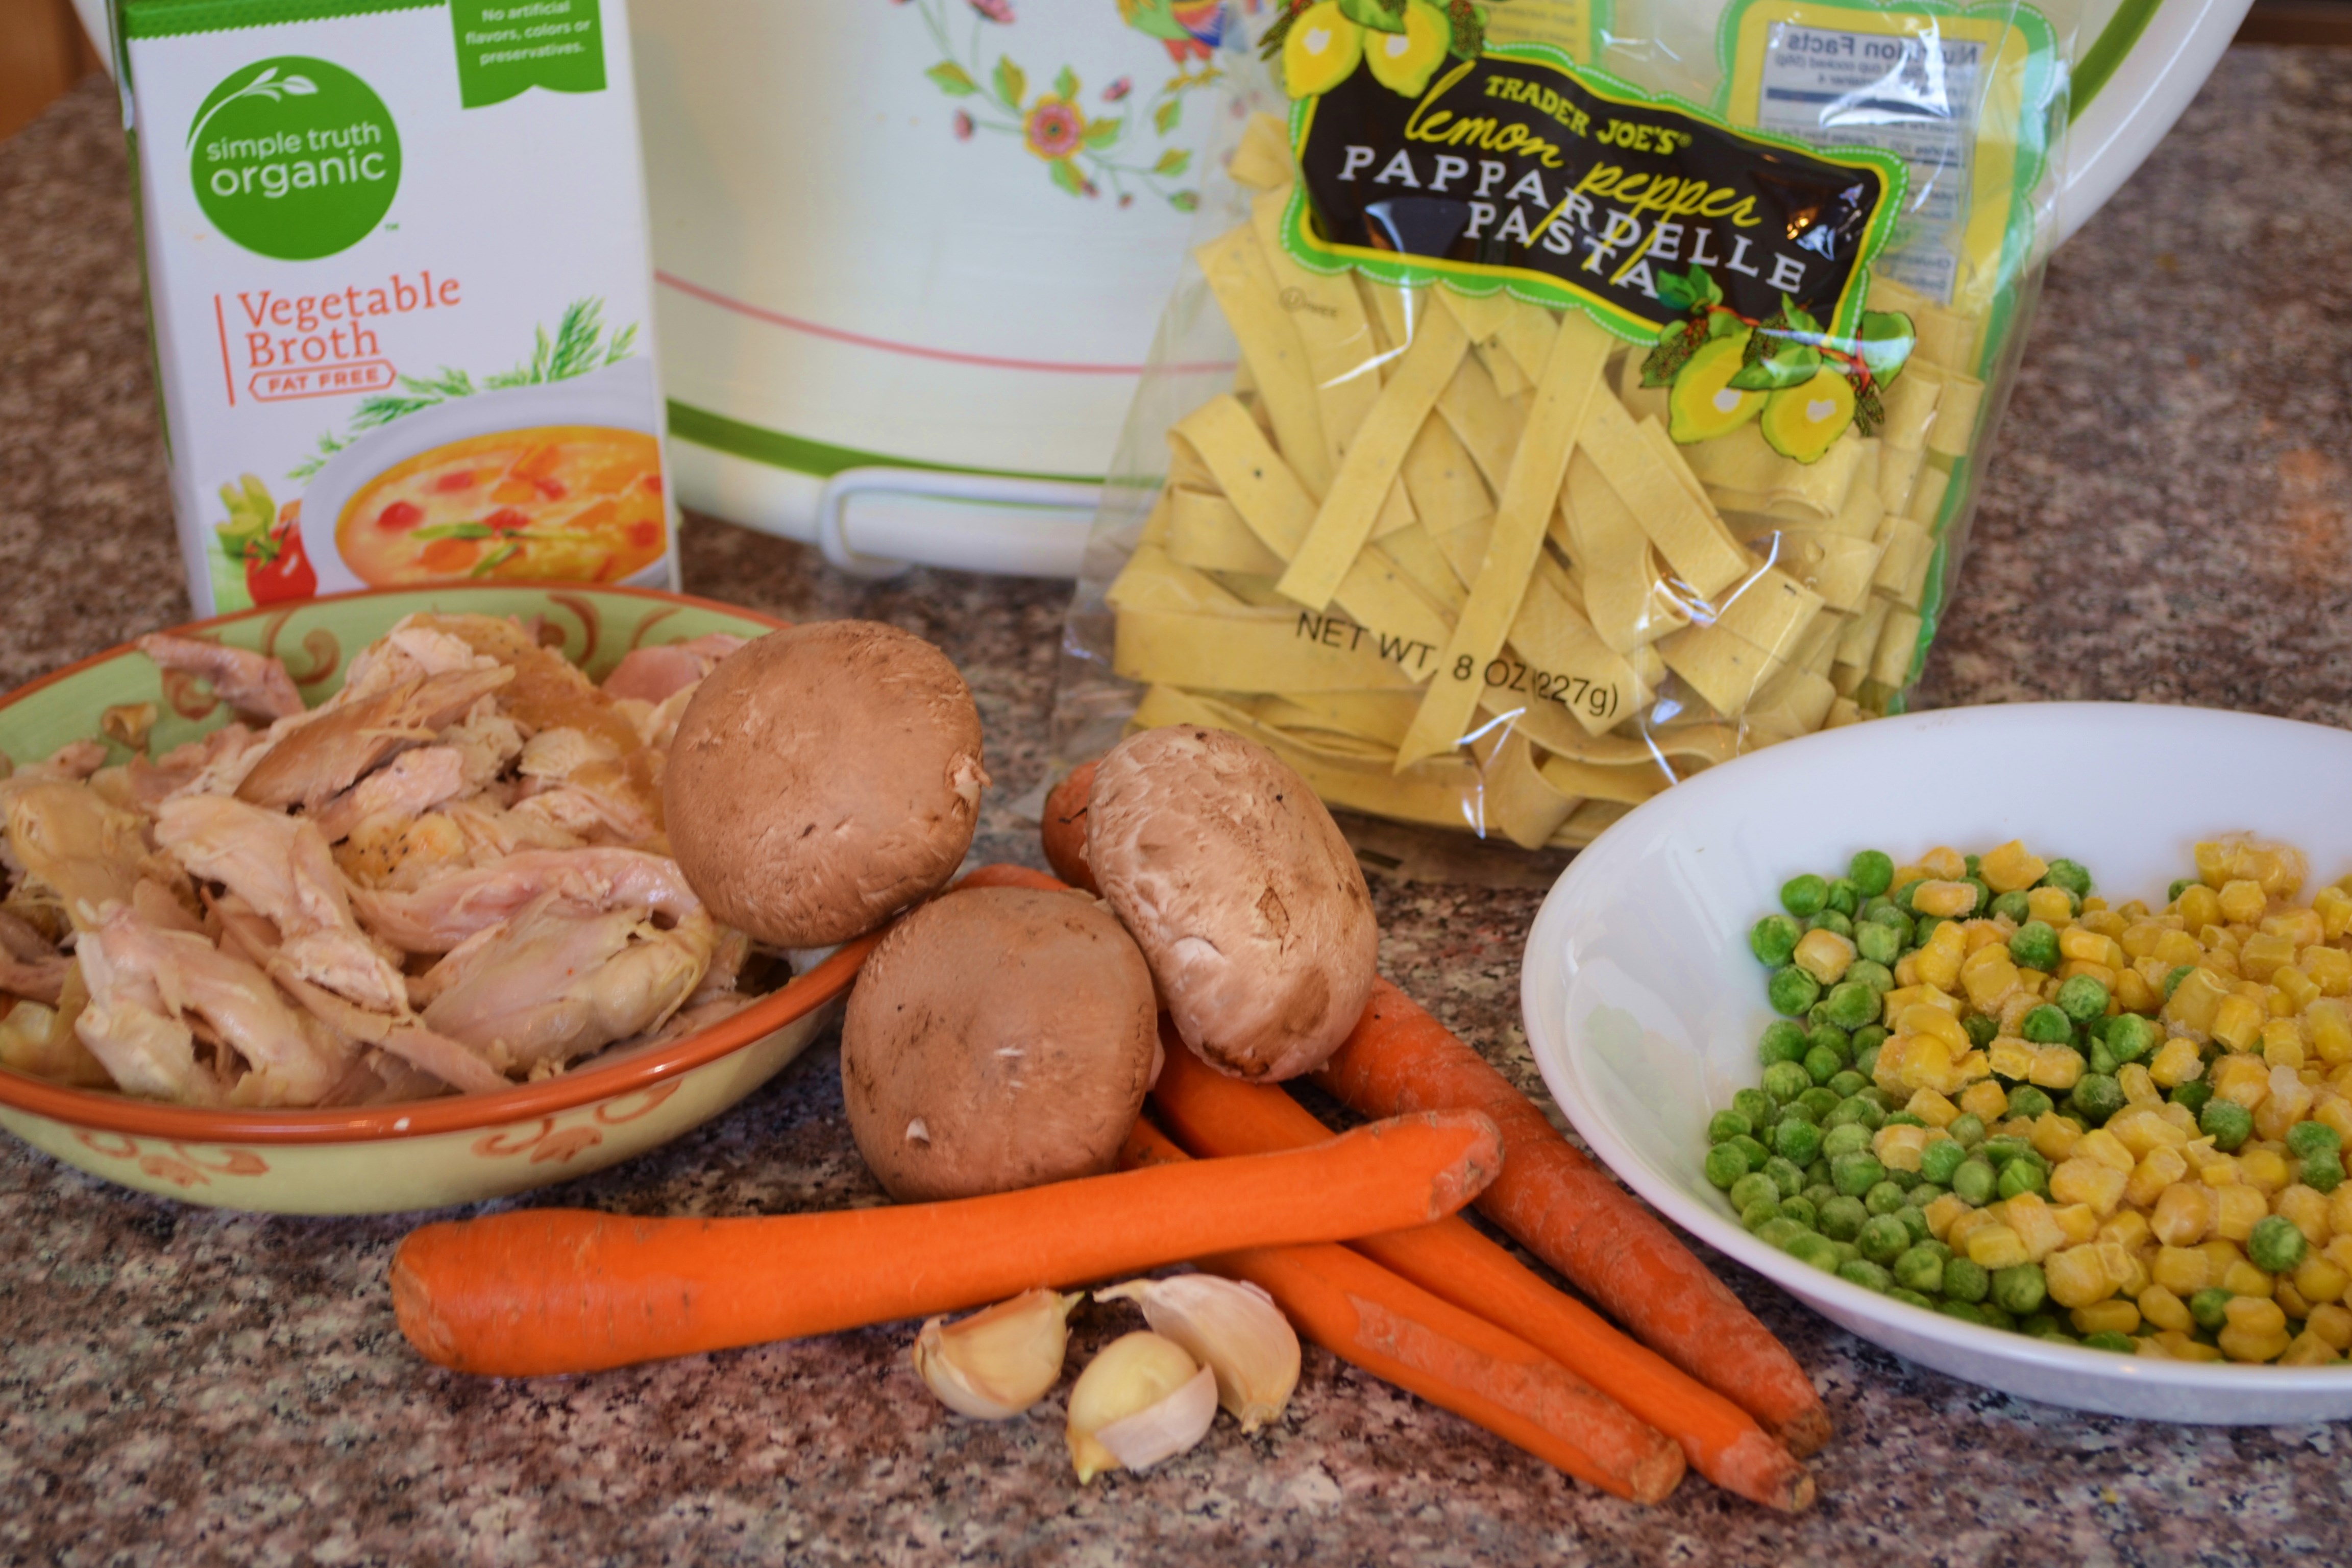
This one uses one of my favorite Trader Joe’s products: Lemon Pepper Pappardelle Pasta. The lemon flavor is not overly strong and the texture of these noodles is perfect for chicken soup: firm but tender –a near-perfect pasta product!
The great thing about this homemade soup is that it only takes 30 minutes to make but tastes like you’ve toiled in the kitchen all day. The special noodles take it to a “gourmet” level that you would be proud to serve to guests.
I believe this easy chicken soup will become your go-to recipe to serve on a chilly day, make for a sick family member or cheer up a friend with the flu. (You might also consider tucking in a copy of We Laugh, We Cry, We Cook for your friend. Nothing cures what ails you like homemade soup and laughter.) It is also easy to “veganize” this dish, and I’ll list alternative ingredients in the recipe below.
Fast & Easy Lemon-Pepper Pappardelle Chicken Soup
Ingredients
2 T. olive oil (or oil and butter combo)
2 T. flour
4 cups of chicken or veggie broth
½ c. water
½ c. milk or almond milk
3 cloves garlic, grated or pressed
4 oz. Lemon Pepper Pappardelle Noodles, broken into 1 – 2 inch pieces (Trader Joe’s brand recommended/ 4 ozs is about ½ a package. Unflavored Pappardelle or other wide noodle will also work if you prefer or cannot find pappardelle pasta at your grocery store.)
4 carrots, peeled and diced (the smaller the dice or slice, the faster they’ll cook)
3 large mushrooms, diced
2 cups of cooked chicken, pulled from a deli roasted chicken (I like to keep some of the pieces fairly large, some small. )
*VEGANS can substitute a can of big butter beans or your favorite vegan chicken substitute for the meat. But add toward the end of cooking.
½ c. frozen corn
½ c. frozen peas
½ to 1 t. salt (you’ll have to taste test because some broths and chickens are saltier than others)
½ to 1 t. pepper (according to your taste)
½ to 1 t. your favorite dried herbs ( I use a little Italian seasoning, a little basil)
Dash hot sauce to taste (like Tabasco)
Directions
In a big soup pot, heat the oil or oil/butter combination until it begins to bubble. Add flour and whisk this roux until smooth and bubbly. Very slowly, and while still whisking with one hand, add one cup of the chicken broth, stirring until smooth. Add the rest of the broth, the water, the milk and garlic, then continue to stir and let it come to a boil.
Add the broken pappardelle noodles and carrots and mushrooms. Simmer this until the veggies and noodles are almost tender. Add chicken, corn, peas, seasonings and dash of hot sauce. Continue to simmer until noodles and veggies are tender (but not mushy) and heated through. Adjust seasonings to taste.
We usually serve steaming bowls of this hearty soup with hot buttered cornbread and fresh apple slices.
From: http://www.laughcrycook.com
Chipotle Chili, A Charm Bracelet Miracle, And The Long Awakening
Posted: November 10, 2013 Filed under: Beef, Book Reviews, Kids Cooking, Main Dishes, Mexican Dishes, Uncategorized, Vegan Options | Tags: Award winning chili, black beans, book review, brown sugar, chili, chili cook off, chipotle, fire roasted tomatoes, kidney beans, kids cooking, Lindsey O'Connor, Ranch style beans, The Long Awakening 1 Comment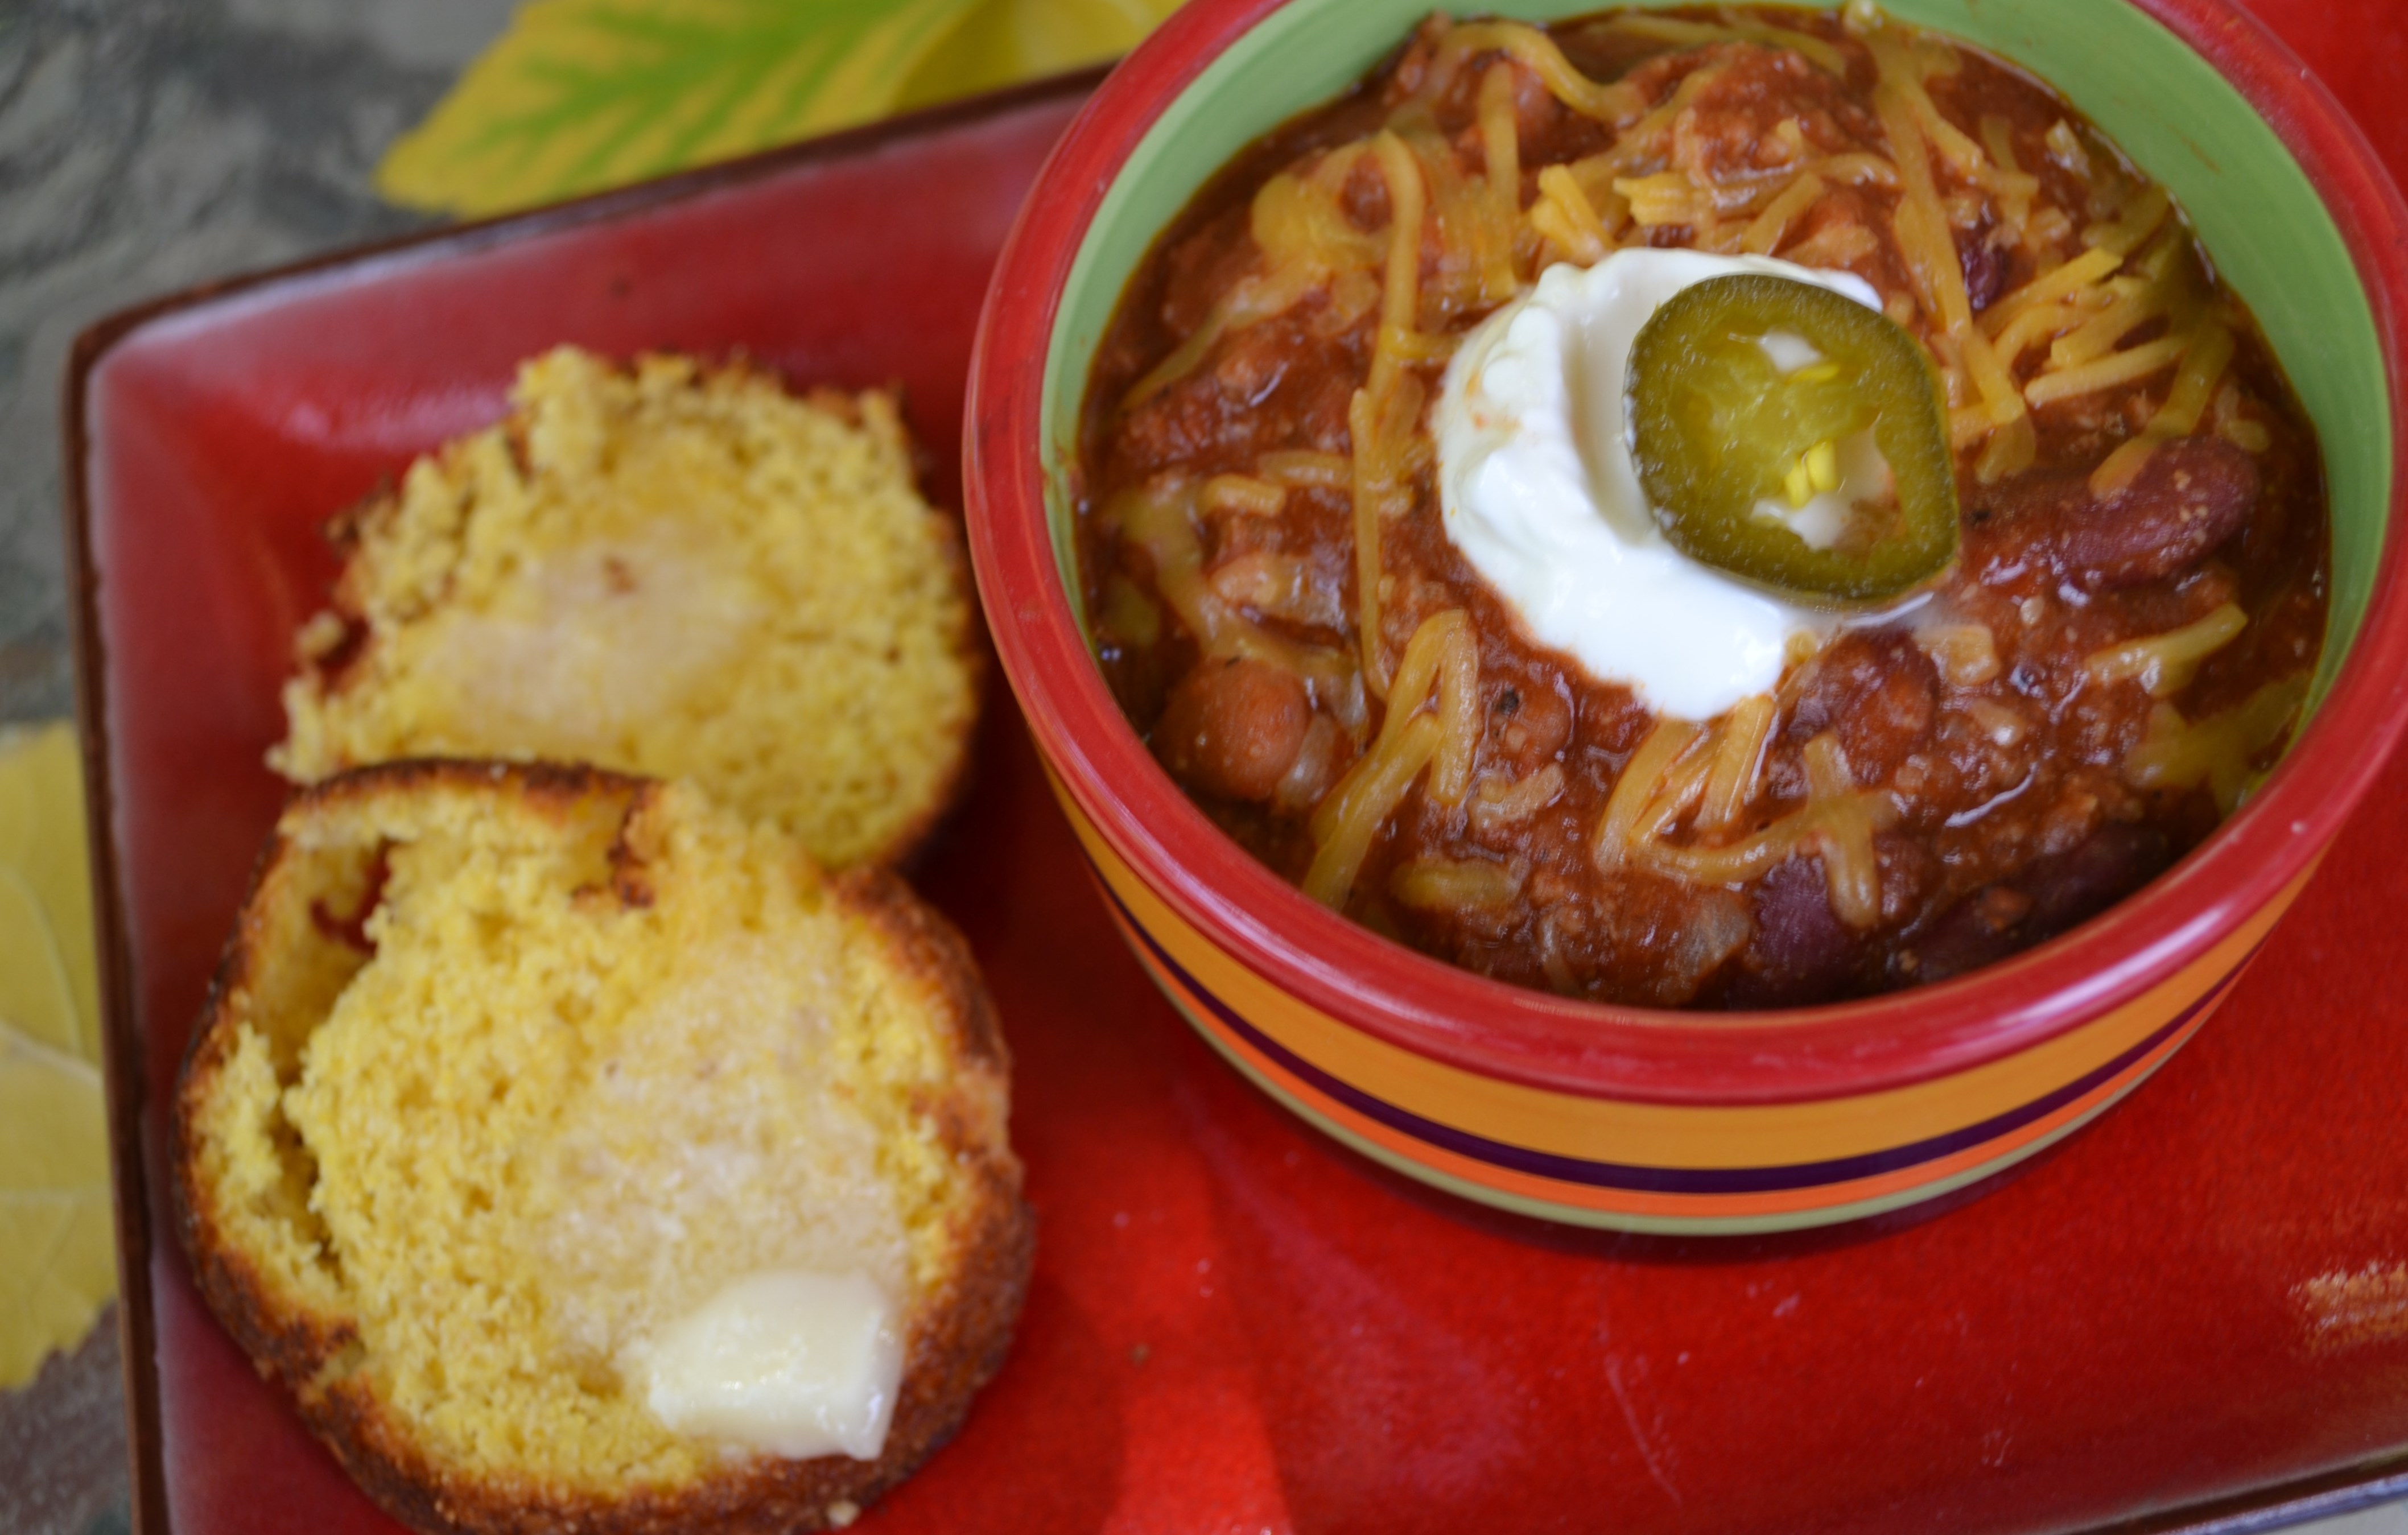
About 11 years ago now, one of my dearest writing friends, Lindsey O’Connor, gave birth to her fifth child, a little girl named Caroline. That happy moment suddenly gave way to a trauma that would leave Lindsey’s life hanging in the balance for many long weeks and months. She writes poignantly of that episode in her life, of what it was like to be “someplace other” and to try to make sense of it all once she woke up, in her brilliant memoir, The Long Awakening. Warning: do not start the book until you have time to read it all. It is impossible to put down once you begin.

Here’s a story Lindsey shared in her book, a memory I still look back on, and marvel at. In fact, I went to Texas two weeks ago, drove past the little store mentioned here, smiled and gave thanks in remembrance.
Near my daughter Allison’s birthday, my friend Becky had emailed Kathy asking for our home address so she could mail a birthday present she’d brought for Allison. Becky and I had started our friendship as writing and speaing colleagues and had grown into sister-friends, who knew and loved each other’s children, and she had wanted to get something special for Alli’s tenth birthday. She dropped in at The Mineola Mercantile, an East Texas boutique not far from where she lived, and told the owner what had happened to me and that I was lying in a coma missing my little girl’s birthday.
The woman told Becky she thought she knew “what God wanted this little girl to have.”
She pulled out a silver charm bracelet and the three silver charms – one said “Big Sis,” another of a heart with “mother and daughter” written across the front of it, and finally a letter “A” with a guardian angel peeking through the “window” of the letter.
The store owner said, “Now tell little Alli that charm represents her guardian angel that is always watching over her all of the time.” Becky went home, wrapped the present, wrote Kathy for the address, and only when Kathy replied did Becky discover a fact she had not know when she’d bought the gift.
It had been my tradition on each day of my daughter’s tenth anniversaries, their double digit day, to give them a silver charm bracelet…
Such a thing. Comatose for months;tradition intact. Unthinkable …..Coincidence? Perhaps.But I don’t think so. Loved by her God? I believe so. His eye was on my sparrow. ” (Excerpt from The Long Awakening by Lindsey O’Connor, Revell, 2013, pg. 97-98)
Now, let’s fast forward time. Lindsey, of course, came out of the coma, and though the road was arduous, she is very much alive, amazing us all. Caroline has grown from baby girl to double digit young lady following her sister Allie, who is now in college. In addition to being the proud owner of a charm bracelet, she’s also of age to want to try her hand at cooking. I posted the picture of this Chipotle Chili, recently, on Facebook, and her mama, Lindsey, asked for the recipe. There was a Chili Cook-off at church, and Caroline wanted to make an award-winning batch of it, all by herself. I gave her my best “Auntie Becky” style directions, and Lindsey let her daughter loose in the kitchen. Later that night, Linds wrote in an email: “Carolyn was ecstatic when she won first prize! She probably said, at least ten times while were cooking that she wanted to win, and thought she would win. And she loved knowing it was your recipe. She really did the whole thing by herself. I taught her how to cut an onion, stood back while she used her knife and kept wanting to take it from her the whole time. Taught her how to use the food processor. She had such fun! Thank you for sharing the recipe.”
I hope this true story warms your heart, and the recipe warms your tummy. Please visit & “Like” Lindsey on Facebook at https://www.facebook.com/LindseyOConnorAuthor and tell her I sent you. (I also write a story of Lindsey bringing me a wonderful Greek meal, including a favorite recipe, watermelon mint feta salad, in our book, We Laugh, We Cry, We Cook.)

Becky’s Quick n’ Easy (Award-Winning!) Chipotle Chili
1 ½ lb. ground beef or buffalo (if you have leftover roast or other beef, you can dice that up and throw it in too)
1 onion diced (if you like onions)
1 clove garlic, peeled
1 large (28 oz) can of fire roasted diced tomatoes
2 – 3 chipotle peppers in adobe sauce (a little can in the Mexican food aisle… — you can freeze the leftover ones in a Ziploc bag to use in another recipe or salsa)
1 can (15 oz) Ranch Style Beans, with liquid
1 can (15 oz) Kidney or Black Beans, with the liquid
1 t. salt
1/2 t. pepper
1 t. chili powder
1 t. smoked paprika
1 T. cumin
1 T. brown sugar
Directions:
Brown the beef with onion in a big pot. Meanwhile,using a food processor or blender, blend the big can of tomatoes with the chipotle peppers and clove of garlic. (If you want some chunks of tomato in your chili, don’t blend the whole can. But my husband Greg thinks I’m trying to kill him if there’s any visible chunks of anything but meat and beans in his chilli.)
Add the blended tomato mixture to the pot, then add the 2 cans of beans, and the rest of the seasonings, tasting as you go to make it balanced as you like it. Adding more sweet, or heat, or salt until you just love it.
Heat on med high and then turn down and simmer on low, for about 15 minutes, stirring often. (You can simmer it longer, but typically my family is in a hurry to eat it, and it doesn’t take long to be edible and yummy.)
You can top with sour cream or Greek yogurt, shredded cheese, jalapenos, diced avocado, green onions, chopped cilantro, crumbled tortilla chips… whatever you like.
Always a hit with hot buttered corn muffins.
Roasted Butternut Squash Mole Enchiladas
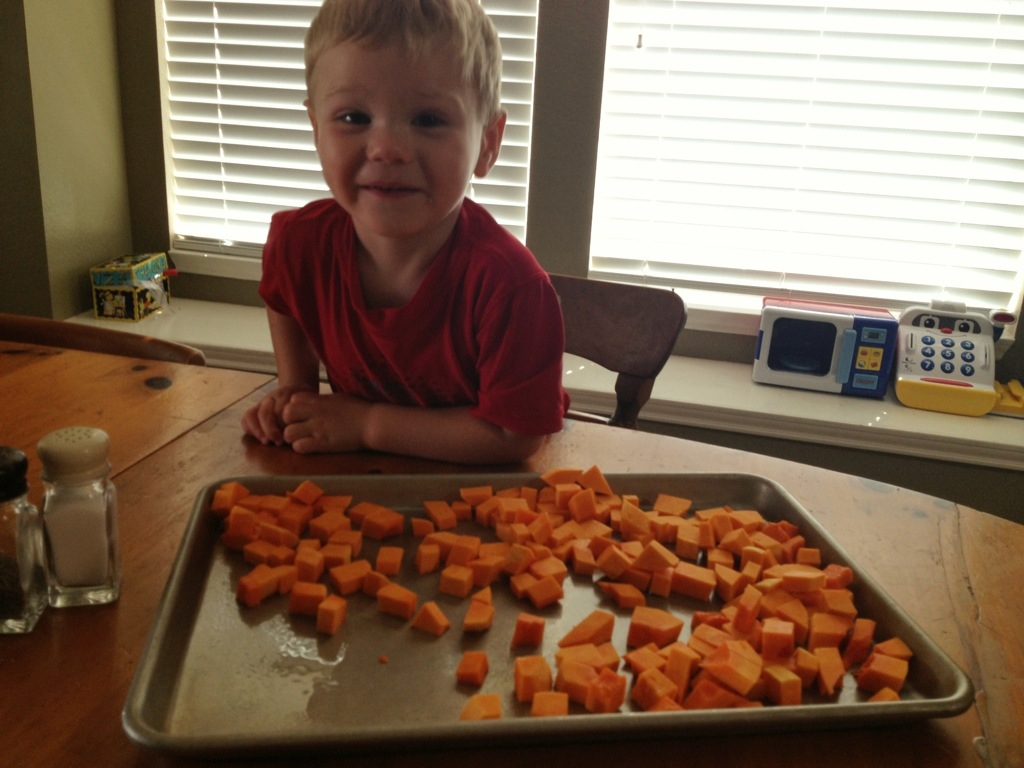
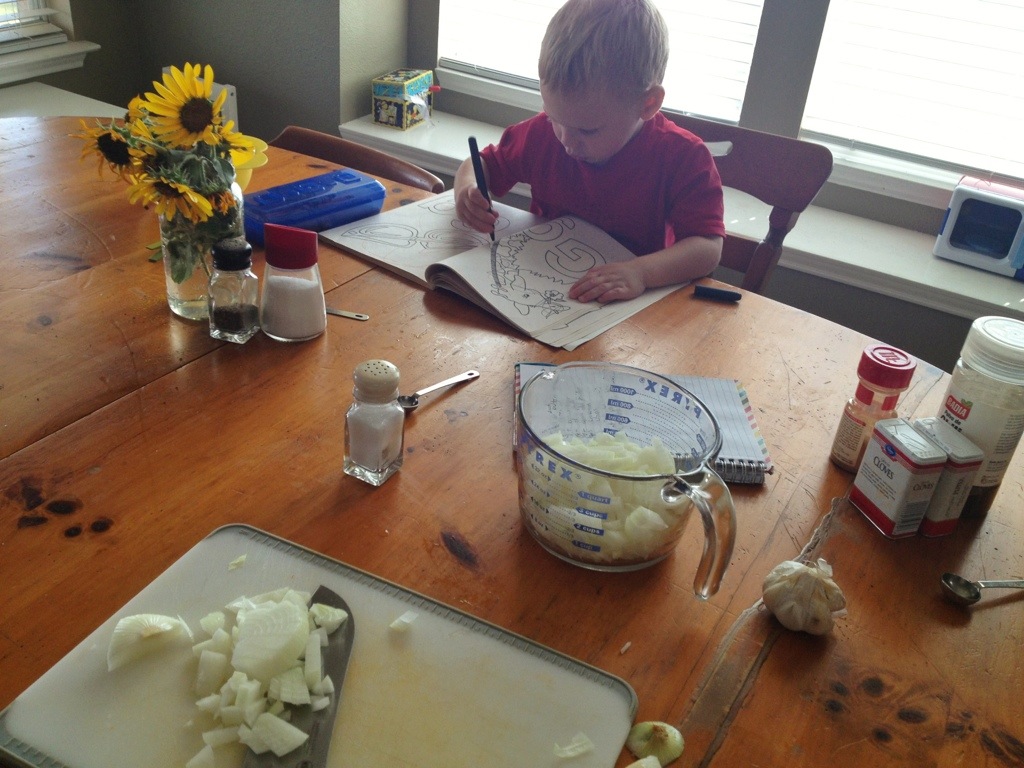
Posted: October 30, 2013 Filed under: Gluten Free, Main Dishes, Mexican Dishes, Toddler-Approved, Uncategorized, Vegan, Vegetarian, Veggies | Tags: Gluten-Fre, mole sauce, raisins, Roasted Butternut Squash Enchiladas, vegan, vegetarian 2 CommentsPeople often ask me how I cook with Jackson around. In We Laugh, We Cry, We Cook, I wrote about how cooking with him was kind of like cooking on an obstacle course. For a long time, that was what it felt like. But recently, I realized at this stage–the two’s–cooking with him is one of the easiest things on my to-do list to accomplish with him around. Not easy…but it’s something he’s come to feel at ease around. It’s kind of “our” thing.
I left him with a friend the other day for a few minutes and when I returned she shared this little conversation they had.
Sarah: Do you have a dog?
Jackson: No, I have a mommy.
Sarah: Oh, well that’s almost as good as a dog.
Jackson: Yeth, I cook with mommy.
Well, there you have it. Dogs don’t make very good cooking companions for kids, but mommies are very good for that.
My other to-dos don’t have the same smiley affect on him. Writing with him around. Yeah right. Phone calls. Let’s just say, the last conference call I was on with our editor, I had to muffle the phone while I hollered, “Jackson, don’t stick your head through the fence” and then again while he hollered, “Noooooo! Don’t wipe meeee!” as I was trying to discreetly potty train mid-call.
Cooking is mostly a piece of cake…because he can participate, he can be a helper. And even when he can’t help with something like chopping onions, he’s still content because we’re together and I’m talking to him, not somebody else on the phone or looking at a computer screen.
And with a little creativity, there’s almost always a way to get a child involved in the cooking if they want to be.
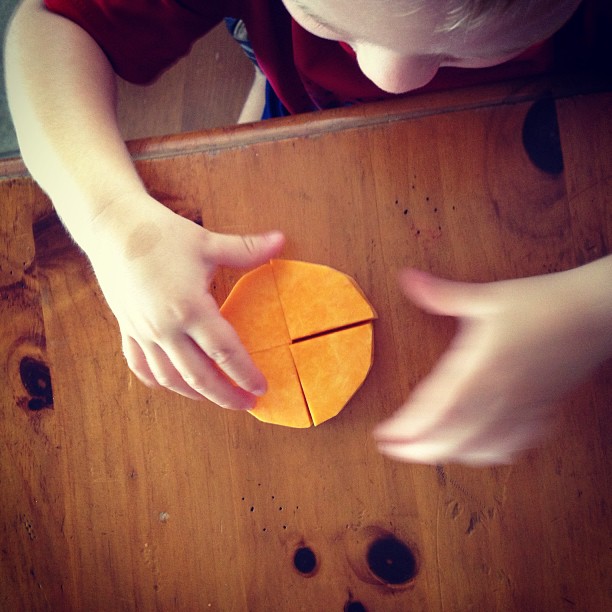
I don’t cook every day, but the days I do, the moments we are in the kitchen together, are often the moments we enjoy the most. The kitchen is a place where our lives intersect, where my almost 30-year old female joys and interests cross with my two-year old little boy’s interests. I don’t have to pretend that the lego tower we just built is the tallest most amazing piece of architecture I’ve ever seen. He doesn’t have to be patient with me as I make a quick call or pick up groceries. The smells of cloves and cinnamon, the colorful block puzzle from butternut squash, the sound of the blender engine purring excite us both. We don’t have to pretend. We just have to be. Together.
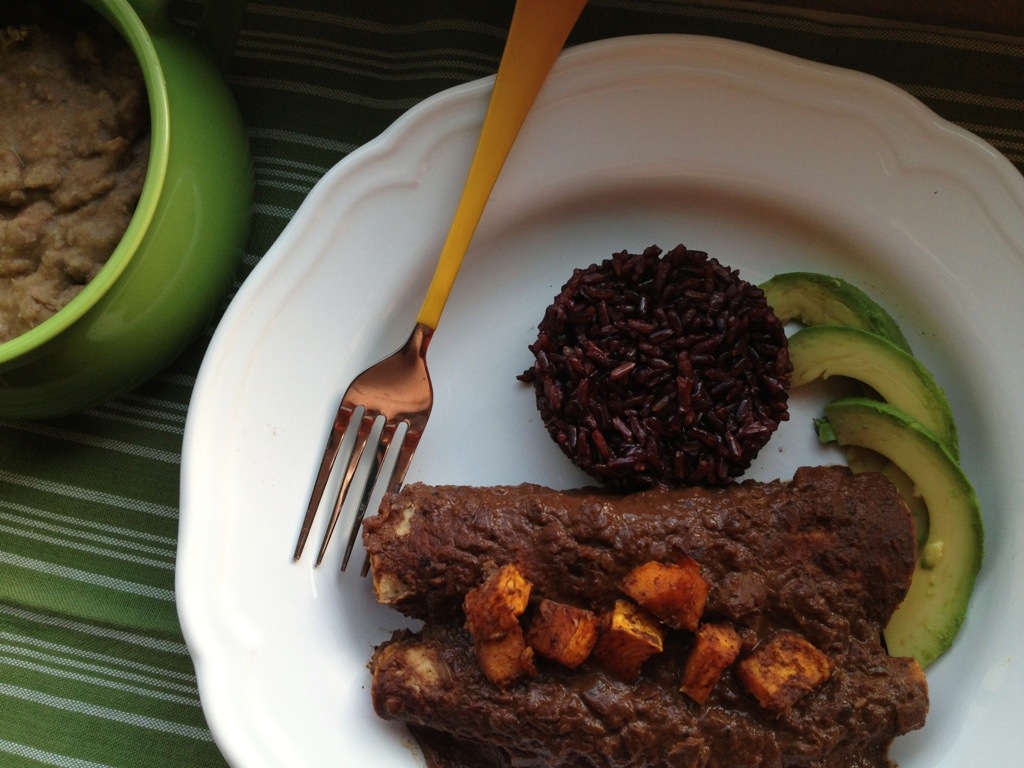
Roasted Butternut Squash Mole Enchiladas
Serves 4
5 cups diced butternut squash
1 tablespoon oil (canola, olive, grapeseed)
1 teaspoon brown sugar
1/4 teaspoon chili powder
1/4 teaspoon cinnamon
8-10 corn tortillas
1/2 cup raisins, soaked for 10 minutes in warm water and drained (optional)
2 cups Mole Sauce (I used this easy recipe from Vegetarian Times)*
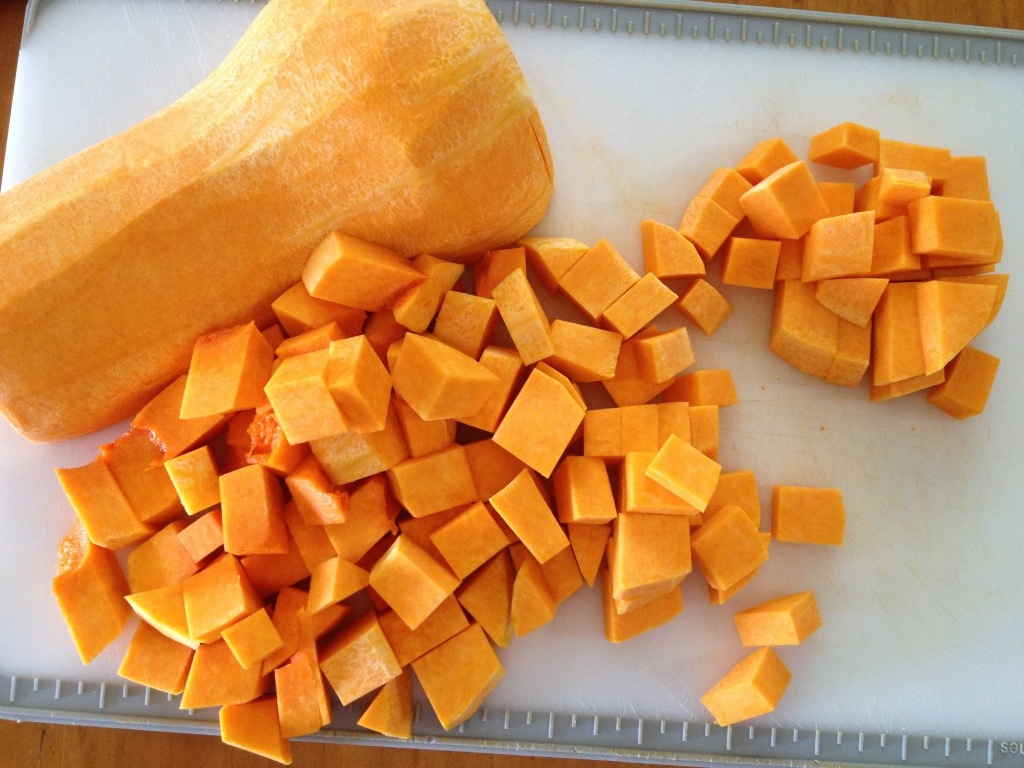
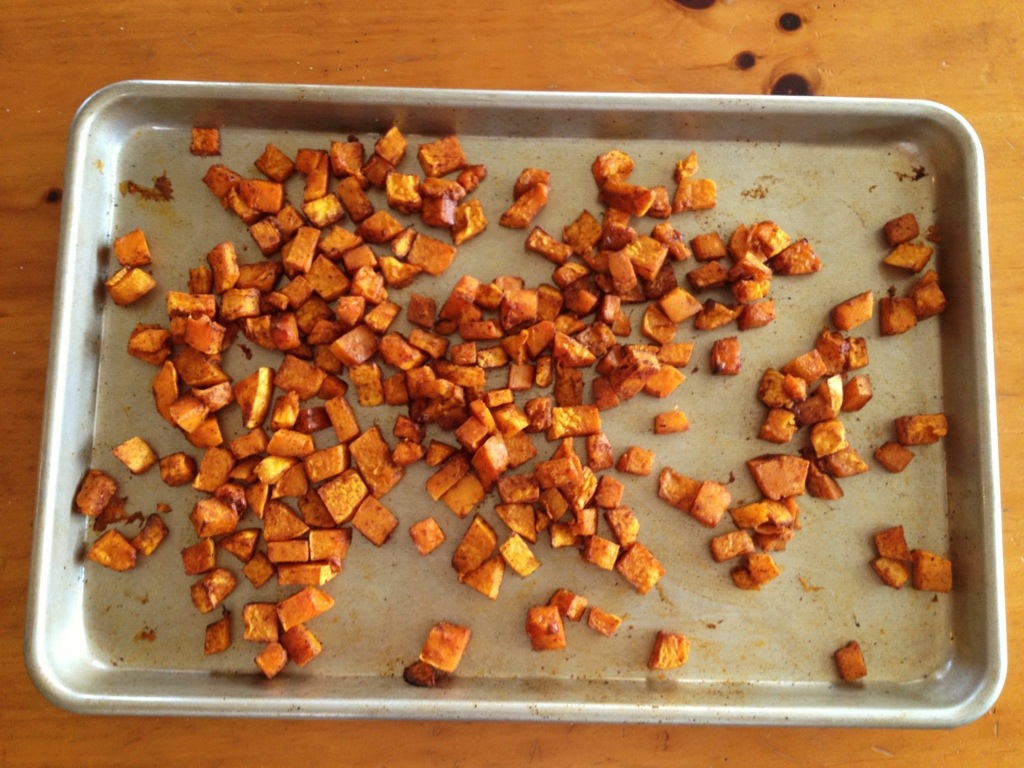
Preheat oven to 400. Toss butternut sqaush with canola oil, brown sugar, chili powder, and cinnamon. Bake at 400 for 20 minutes or until tender and cooked through. Resist temptation to eat all the squash now.
Reduce oven temp to 350. Ladle 1/2 cup mole sauce into bottom of a 9×13 casserole dish. Wrap corn tortillas in a damp paper towel and heat in microwave for about 30 seconds, just enough to warm them up and make them pliable. Dip corn tortilla into mole sauce. Fill with about two tablespoons of butternut squash and a sprinkle of raisins. Roll up. Repeat. Ladle a generous amount of sauce on top. Bake at 350 for 15 minutes.

I didn’t put the raisins in when I took pictures, but I should have! I added them to the top and it really made the dish, so I incorporated them into the final recipe.
Serve with black or wild rice. The nuttiness from the black rice went perfectly with this dish.
*I blended half of the sauce this time. I think I’d leave it unblended next time though, because it was a lot prettier unblended.
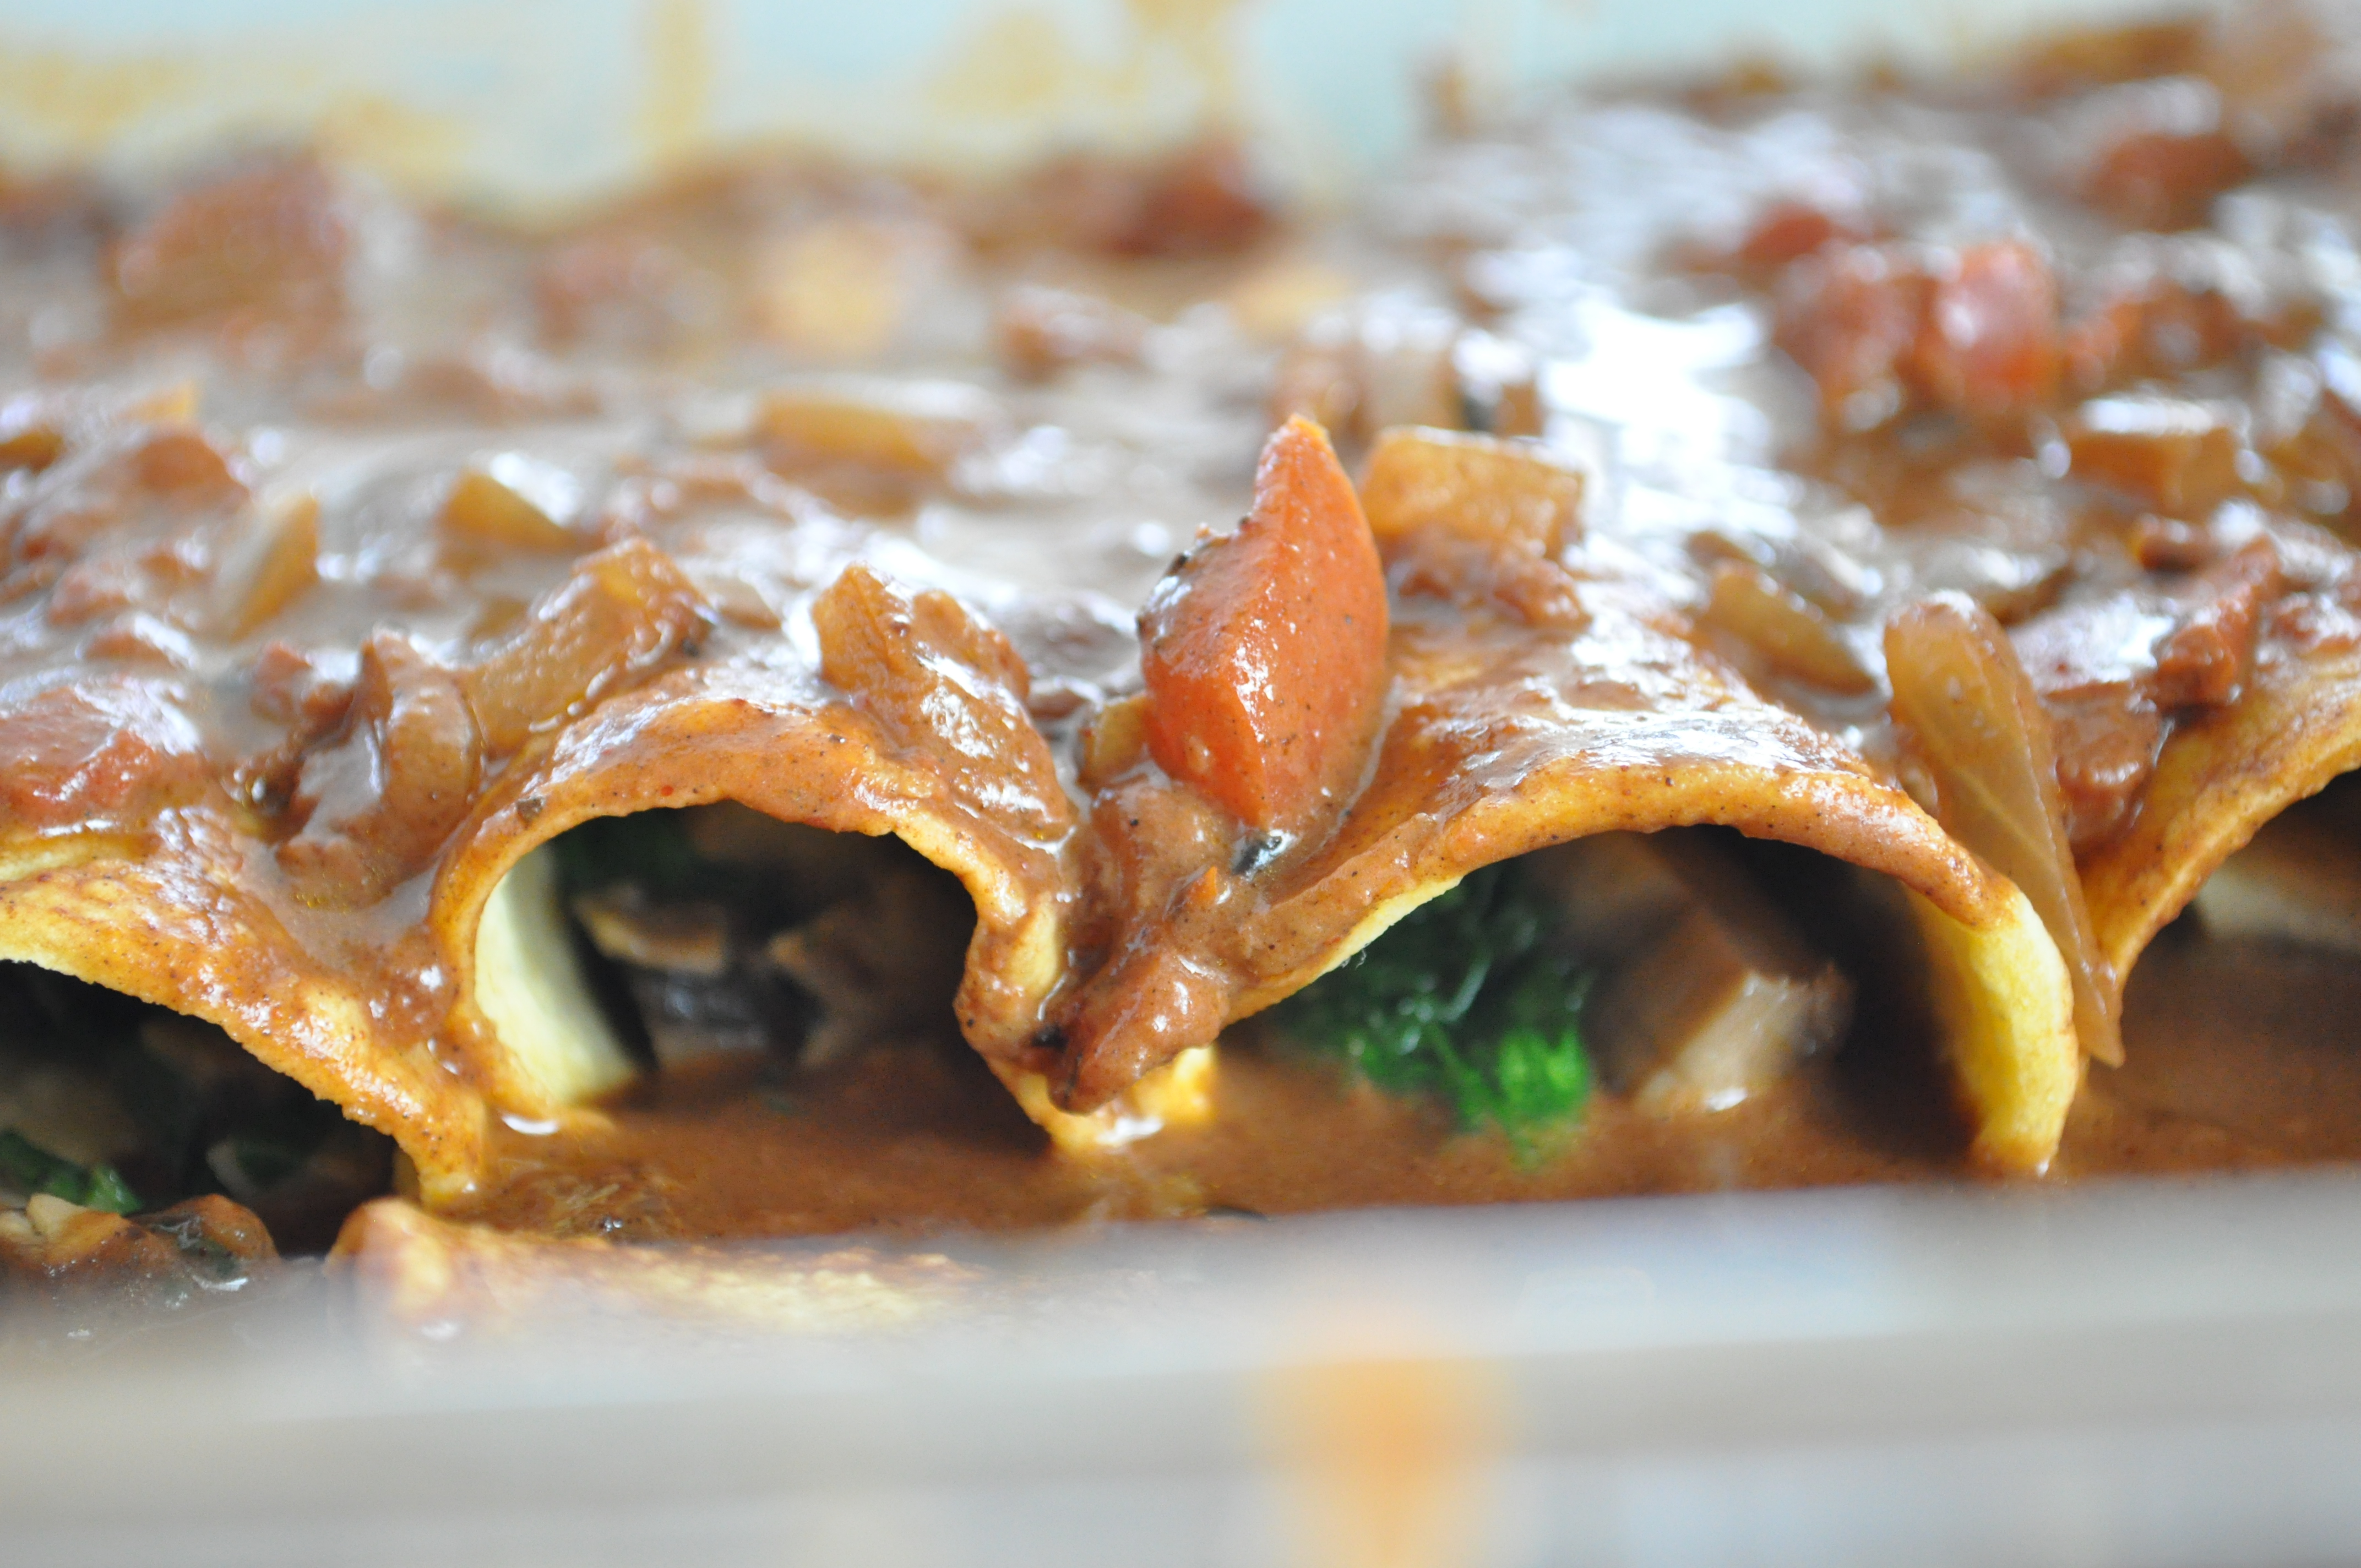
Same sauce unblended on spinach and mushroom enchiladas. Much much prettier, eh?
Pineapple Chicken Stack Ups
Posted: July 1, 2013 Filed under: Chicken, Main Dishes, Uncategorized | Tags: chicken stack ups, dill, English Muffins, green onion, mayonaise, pineapple Leave a comment
(Becky, the Mama)
I have literally been making this recipe for 30 years!
As a newlywed and college student, one of my best friends was Brenda Scott. We both married young (I was 17 and she was 18), so we swapped recipes and sometimes cooked together, too, trying to learn our way around the kitchen. One day we whipped up chocolate chip cookies in my small duplex kitchen. We each took a bite of a cookie at the same time, then both ran to spit it out in the sink, reaching for water to quench our sudden thirst.
“Becky, what did I do wrong?” Brenda asked, her Texas accent thick. “These taste like pure salt!”
I held up a clear canister that I’d filled with salt. (I never bothered with pesky things like “labels.”)
She looked at me, her eyes wide with confusion. “Who keeps salt in canister?”
All I could do, since I was laughing so hard, was to point to myself and shrug.
Eventually we both had children, and on a visit for lunch in her home, our kids everywhere around us, Brenda served this sweet-savory dish called Pineapple Chicken Stack-Ups. She thinks she may have found the recipe on the back of a Dole Pineapple can. Wherever she found it, for me, it was love at first bite. The toasted English muffin is smeared with a savory mayo dolled up with dill and chopped green onions, then layered with pineapple slices (fresh or canned), a piece of cooked boneless chicken (thighs or breasts or even tenders), a little more sauce and sprinkle of grated cheese… popped in the oven for about 10 minutes, and dinner is served. (All you need is a simple salad on the side.)
I went home from Brenda’s house and made this recipe that very evening and have been making them on a regular basis for 30 years now, as long as Brenda and I have been friends, as long as we’ve been laughing together about our own foibles . (I should mention she went on to become one of the finest nurses you can imagine. Since I still forget to label things, I decided not to inflict my personality on the medical world, and eventually turned to writing humor as a career.) I mentioned these Pineapple Chicken Stack Ups to Rachel the other day and she said, “I loved those! And see? There’s proof you DID actually cook for us when we were kids.” My youngest son, Gabe, chimed in as well. “I loved those things, too!”
You can make as many “stack ups” as you want (and can fit) on a cookie sheet by increasing the recipe, which is really easy to do. Because they spend very little time in the oven, they make a nice summer meal. Perfect for fancy ladies luncheons, too, as you can construct them ahead of time, and then pop them in the oven to heat and melt at the last minute. This recipe is also easily veganized by subbing Veganaise for the mayo; cooked vegan chik’n cutlets, and vegan cheese. I used fresh pineapple this time, but when the kids were young, and time short, I reached for a can of pineapple rings and the results were still yummy.

Brenda’s Pineapple Chicken Stack Ups
Makes 4 servings (If your gang is hungry, they might eat 2 of these each, making the yield just 2 servings)
Preheat oven to 350 degrees.
Ingredients:
2 English muffins, split into 4 halves, and lightly toasted (I prefer multigrain)
4 boneless chicken thighs or smallish chicken breasts , seasoned with salt & pepper, and cooked on both sides, in a skillet, in a little olive oil until golden brown (or a vegan “chik’n” substitute)
1/2 cup mayonnaise (vegans use veganaise )
2 T. chopped green onions
1 T. dried dill or 2 T. fresh dill
4 fresh or canned pineapple slices
1/3 cup grated cheddar cheese (vegans use a dairy-less cheese)
Directions:
Mix mayo, green onions and dill together in a small bowl. (Don’t skip the dill, it is truly what makes this dish special!) Spread the toasted muffin halves, cut side up, with a heaping Tablespoon of the may0-dlll-onion sauce. Place the muffins on a cookie sheet or large baking pan, leaving at least 2 inches between them. Next, place a slice of pineapple on each muffin. Then carefully lay one piece of boneless cooked chicken on top of the pineapple, followed by another scant tablespoon of mayo-dill-onion sauce and finally a heaping tablespoon of grated cheese on top of it all.

Stack Ups Ready for the Oven!
Carefully pop in the oven and let heat through until cheese is melted on top for about 10 minutes.
This was printed from: We Laugh, We Cry, We Cook
The site URL: http://welaughwecrywecook.com
The Title: Pineapple Chicken Stack Ups
The URL:http://wp.me/p1UwM9-10A
This was printed from: We Laugh, We Cry, We Cook
Roasted Tomato and Sweet Pepper Pasta Sauce
Posted: June 25, 2013 Filed under: Gluten Free, Italian, Main Dishes, Pasta, Toddler-Approved, Vegan, Vegetarian, Veggies | Tags: Garden Tomato Recipes, Roasted Pepper Tomato Pasta Sauce, Roasted Tomato Sauce 2 Comments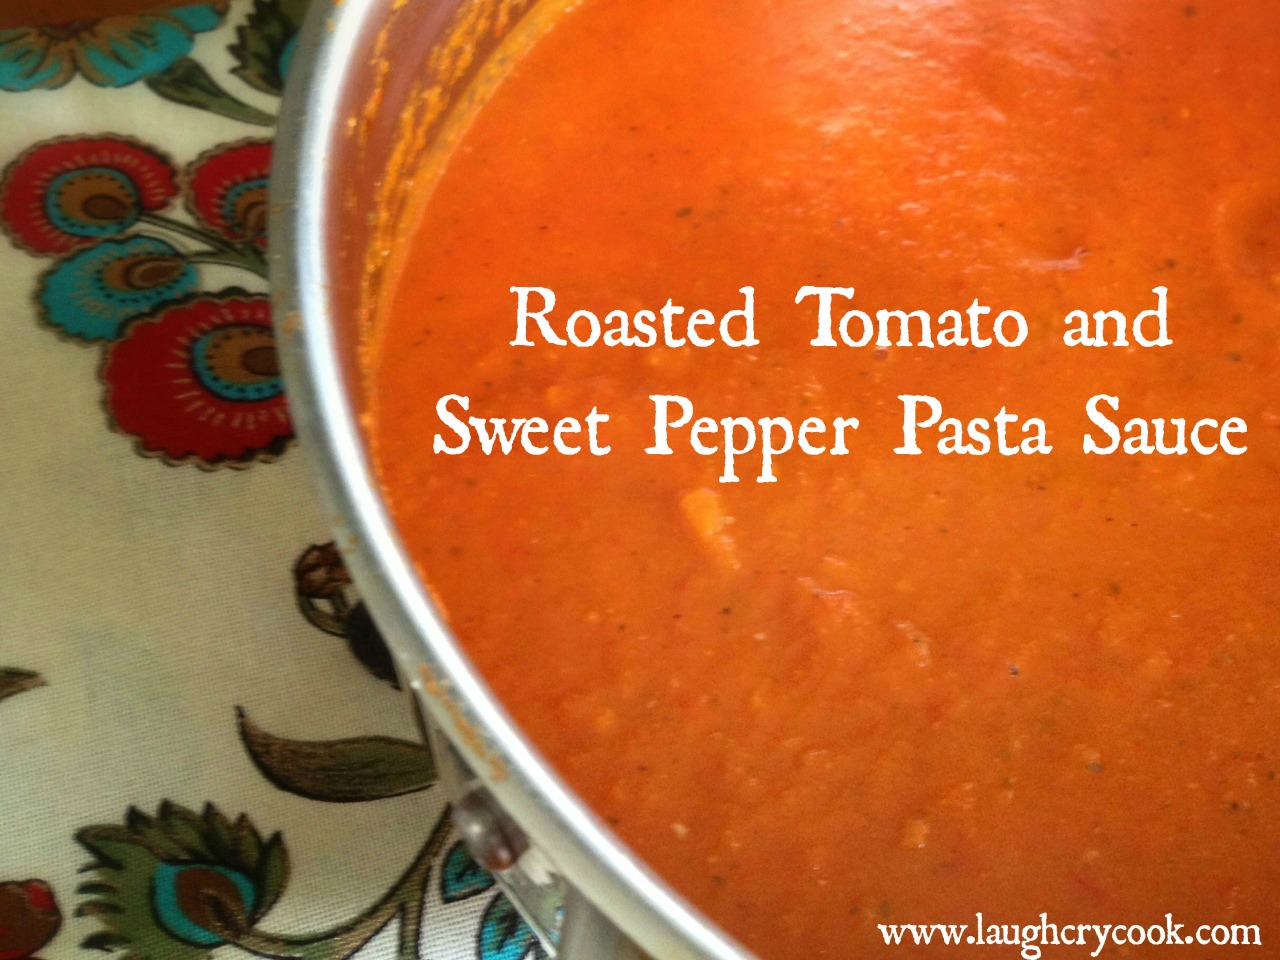
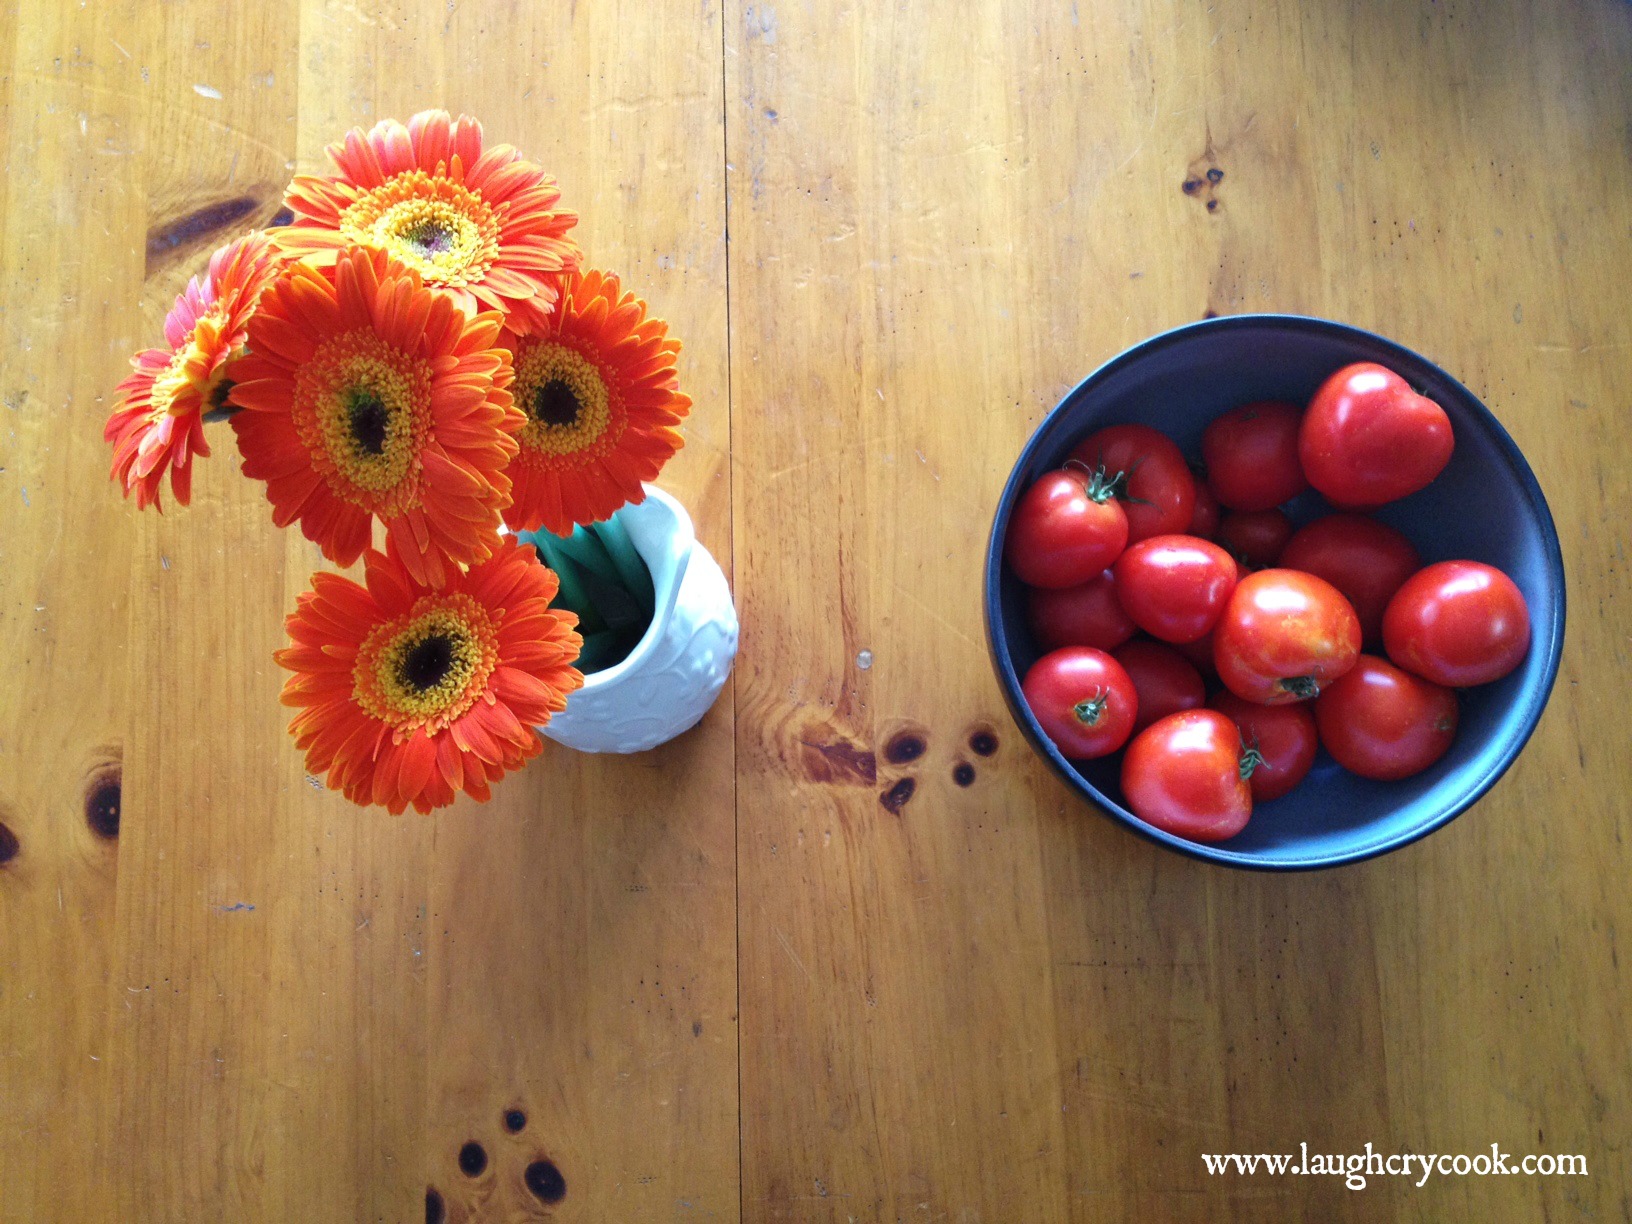
There comes a time in every gardener’s life when they ask themselves, “What am I going to do with all these tomatoes?” And until that day comes for me, I will pull up my dead plants with my black thumbs, quietly curse those gardeners under my breath, and smile graciously when they offer up some of their overwhelming bounty to me.
I’ll display them on the counter for a day or so until I can’t take their mockery anymore.
And then I will cook my way out of despair.
And remember the gifts I can offer my family, even if a plentiful vegetable garden is not one of them.
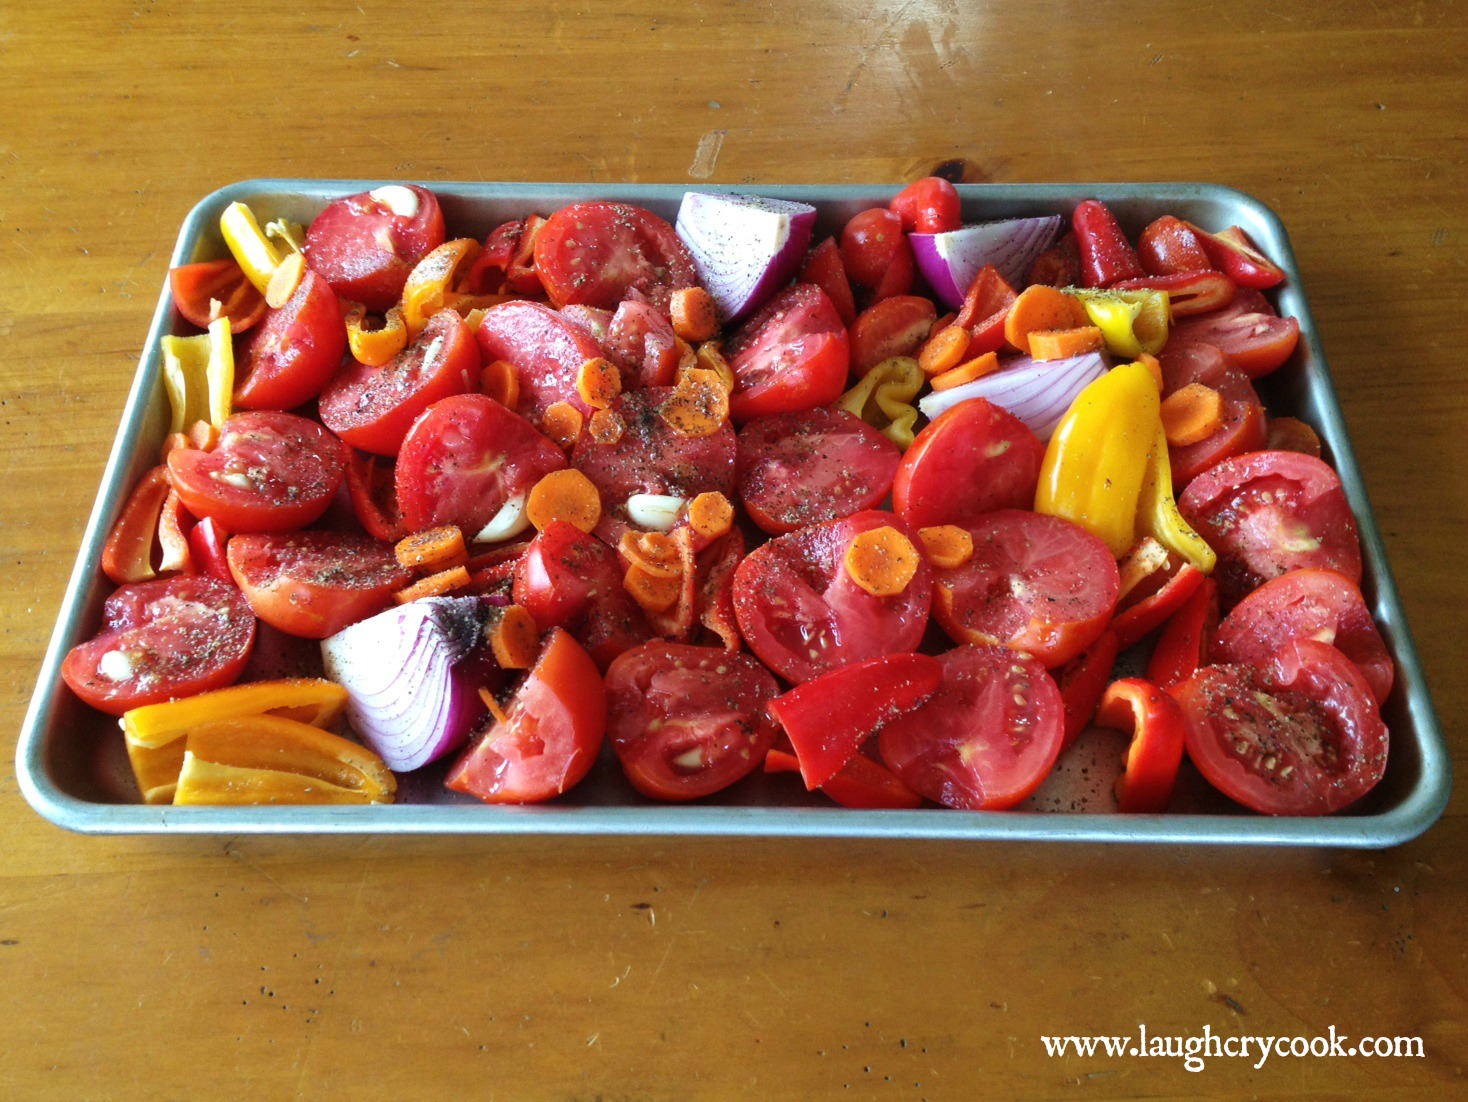
Instead, I will slow roast my way into their hearts with sweet peppers, carrots, onions, and garlic (store bought, but flavorful nonetheless), garden tomatoes (generously given to this less fortunate gardener), and a few sad looking twigs of rosemary and oregano (just barely surviving in my garden of doom).
And I’ll bring those flavors together in one delightful pureed sauce. My husband will declare that he may never eat jarred sauce again. My toddler will slurp his pasta up with messy reckless abandon. And I will stand over the pot eating the sweet rich roasted sauce by the spoonful, my self esteem having made a complete (near manic) turn for the better.
For those of you who feel the need to do something good and right by your family, I give you this recipe. It will restore their faith in you, and your faith in yourself.
Roasted Tomato and Sweet Pepper Pasta Sauce
Serves 6
Ingredients
- ~ 3 pounds of tomatoes (I don’t have a scale, but I used about 12-15 smallish tomatoes), cut in half
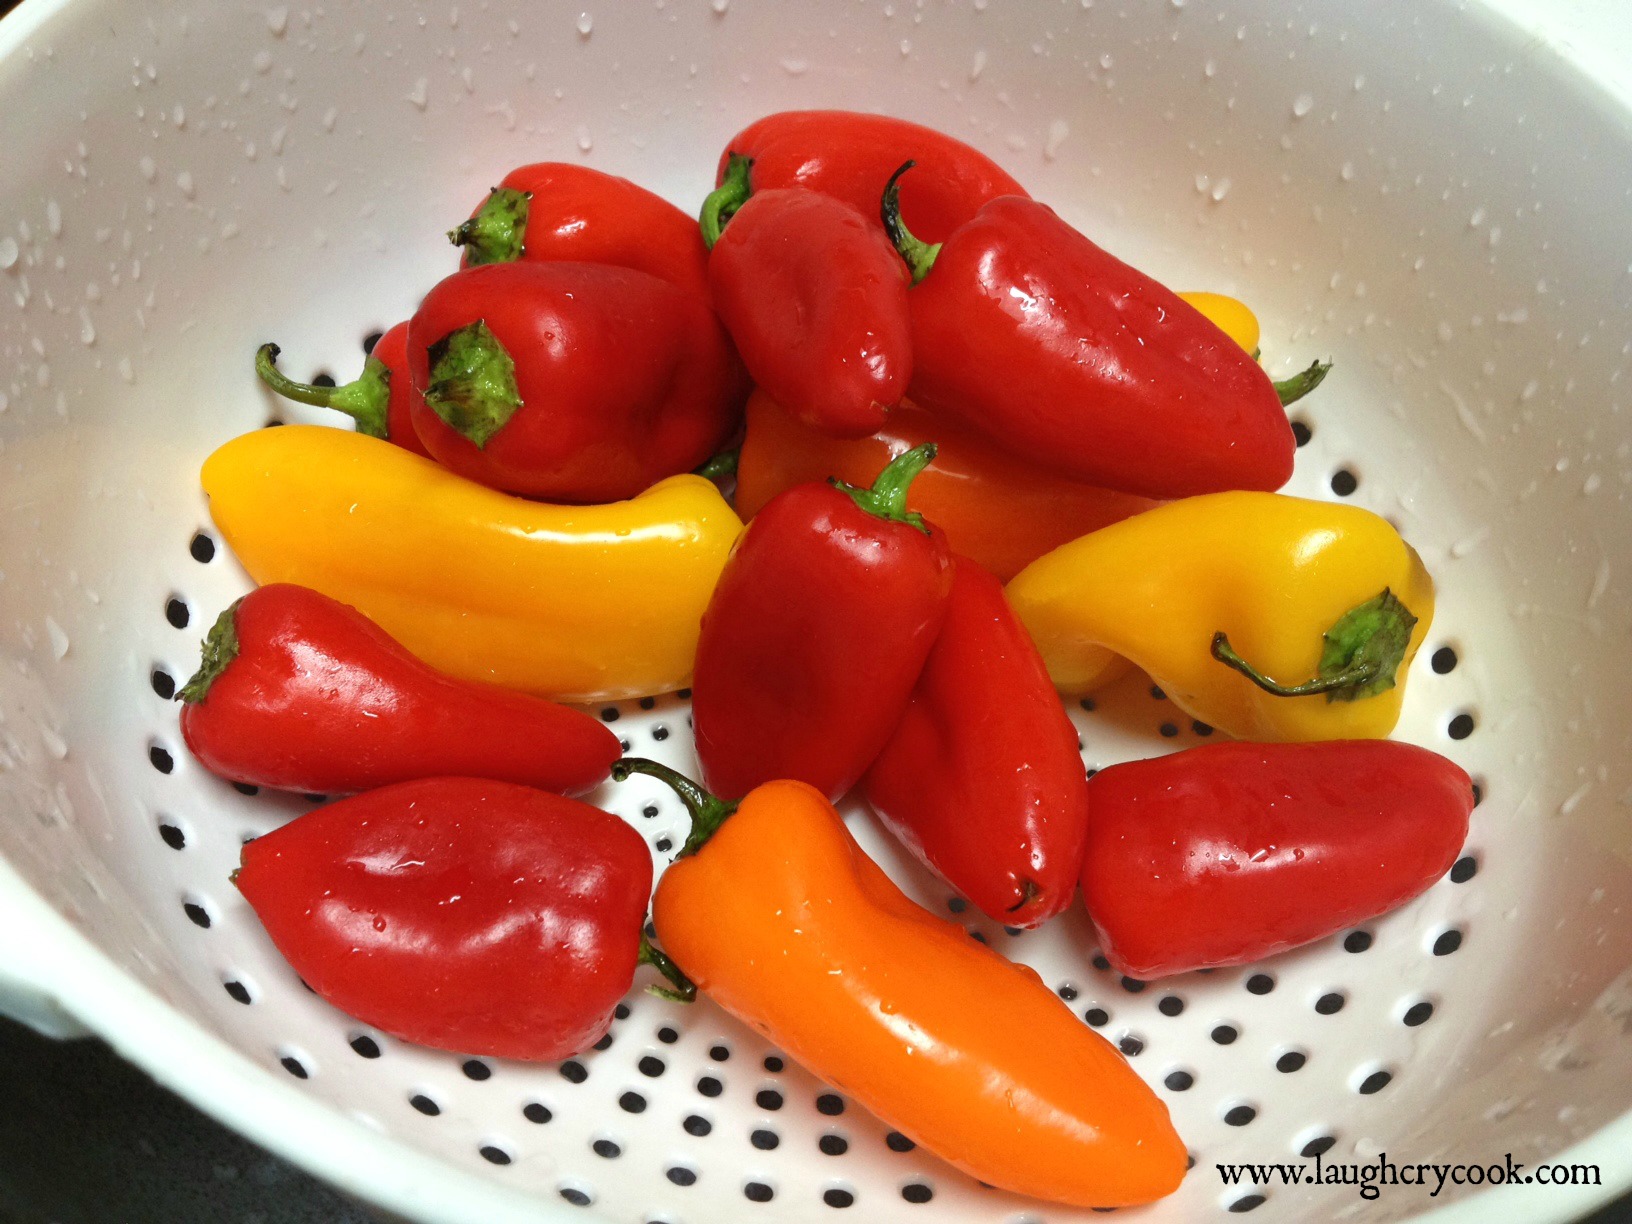
- ~15 mini sweet peppers (or 3 red, yellow, or orange bell peppers), cut in half and seeded
- 1 carrot, peeled and sliced thin
- 1 red onion, quartered
- 8 garlic cloves, peeled
- 2 twigs fresh rosemary, removed from stem (or 1 teaspoon dried)
- 1 tablespoon fresh oregeno, removed from stem (or 1 teaspoon dried)
- 2 tablespoons olive oil
- 1 teaspoon kosher salt
- Generous sprinkle of fresh cracked pepper
- 1/2 teapoon salt
- 1/2 teaspoon molasses (or brown sugar)
- Handful of fresh parsley, rough chopped (or 1 teaspoon dried)
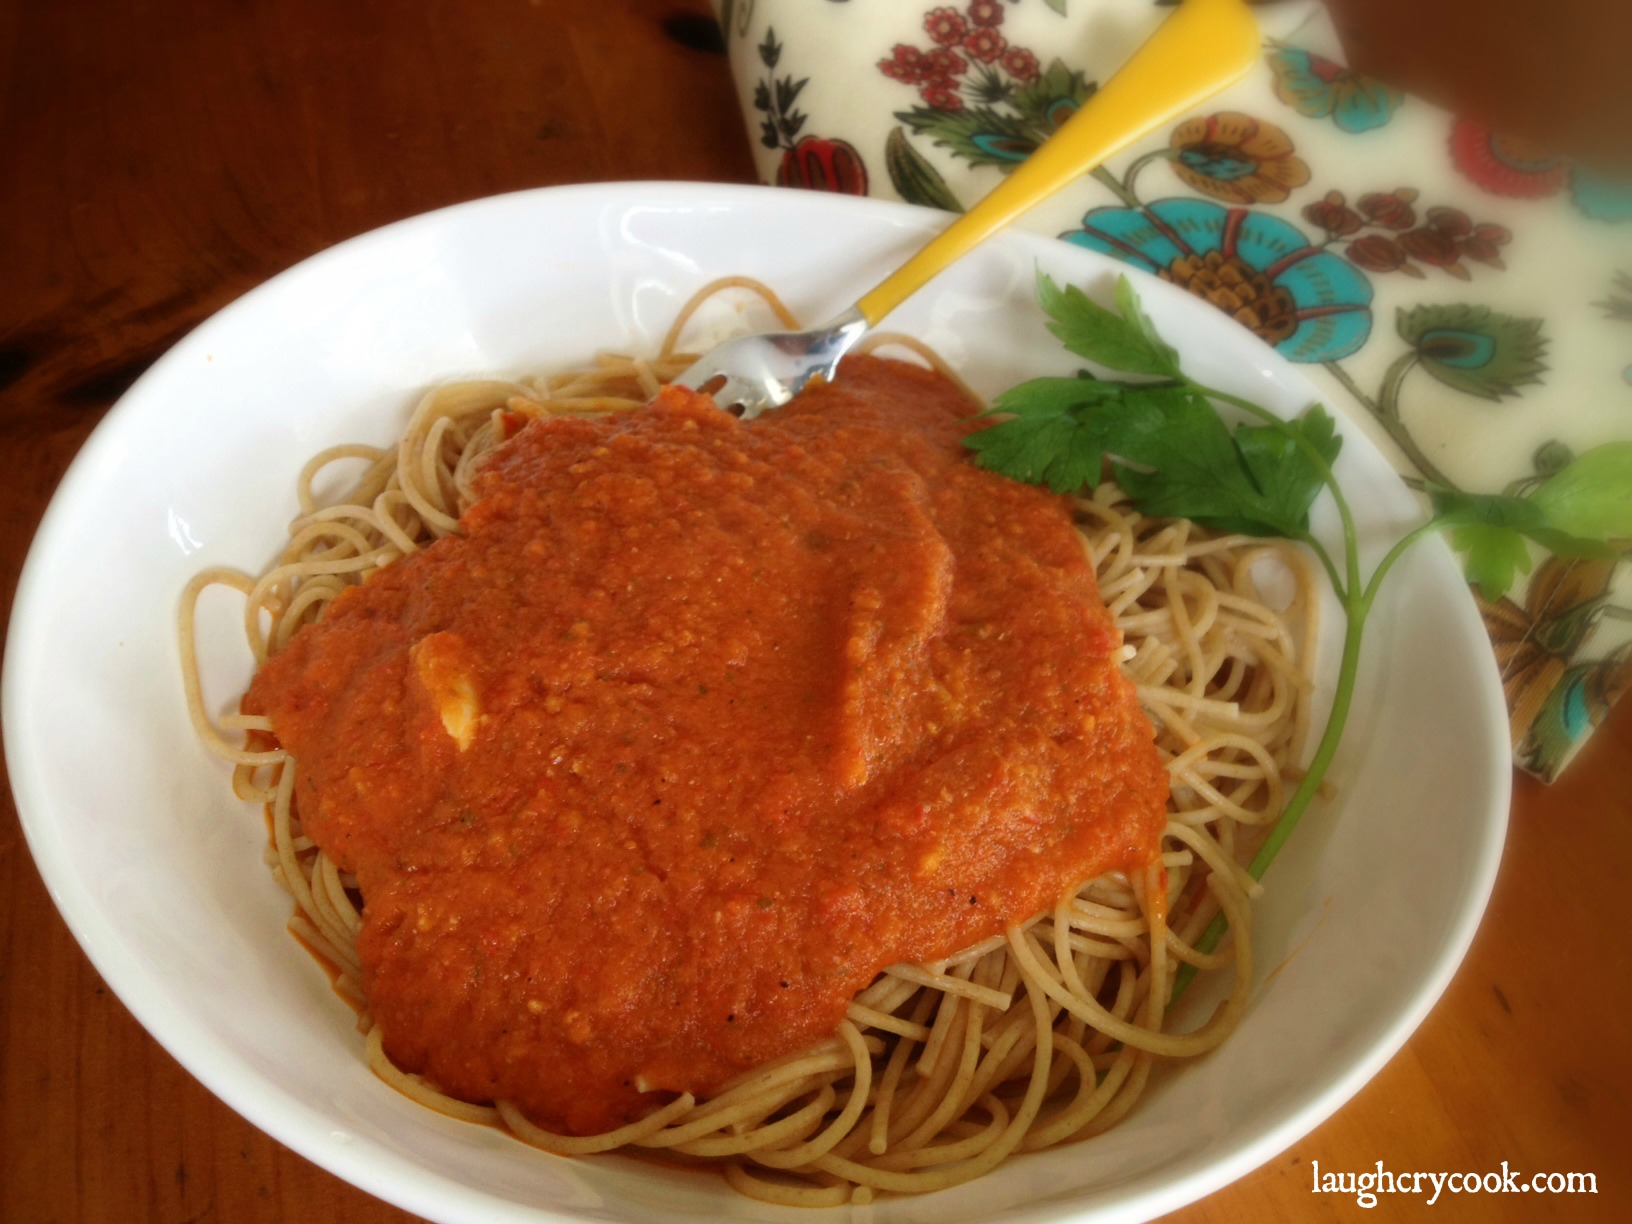
Other: 1 lb pasta, cooked (I used whole wheat thin spaghetti, use gluten-free if needed)
Directions
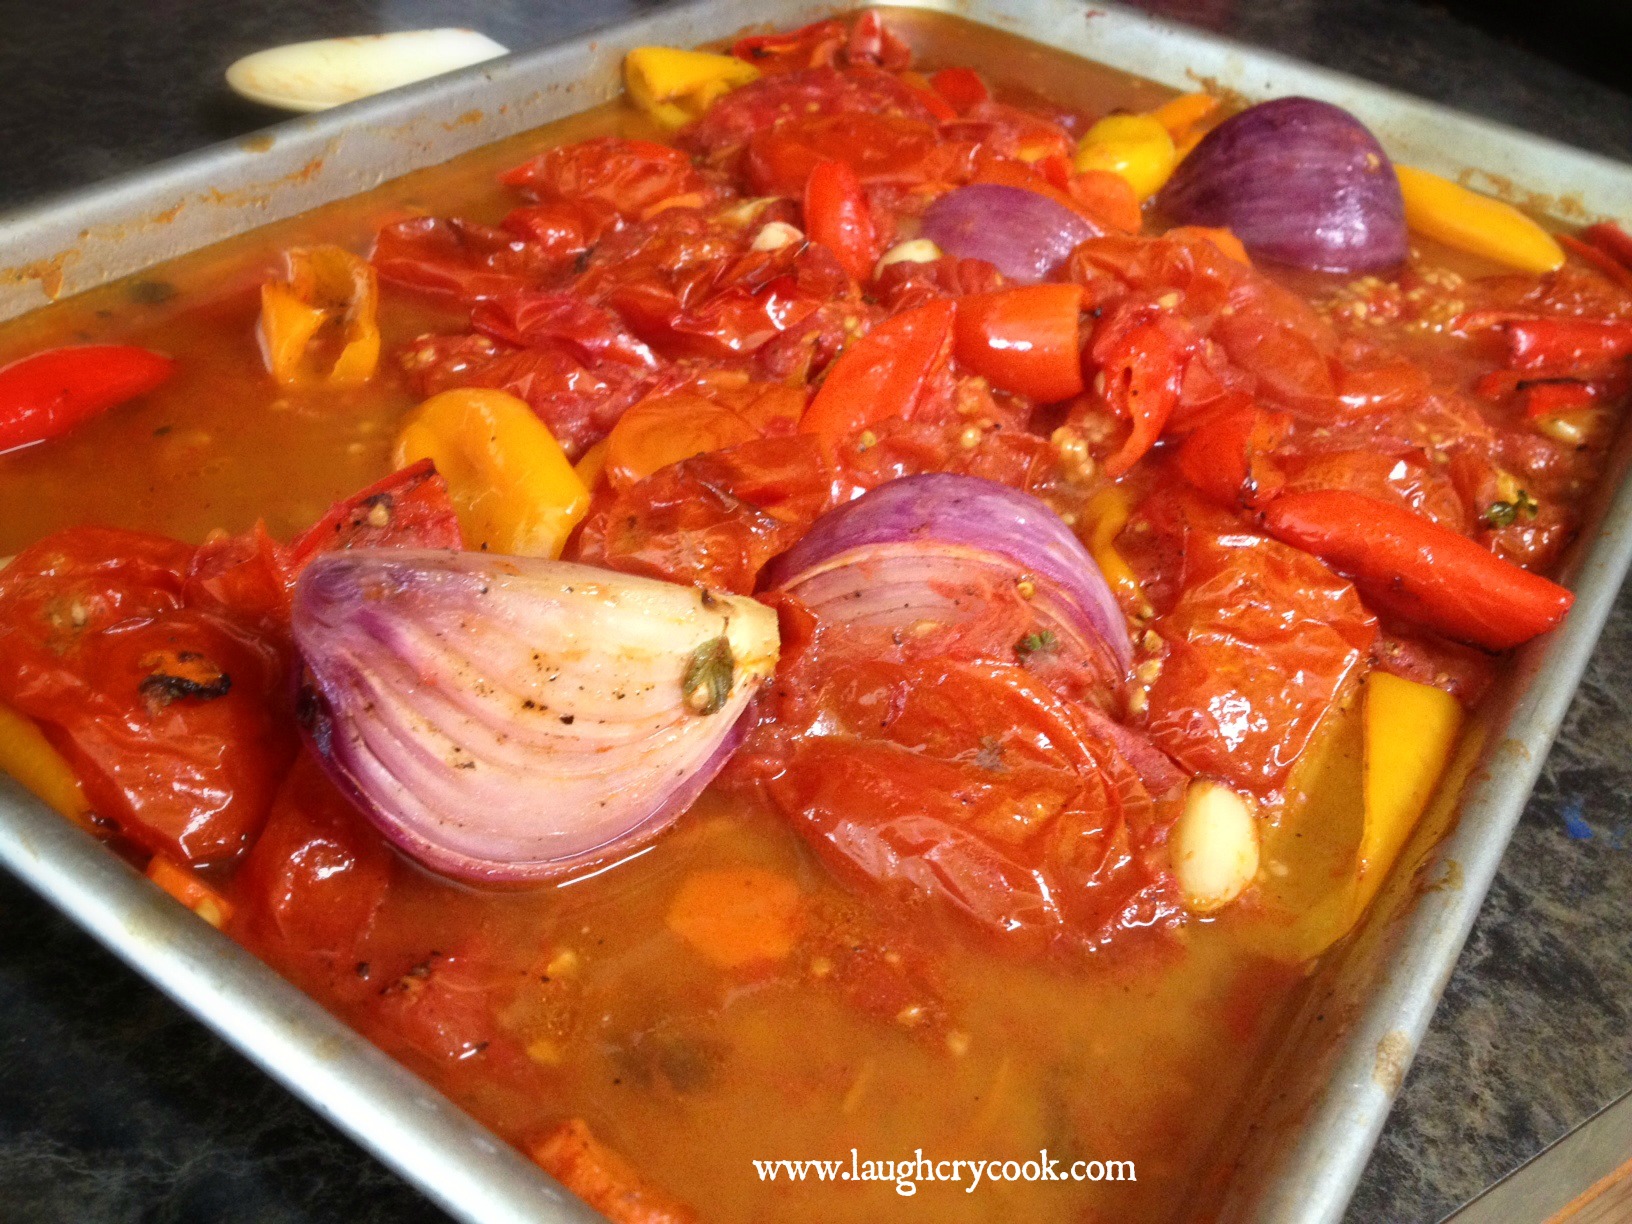
Heat oven to 400. Put chopped vegetables and herbs on a large deep-sided sheet pan. Stuff the garlic cloves into the tomatoes so they don’t burn. Drizzle with olive oil and toss with salt and pepper. Roast for 45 minutes, stirring every 15 minutes.
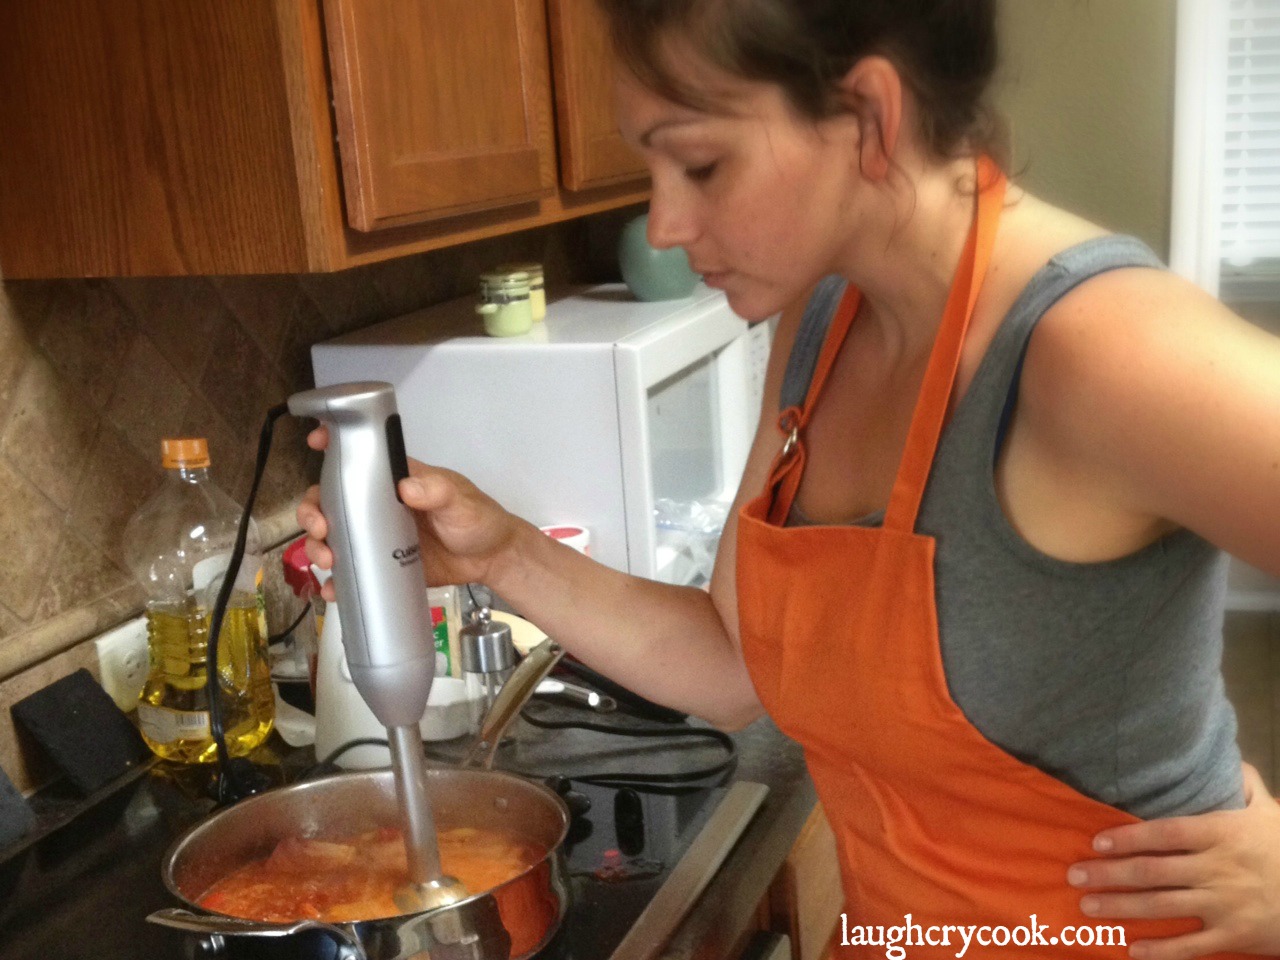
Carefully pour the veggies and their sauces into a pot on the stove and use an immersion blender to puree the vegetables. (If you don’t have an immersion blender, let the veggies cool to room temperature, then transfer to a blender or food processor and puree. Then pour into a pot on the stove.) Add parsley, salt, and molasses. Bring to a boil and then reduce to low heat. Simmer for 30 minutes. My sauce was thick already, so I simmered with the lid on, but if you have really juicy tomatoes, you may want to simmer with the lid off until you reach the desired consistency. Check for seasoning. Adding more salt or molasses (adds sweetness and cuts acidity) as needed.
Variations
Make it Salsa: This base recipe could easily be turned into a salsa by switching up the seasonings — add a few jalapenos and cilantro, omit rosemary, oregeno, and parsley. Pulse in the food processor for a chunkier version. Would be delicious served hot or cold with chips.
Make it Soup: Add a little broth or cream for a delicious roasted tomato and pepper soup.
Make it a Meal: While you’re simmering the sauce and the oven is still hot, roast up some chickpeas tossed in olive oil and Italian seasoning for a crunchy protein-filled topping. Wilt some spinach into the sauce in the last five minutes to sneak in some greens.
This was printed from: We Laugh, We Cry, We Cook
The site URL: http://welaughwecrywecook.com
The Title: Roasted Tomato and Sweet Pepper Pasta Sauce
The URL: http://wp.me/p1UwM9-10a
Disclosure: This post contains affiliate links.


