
Creamy Artichoke Basil Sauce
Posted: April 17, 2012 Filed under: Main Dishes, Vegan | Tags: artichokes, basil, easy dinner, garlic, healthy, low fat, main dish, pasta, quick dinner, roasted bell peppers, side dish, vegan, vegetarian 5 Comments
Artichokes give this sauce its creamy factor without adding any fat.
Motherhood has changed me. We just spent an evening discussing life insurance and wills. I wake up before eight a.m. without an alarm. I no longer pee alone. I don’t shower until noon most days (if I shower at all). And I cook every meal while simultaneously pulling my child out of cabinets, trash cans, and the wash machine … or out from between my legs.
My mom snapped this picture of Jackson last time she was here. He pulls up on my pant legs right behind me and completely immobilizes me. I can’t turn around or squat down to get him or he’ll fall over. Cooking like this is challenging to say the least.

So I love a meal that is quick and easy, but tastes deliciously gourmet. This pasta sauce is exactly that. It takes about five minutes to make and if you pour it over hot pasta, you don’t even have to simmer it. As a bonus, Jackson likes it too, so I can give him little bites of my dinner without making a different meal for him. Mommy and baby approved!
Did I mention there is no cream in this creamy pasta? It’s almost guilt-free, minus the two tablespoons of olive oil. Another bonus for this post baby body!

Rachel’s
Creamy Artichoke Basil Sauce
Serves 2
Ingredients
2 garlic cloves, diced
2 T. olive oil
1 14 oz can of artichoke hearts, reserve liquid
1 1/2 roasted red bell peppers (jarred or make your own*)
A palm full of basil, roughly chopped
Juice of 1/2 a lemon
1/4 t. salt
1/4 t. pepper
1/2 t. Italian seasoning
8 oz pasta (I used whole wheat spiral pasta, but any kind you like would be fine)
Directions
In a small skillet, heat garlic and olive oil until garlic is just starting to brown. In a blender or food processor, blend all the ingredients including the sauteed garlic and olive oil. Add reserved liquid** from the artichokes (I think I used about a half a cup) to thin out sauce to desired consistency. Taste for seasoning and adjust if needed.
Toss with pasta immediately out of the boiling water. Garnish with a little chopped basil if desired.
*Making your own roasted peppers is easy. Just placing them directly on on a gas burner flame rotating it a few times (like this) or on a pan under the broiler until charred. Then put it in a bowl tightly covered with plastic wrap for a about five minutes. Rub off most of the skin with a damp paper towel. Voila, roasted peppers!
**Pasta water would work great too if you accidentally forget to reserve the liquid from the artichokes. Yes, I speak from experience.
Variations
Stir in chickpeas, sauteed veggies, chicken or Italian sausage (or the vegan versions of these)
Italian Veggie Layered Casserole
Posted: April 16, 2012 Filed under: Main Dishes, Uncategorized, Vegan Options, Vegetarian, Veggies | Tags: eggplant, Italian veggie casserole, layered veggie casserole, squash, squash casserole, vegan casseroles, vegetarian casseroles, veggie lasagne, zucchini, zucchini casserole 2 Comments

Becky's Italian Veggie Layered Casserole
When my kids were little, I remember going bathing suit shopping with three small children in tow. (The last child, number 4, had yet to be born.) Like most women, I’d rather pour lemon juice on a paper cut than shop for a bathing suit, especially after having incubated, grown and given birth to multiple children. The only thing that could make this task even more painful was to try to get it done with three bored and antsy preschoolers in tow.
After what must have seemed an eternity to my eldest son, he said, “Mom, just buy one of those zucchini bathing suits and let’s get out of this Lady Store!”
Little did this child know that due to his weighing in at 9 lb 2 oz, leaving stretch marks from my neck to the my knees, his mother’s days of wearing “zucchinis” (bikinis) were forever behind me.
However, I am quite fond of cooking with zucchini, and this casserole below is one of my favorite ways to use up the abundance of zucchini squash that seem to overflow everyone’s backyard garden all summer long.
I created and made this casserole last week, and it seemed to get even better the next couple of days, as I enjoyed for a vegetarian lunch or a side dish with dinner. It’s a little trouble to make, but it makes a bunch and keeps beautifully in the fridge for several days. Just cut a slice, nuke and enjoy! (Would be a great take-to-work lunch.) It also makes a gorgeous colorful side dish to go with a simple meat like baked chicken, fish, or hamburger patty for the omnivores in your family, while making a satisfying meal for any vegetarians among you. With a few tweaks, this can easily be made into a vegan-friendly dish as well.
Variations:
Vegan version below.
Add cooked seasoned ground hamburger, turkey, chicken, or Italian sausage for an all-in-one main dish casserole.
Using same technique experiment with a variety of veggies and cheeses. Try using Alfredo sauce in place of marinara.

Becky's Italian Veggie Layered Casserole
Becky’s Layered Italian Veggie Casserole
Serves 10 to
Olive oil to coat large skillet (1 to 3 Tablespoons)
1 eggplant, peeled, sliced about ¼ inch thin
2 smallish or 1 large potato, unpeeled, sliced about ¼ inch thin
1/3 c. water
3to 4 zucchini squash, sliced ¼ inch
3 to 4 yellow squash
6 slices Swiss cheese (or mozzarella or any white cheese that melts; almond or soy cheese for vegans)
4 cups marinara sauce, your favorite brand, your favorite homemade recipe or my quick blender marina sauce below * (Try to choose or cook a marinara that is a little on the thick side.)
½ c. to 2/3 c. grated Parmesan, Asiago or other firm Italian cheese (Vegans, click on this link for a recipe for fake vegan parm)
1 ½ c. crushed buttery whole wheat crackers like Ritz or Town House brands (vegans use vegan-friendly crackers of your choice)
2 T. olive oil
2 T. butter or Earth Balance for Vegans
1 t. oregano or Italian seasoning
Salt and pepper
Directions:
In large skillet, pour a couple of tablespoons of olive oil around skillet then sauté eggplant slices until partially cooked, Using tongs, place eggplant in a layer in bottom of big rectangle 11 by 13 inch baking dish. Next, partially cook potato in same skillet, adding 1/3 cup water. Then add this layer on top of the eggplant. Salt and pepper the eggplant-potato layer to taste. Pour two cups marinara sauce on top of potato and eggplant.

First layer of eggplant an potatoes with first layer of sauce being ladled on
Lay Swiss cheese or other white cheese on top of this layer. Next (using same skillet), lightly sauté zucchini and yellow squash together, adding more oil if needed. Put this layer on top of Swiss cheese. Lightly salt and pepper the squash. Pour two more cups of marina on top of squash.

Second layer of squash and marinara
Sprinkle with Parmesan cheese (or vegan substitute) Melt butter with olive oil in skillet, add crushed crackers, and stir until evenly coated. Pour buttered crackers atop casserole. Sprinkle with 1 t. oregano or Italian seasoning.

Topped with cheese and buttered crackers, ready for oven
Bake at 350 until cheese is hot and melted and crackers are golden brown about 20 to 30 minutes.


A slice of Italian veggie heaven...
* Becky’s Quick Blender Marinara
1 16 ounce can diced tomatoes with basil
1 small 4 oz. can tomato paste
1 c. water
1 t. salt
1 t. Italian seasoning
½ onion
2 garlic cloves, peeled
2 t. brown sugar
(optional: fresh basil leaves, ¼ cup red wine)
Put all ingredients in a blender, blend until smooth, or until as chunky as you like it. Makes about 4 cups marina, perfect for this recipe.
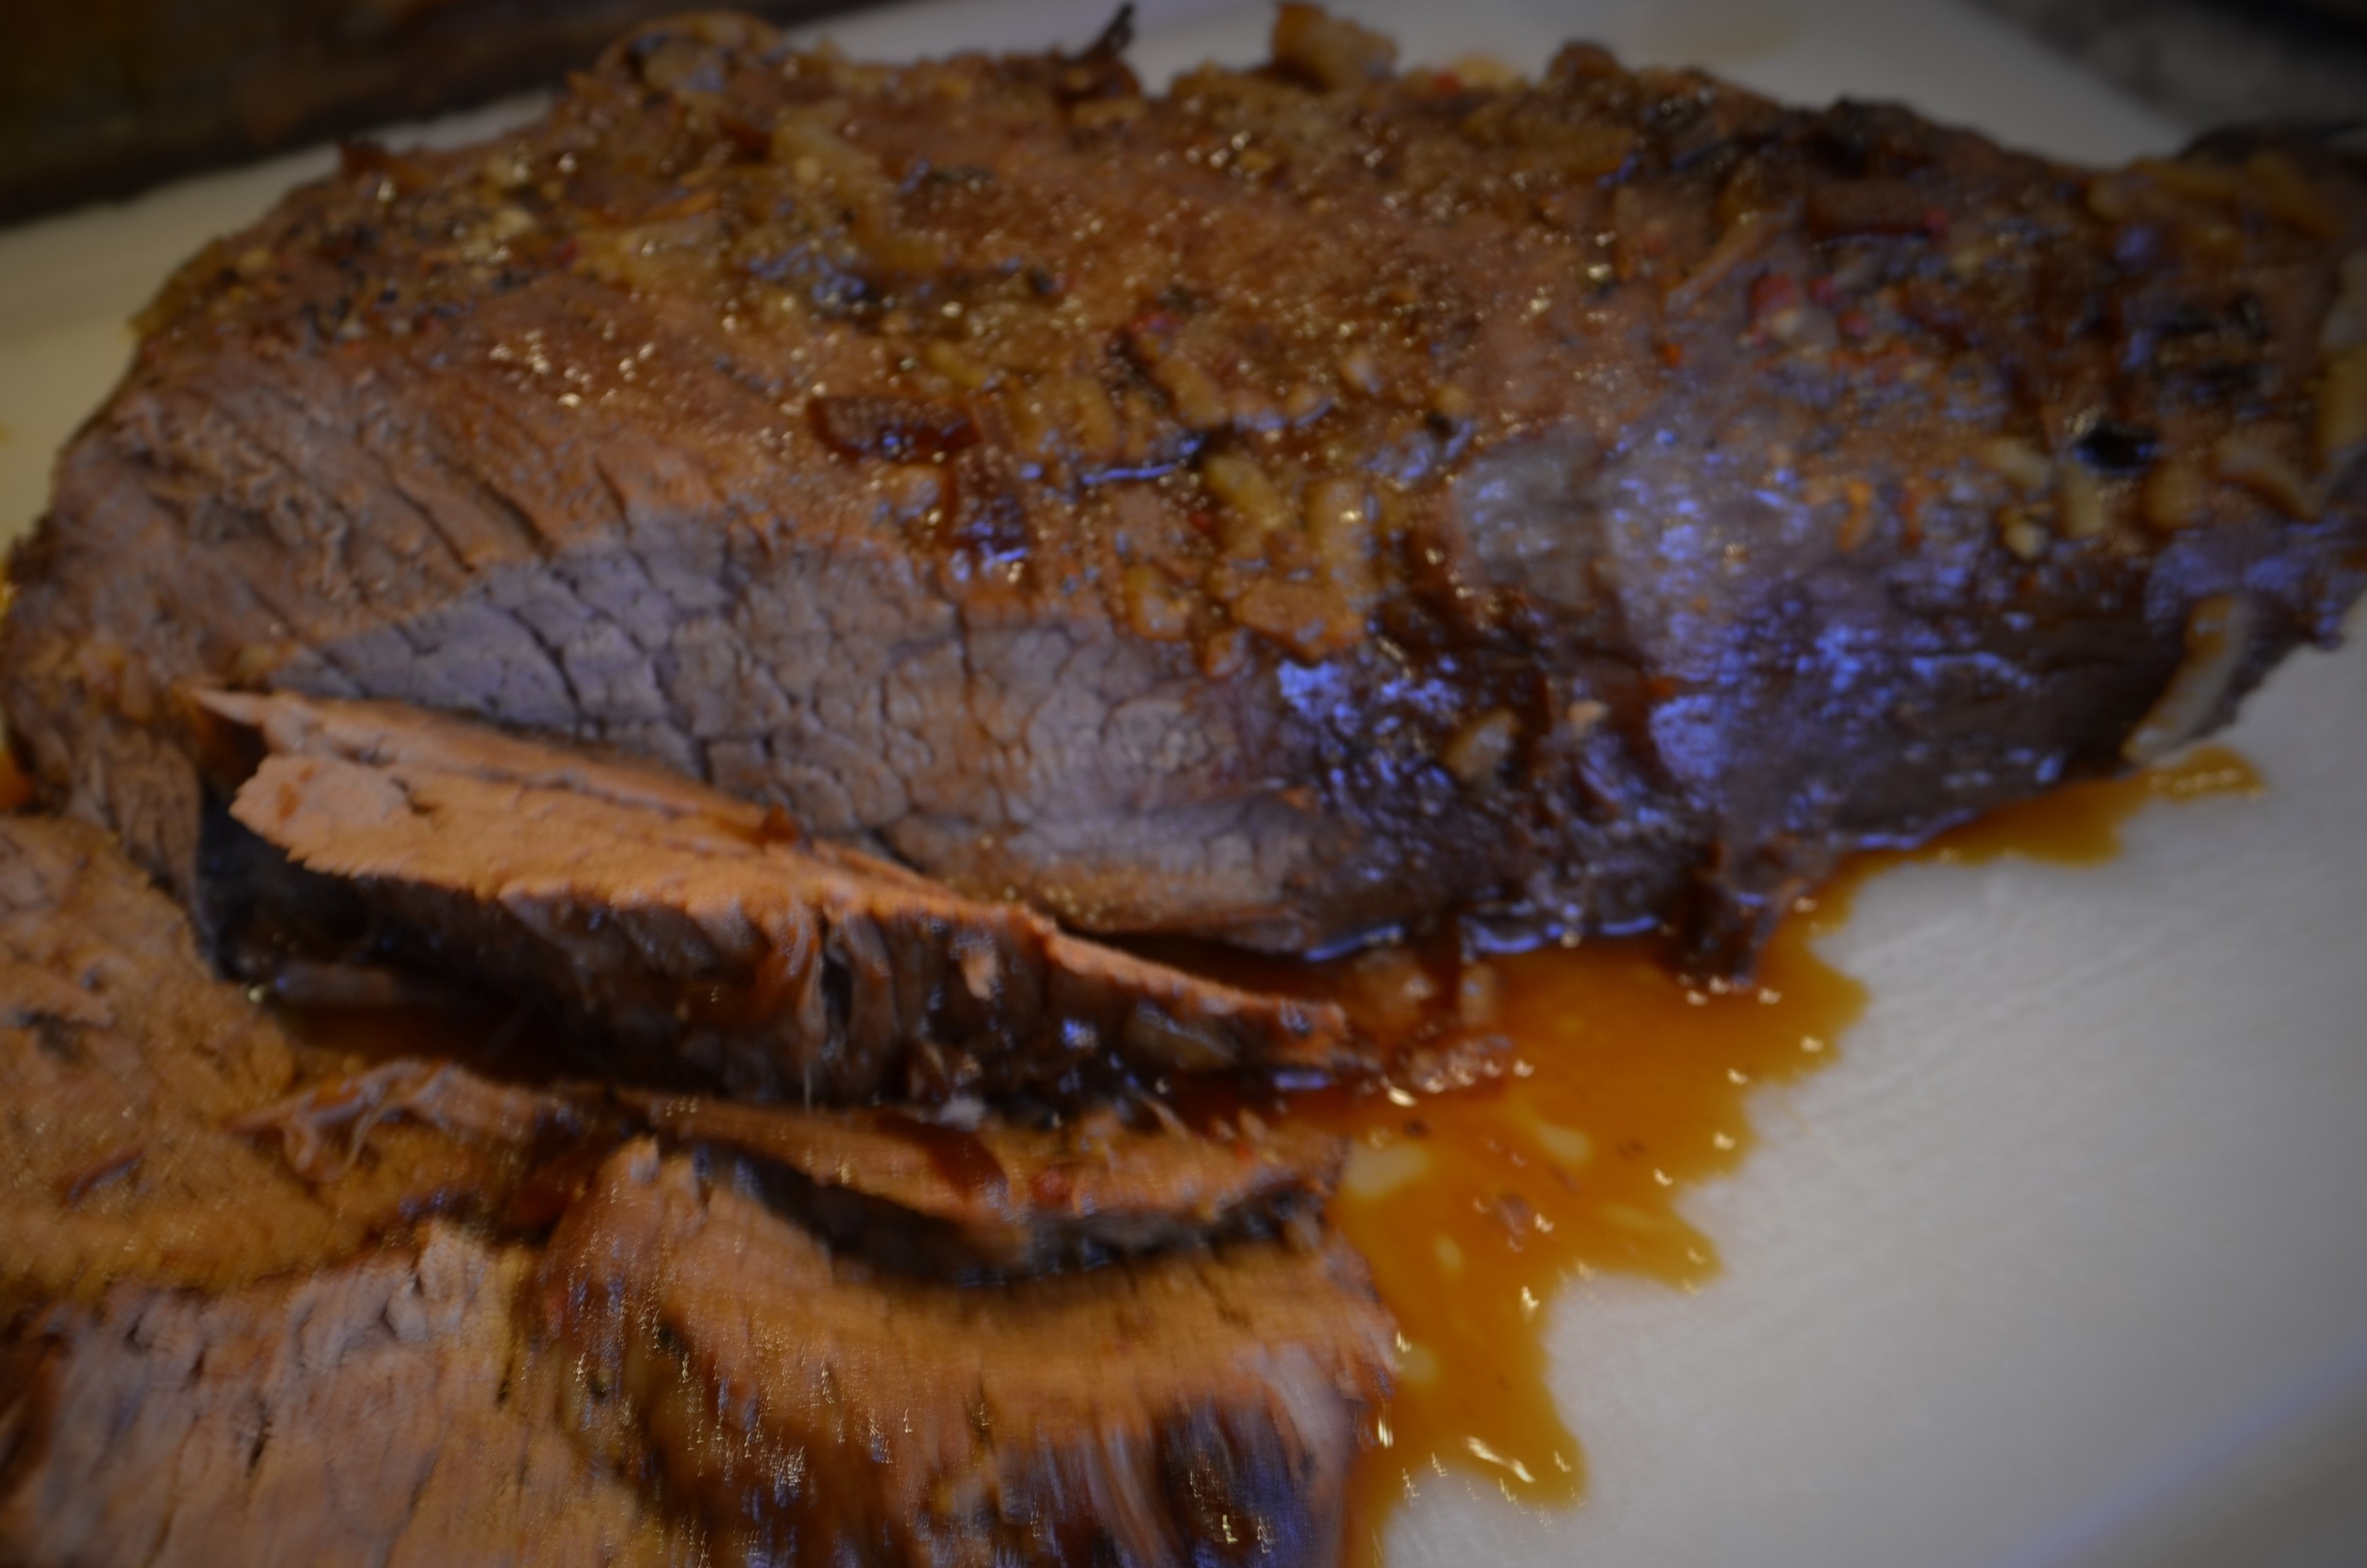
The BEST, Easiest , Juiciest Tri-Tip with Oodles of Au Jus
Posted: April 13, 2012 Filed under: Beef, Main Dishes, Sandwiches | Tags: au jus, beef, beef sandwiches, open face sandwiches, steak dip sandwiches, tri tip, tri tip dips 3 Comments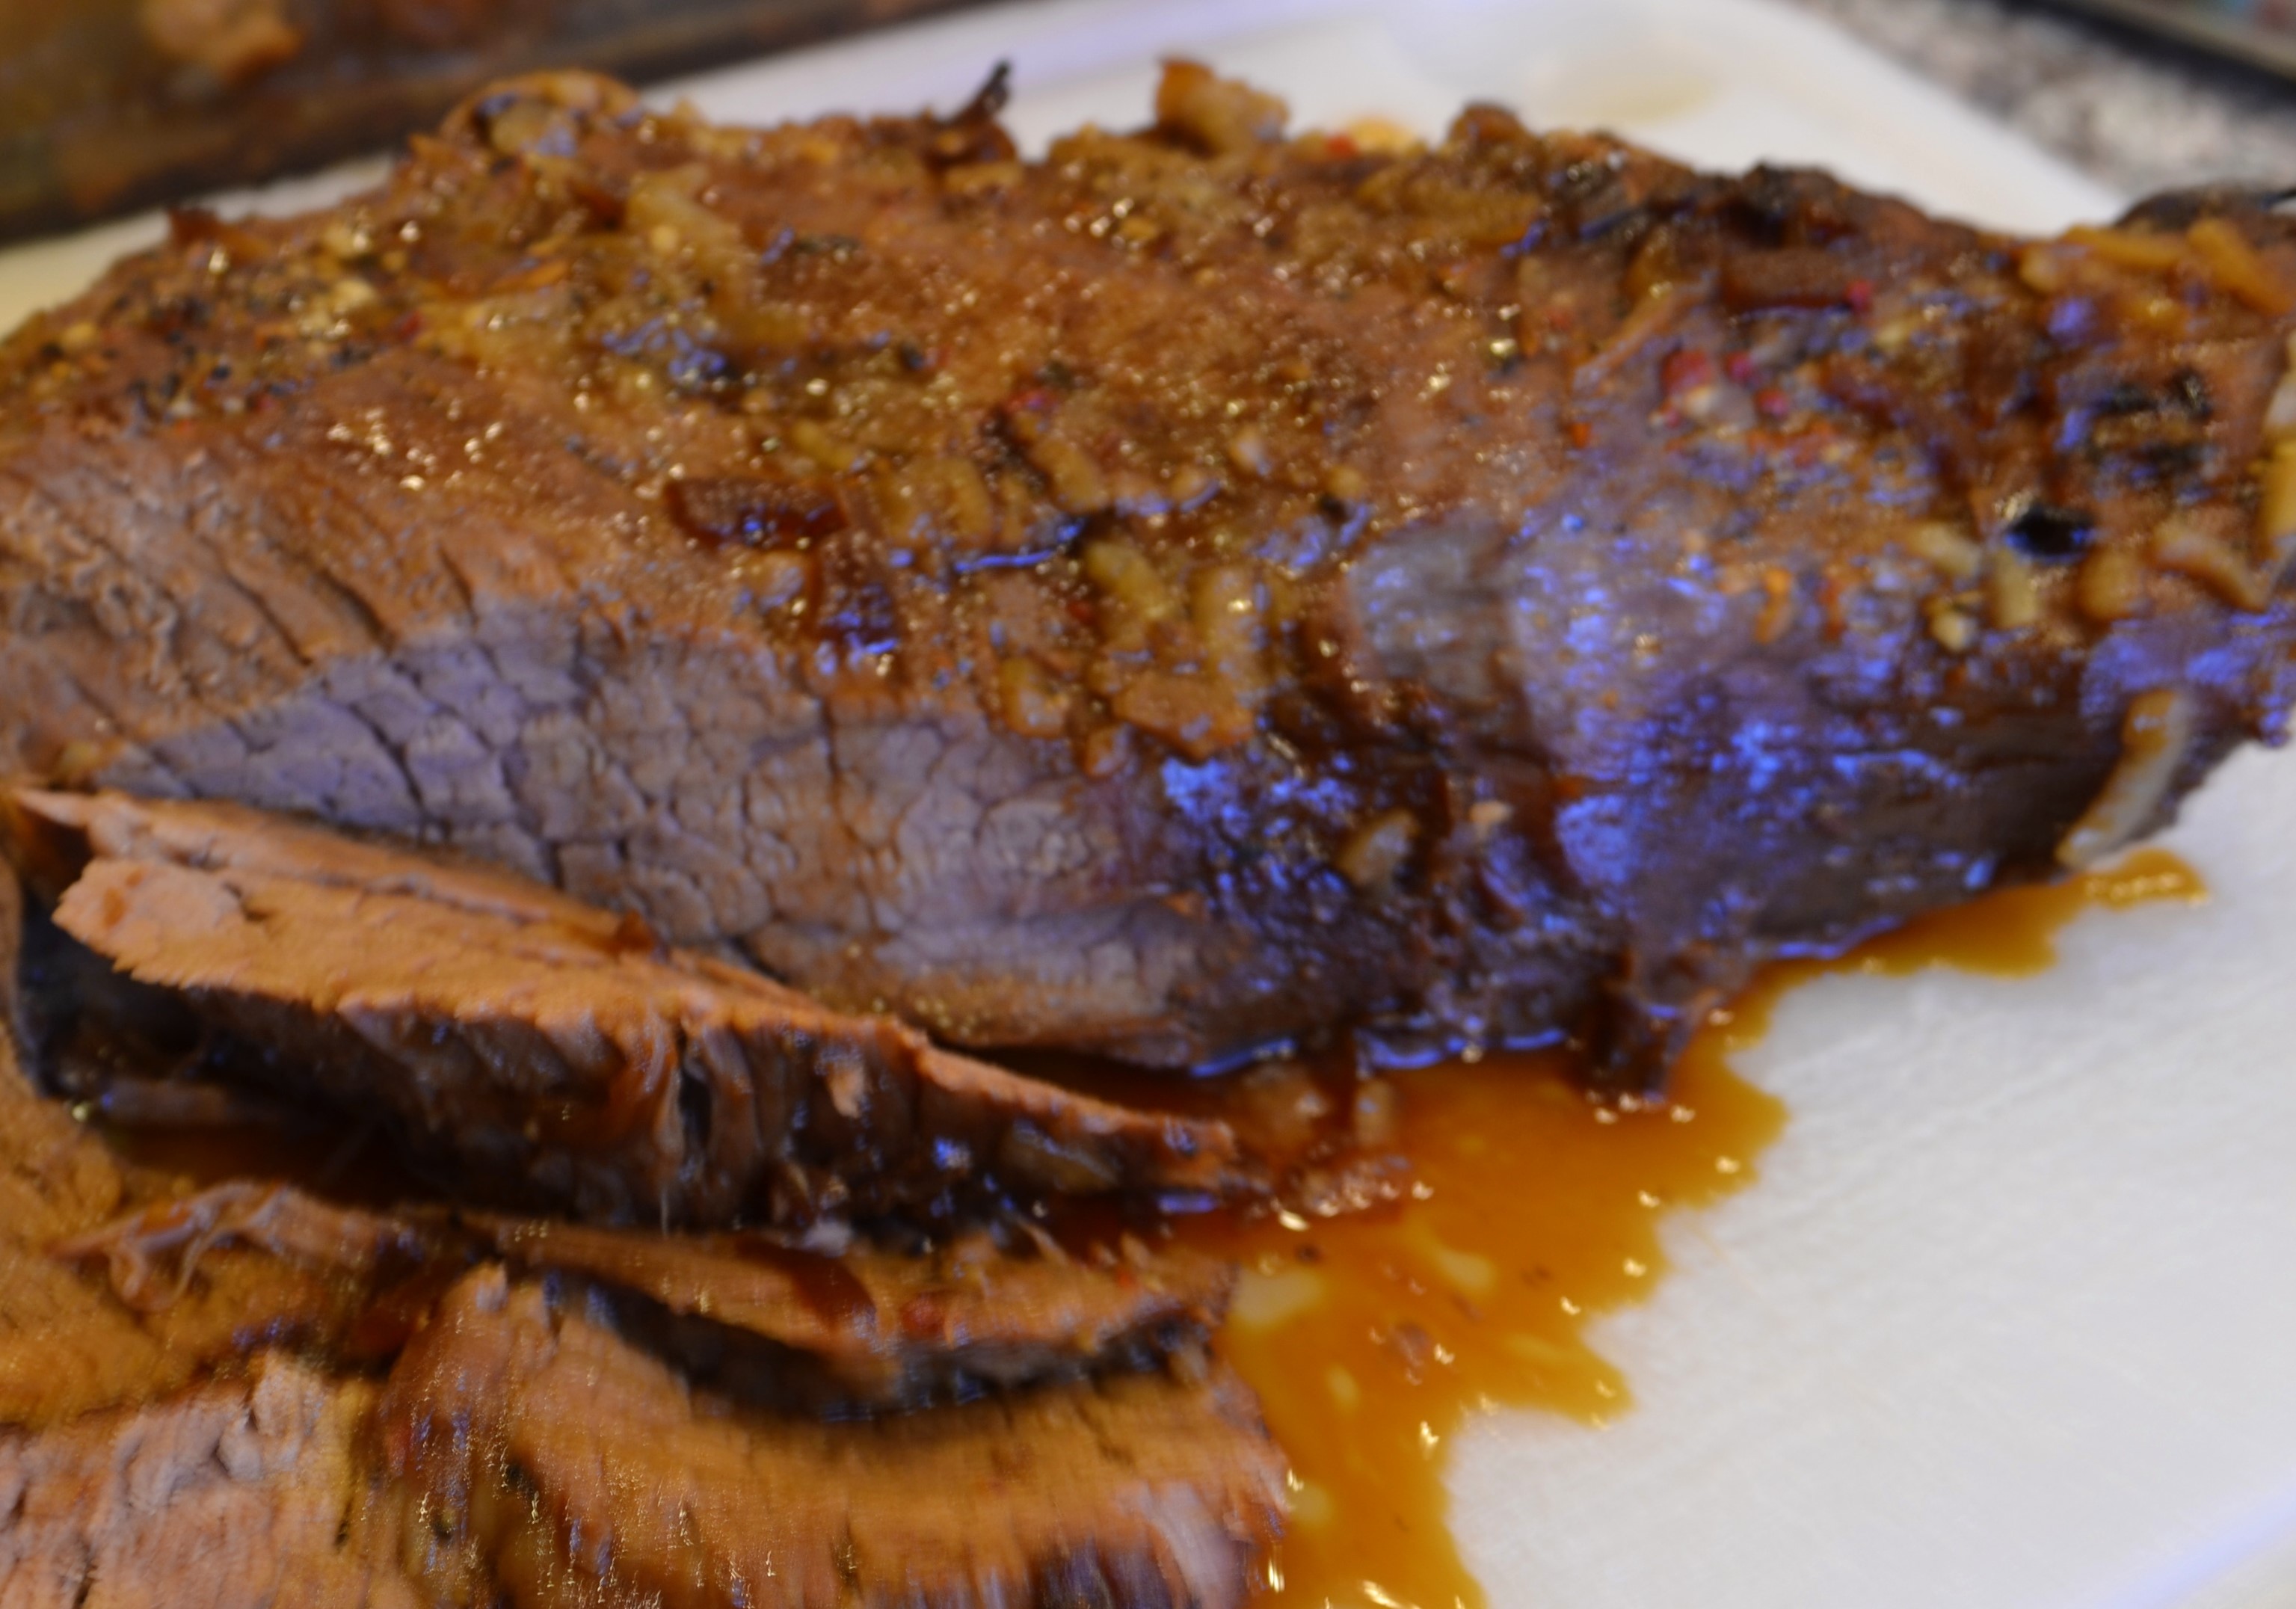
This recipe for tri-tip is so lip-smacking good, that our pastor Hugh Halter once asked me to do a little cooking demo of it before a church service. I have no idea how he tied this into the sermon, but if Hugh is anything, he is creative.
Last week I made it again for our pastor and his wife and some friends. As we sat on the back porch enjoying the meal, Hugh said, “I just don’t know how you make a piece of beef this juicy and tender!” I reminded him that I had once done a cooking demo on how to do it, in front of the entire church. Another attribute of our beloved pastor is that he has a memory like Swiss Cheese and had totally forgotten all about it.
Another one of the men at the table that day, leaned back, patted his stomach and said, “Becky this tri tip has ruined me. My father in law takes us out to the best steakhouse in town about once a year, and no steak I’ve had there is as good as this roast.”
Seriously, this tri-tip recipe will change your life. Your IQ will raise, you’ll be more beautiful, your charm quota will hit an all time high. At least in the eyes of the people to whom you serve this meal. They will look at you as if you are the Cooking Angel.
The best part: it will be the easiest roast you’ll ever make. I typically pop this roast in the oven before church – a la our mothers and grandmothers of the past – and 3 hours later, we walk into a home filled with a heavenly fragrance, lunch practically done.
I serve this roast alongside mashed potatoes and a salad the first day. But the second day is my favorite, because the I take the thinly sliced marinated leftovers and put them atop thick slices of buttery garlic toast, then top this with grilled onions and peppers, and finally the au jus. Au man, it is amazing.
I’ll first give the recipe for the Tri Tip, followed by the recipe for the Tri Tip Dip Sandwiches. Prepare to amaze yourself.

Tri Tip Dip Open-Faced Sandwich (Before pouring on au jus)
Becky’s Tri Tip
Serves 8-10
Heat oven to 325 degrees
Ingredients:
Two tri-tips (if you go to Sam’s Club, ours sells them two to a package)
Large Reynolds Cooking Bag
2/3 c. teriyaki sauce
1 envelope Lipton Onion Soup
3 ½ c. water
Directions:
Take a large cooking bag and holding it upright like you would a grocery bag, fill it with teriyaki sauce, onion soup mix and warm water. Carefully squish it around. Then, put both tri tips in the bag (you may want to call for some help on this), tie the bag with the twist tie that comes in the package. Then carefully lay the tri tips into a large rectangle pan. I do not poke holes in the cooking bag, and this seems to keep the roast juicier.

Two tri-tips in cooking bag with marinade, tied up and ready for roasting
Thus far, I’ve not blown up a bag and I’ve probably made this recipe 30 times. (I use my biggest Pyrex.) Pop in the oven at 325 and bake for 3 to 3. 5 hours.
When the tri-tip is done, carefully cut a slit in the bag and pour the juices into your biggest, deepest skillet. Slice the roast (I use an electric knife) across the grain. Then put the slices into the au jus in the skillet and simmer for a few minutes to infuse the roast with juices. Test to see if it needs additional salt and pepper.
Delicious served alongside or atop mashed potatoes.

Becky’s Tri Tip Dips & “Pouring on of Au Jus”
Tri Tip Dip Open-Faced Sandwiches
Serves 2
4 slices of French bread
1 T. olive oil
1 T. butter
1 clove garlic, peeled and cut in half
1 onion, sliced thin
1 large red or yellow pepper slice
Leftover Tri-Tip, sliced and Au Jus
Directions:
Put 4 slices of French bread on a cookie sheet and spread with butter, then sprinkle with olive oil. Broil until golden brown and then rub each slice with the cut end of a piece of garlic.

Toasted garlic bread
Saute onions and peppers until soft. Put two pieces of garlic bread on a plate, followed by several slices of warmed tri-tip, and generous portion of onion and peppers. Serve warm au jus in a small bowl on plate. Just before eating pour au jus over all and eat open-face style with knife and fork.
Sweet and Smoky Tilapia
Posted: April 11, 2012 Filed under: Fish, Main Dishes | Tags: blackened fish, blackened tofu, brown sugar, cumin, easy fish recipes, fish, smoked paprika, sweet and smoky tilapia, tilapia, tofu, vegan friendly 1 Comment
Becky's Sweet Smoky Talapia
I raised my kids on a lake in the country in small town Texas. I had three sons who all loved to fish, and by the time my youngest, Gabe, was six, he could dig for his own worms, bait his own hook, walk out the back door to the dock and pull in a small crappie (pronounced “croppie” ) or two.
His older brothers would paddle the boat out further and catch bigger bass, and Gabe longed to catch a bass with all his little heart. One day, I was being interviewed “live” on the radio, via telephone. I think I was discussing my first book, Worms in My Tea (co-authored with my mom, Ruthie), when the door to my office swung open, and a large mouth bass nearly smacked me in the face. When I calmed down from the shock of a fish flying in my office, I realized the fish was on the hook end of a fishing pole, being held by one excited little boy on the other end.
“Mom!” he yelled. “I caught a bass!” He sure did, and the news of it was broadcast live, somewhere on the radio in middle America. I managed to wipe fishy lake water from my brow, congratulate Gabe and carry on with the interview. These are things professional mothers do.
But I digress. I started this blog post thinking about crappie, and how, though they aren’t very big, they are, as we say in Texas, “some good eatin’.” And we ate a lot of them. So when the small fish, tilapia, seemed to swim out of nowhere into our supermarkets and on to the foodie scene as the new Rock Star of mild, affordable fish, I couldn’t help thinking how much they looked and tasted like crappie. In fact, who knows? They might just be crappie, with a fancy new name.
I loved tilapia at first bite. And it’s the best last-minute dinner! Even if it is frozen, it thaws in no time. Below is one of my favorite fish dishes. It’s fast, it is easy, it tastes amazing with its sweet, smoky, spicy, citrus flavors. And look how beautiful it is! Serve with an ear of fresh corn and a salad with avocado, and you’ve got a beautiful plate of healthy “good eatin’.”
Here’s something you may not know about tilapia, but as soon as you read this you can tell your friends and amaze them with it. Or just sound like a fish fact Know-it-All. Tilapia can be found in the Sea of Galilee, and are sometimes called “St. Peter’s fish.” This comes from the story in the Gospel of Matthew about the apostle Peter catching a fish that carried a coin in its mouth. (Matthew 14:24-27.)

Becky's Sweet and Smoky Talapia
Becky’s Sweet and Smoky Tilapia
Serves 2
Ingredients
2 T. olive oil
2 T. butter
4 medium to large tilapia fillets
2 T. smoked paprika
2 T. cumin
3 T. brown sugar
salt and pepper
1 lemon, cut in half
Directions:
Pre-heat oven to 350.
Put oil and butter in rectangle pan (large enough to hold tilapia without overlapping) and put in oven until butter has melted. Tilt pan until it is evenly coated.
In small bowl, mix paprika, cumin and brown sugar. Lightly salt and pepper both sides of 4 fillets. Lay tilapia fillets side by side in the buttery pan. Turn over so both sides are coated with oil/butter. Generously sprinkle tops of tilapia with the brown sugar-spice mix (using all of it), patting it in gently as you would a rub or blackening seasoning. Squeeze one half lemon over all.
Put in oven for 15 minutes or until fish flakes easily. Then turn oven to broil and watching carefully, broil the tops of the fish until the spice mixture starts to caramelize. Remove, serve with the remaining lemon half, cut in pretty slices as garnish.
Variations: Try this method with other fish and other spices you enjoy!
Vegan Variation: Use Earth Balance instead of butter, pressed or plain tofu slices or veggie burgers instead of fish.

Rachel made this with thin slices of pressed tofu & Earth Balance, following the above directions exactly and said it was delicious!
Chicken-Cream Cheese-Nut Cranberry Monte Cristos
Posted: April 9, 2012 Filed under: Main Dishes, Sandwiches, Uncategorized | Tags: chicken sandwiches, cranberry, cream cheese, ham sandwiches, monte cristos, walnut Leave a comment
Chicken-Cream Cheese-Nut Cranberry Monte Cristos
If you, like me, served a big bunch of family and friends a large Easter dinner yesterday, then I declare tonight to be “Cook’s Night Off!” If, however, like me, the thought of getting dressed, driving to a restaurant, and making polite conversation with other human beings sounds like it would take more energy than you currently have leftover, this AMAZING and easy sandwich recipe will help you get out of the kitchen and onto the comfy couch quick.
Sorry about the long name. I tried to work with just the initials (a la the “BLT”) but “CCNCMC Sandwiches” sounded like robot food.
I also give you permission to eat this buttery deliciousness in your most comfy T-shirt and stretchy pants. Or better yet, just wear your PJs and ratty old robe. Home chefs that serve big holiday meals deserve to be as lazy as you want to be the next day. Wallow in it, I say!
Feel free to substitute ham if you’ve got lots of it leftover and want to use it in place of chicken or as an addition to it. I am personally a little “hammed out” today.
A vegan version also follows, because I love my daughter and I want her to taste this dynamite flavor combo!

Becky’s Chicken-Cream Cheese-Nut Cranberry Monte Cristos
Serves 4
Ingredients
4 slices good bread (I like the round sliced French boule from Whole Foods, a light and airy artisan bread)
1/2 c. whipped cream cheese (Toffuti “Better than Cream Cheese” if you are vegan)
1/4 c. chopped walnuts, pecans, or pistachios
1 T. chopped green onions
4 slices turkey or chicken (use extra portion of of chopped nuts in place of meat for vegans)
1/3 c. whole cranberry sauce
2 eggs beaten with a dash milk (vegans use egg-replacer of choice and 1/3 c. non-dairy milk)
1 T. olive oil
1 T. butter (Earth Balance for vegans)
1/4 c. arugala or other lettuce greens
1 T. powdered sugar
Directions:
Mix whipped cream cheese or Tofutti with chopped nuts and green onions. Spread 4 pieces of bread with this mixture on one side. Lay two slices of chicken or turkey on two slices of the bread. (Add extra layer of chopped nuts in place of meat if you are vegan.) Spread cranberry sauce on the other two slices. Put together to make two chicken-cheese-walnut-cranberry sandwiches.
Melt butter or Earth Balance and oil together in a skillet big enough to hold two sandwiches. In a wide shallow bowl, beat the two eggs with milk (or substitutes if you are vegan). Carefully dip both sides of the sandwiches in the egg mixture as you would for French toast. Place the sandwiches, gently, into the skillet and let cook at medium heat until one side is golden brown. Carefully turn over the sandwiches and grill the other side (adding more oil and butter if needed.)

Sizzling Sandwich
Cut in half, tuck in a few arugula leaves, sprinkle tops lightly with powdered sugar. Serve with extra dollop of cranberry sauce if desired.
Rustic Iron Skillet Pot Pie
Posted: April 6, 2012 Filed under: Beef, Chicken, Main Dishes, Uncategorized, Vegan, Vegan Options, Vegetarian | Tags: beef pot pie, chicken pot pie, gravy, iron skillet pot pie, pie crust, pot pie, rustic pot pie, vegan pot pie, vegetarian pot pie, veggie pot pie 4 Comments
Homestyle Iron Skillet Pot Pie
My daughter is usually somewhat appalled at the disorganization in my refrigerator, along with the occasional discovery of leftovers-turned-science experiments lurking in its dark recesses.
On her last visit to Denver, her husband Jared was hungry and I told him, “Just look in the fridge and see what looks good to you. You never know what you might find.” To which Rachel immediately deadpanned, “Or what might jump out at you.”
So before I accidentally create new life forms from my leftovers, I really do try to use them up in more timely fashion these days. There are certain recipes I go-to when I need to use up the food I have on hand at the end of the week. This easy version of pot pie is one of the most successful and requested ones.
It is a little slice of flaky, creamy, hot home-style goodness. I don’t know why pot pie tastes so much better in an iron skillet than in a pie pan, but it does. And you’ll be amazed how easy it is, how fast it cooks up and comes together. (However, if you don’t have an iron skillet, it is still pretty darn amazing in a deep dish pie pan.)

Becky’s
Rustic Iron Skillet Pot Pie
Serves 4 to 5
Ingredients
1 pie crust, your favorite recipe, or refrigerated version or vegan version. (Click link for a great flaky vegan recipe!)
1/4 c. flour
2 T. olive oil
2 T. butter or Earth Balance (vegan)
1 1/2 c. chicken, veggie, or beef broth
2 potatoes, peeled and diced
4 medium carrots, peeled and diced
1/4 c. teriyaki sauce
1/2 t. grated garlic
1/2 c. frozen corn
1/2 c. frozen peas
Any other bits of leftover cooked veggies you have on hand. (I had about a 1/2 c cooked mushrooms to toss into the mix tonight, along with some leftover sauteed onions & peppers.)
Leftover diced cooked meat: chicken or beef, or any combination to make 1 1/2 to 2 cups, depending on how much you like and how much room is left in the skillet! (I diced a large cooked chicken breast and a cup of diced leftover roast. I often use leftover Rotisserie chicken meat for this dish.)
For Vegans: Use 1 can drained kidney beans and 1 can drained butter beans in place of meat. The kidney beans add a nice firmness and color and the butter beans are big and creamy and well, buttery. The combination makes a very tasty veggie pot pie. If you have a favorite vegan meat substitute, this could also be used.
Salt & Pepper to taste
Directions:
Preheat to 400 degrees.
Cook diced potatoes and carrots in about two cups water with dash of salt, turning burner to high to get a boil going, then down to medium heat to let them simmer.
While potatoes and carrots are cooking, mix 1/4 c. flour with 2 T. oil and 2 T. butter (Earth Balance for Vegans) in bottom of 10 inch iron skillet. Cook and stir constantly on medium heat until a paste forms (happens quickly), and while stirring with one hand (use a whisk), pour 2 1/2. cups veggie, beef or chicken broth slowly into skillet to make thickened gravy. (If you are new to gravy-making it helps to have a partner do the slow pouring of broth while you whisk.)
To the simmering gravy add:
2 T. teriyaki sauce
1/2 t. grated garlic
1/2 c. frozen corn
1/2 c. frozen peas
Any other leftover veggies you have on hand. (I had about a 1/2 c cooked mushrooms to toss in to the mix tonight, along with some leftover sauteed onions & peppers.)
To this add the drained, cooked carrots and potatoes. Gravy should be pretty thick and creamy (about consistency of heavy cream); adjust to desired thickness by simmering more to thicken, or adding a little more broth to thin. (You can add a splash of half-in-half or cream if you want a more creamy gravy.)
At this point, add salt and pepper to taste. Stir. Remove from burner.
Place uncooked pie crust over the top of the hot gravy-veggie mixture and carefully (that skillet is hot!) tuck the edges of the pie crust just inside the cast iron pan as pictured. Cut decorative slits in pie crust with a sharp knife to allow steam to escape.
Transfer skillet (using potholders) to 400 degree oven for 20 minutes or until crust is flaky and golden.
Serve pot pie at the table in the skillet, with big spoon to let each person dip out what they want. (Be sure to wrap a tea towel around handle of iron skillet so nobody burns themselves touching it.) Best served and eaten in bowls to catch every drop of goodness. Serve with a simple side of sliced fresh fruit and you’ve got dinner!
Variations: Some people prefer more “crust” with their pot pie. I love pie crust, too, but too often the bottom of pot pies can be soggy. So I will simply cook an extra round of pie dough, flat, on a cookie sheet, break it up in about 2 inch pieces, and serve in a bowl at the table, allowing “pie crust” lovers to add more crispy crusts to their bowl if desired. No soggy bottoms!
Mexican Comfort Casserole & Cashew Queso
Posted: April 3, 2012 Filed under: Appetizers, Main Dishes, Mexican Dishes, Uncategorized, Vegan | Tags: baseball, beans, cashew cheese, cashew queso, chipotles, chipotles in adobo sauce, coach's wife, mexican casserole, nutritional yeast, recipes, vegan, vegan mexican casserole, vegan queso, veggies 13 CommentsSaturday was a big game for my husband’s high school baseball team. I told him as I kissed him goodbye “We”ll be there, look for us in the stands.” Of course, Jackson’s afternoon nap fell at exactly the start of the game. I’ve been trying to keep him on a good sleep schedule during the day as it seems to translate to better sleep at night, so I waited until he woke up. Finally, after sleeping an hour and a half, I quickly loaded him in the car to try and make it to the game before it ended. I tuned into the local radio station airing the game and crossed my fingers that the innings would slow down (the ONLY time I’ve ever wished for baseball to slow down!) We rushed into the stadium as the seventh inning began, our team down three runs.
I sat in the stands next to another coaches’ wife. We both cheered loud when our husbands’ team tied up the game, sending us into extra innings. It was a nail biter of a game!

Sadly, the other team scored the winning run knocking our boys out of their first place spot in district.
“I don’t think I’m going to wait around for them to finish talking to the boys.” I told the other coach’s wife. “I think I’ll head to the store for a few things instead. There’s nothing like Mexican food to cheer Jared up.”
“Yep, I have a pint of Blue Bell in the freezer for occasions just like this,” she nodded.
So I whipped up a mexican casserole, cashew cheese dip, rice, salsa, and gaucamole. Then popped open a couple of Coronas with a twist of lime. Boy was my kitchen a mess, but my husband was feeling like a winner again!

My mom got that little avocado green dip dish for me. It’s an antique from 1960. I think it’s so cute!
Due to that whole baby sleep schedule mentioned above, it was dark by the time we actually sat down to eat, so pics of the Mexican Fiesta were quite meh. Yeah, meh is a word. So I made a plate of leftovers on Sunday for lunch to get better pictures. Leftovers = equally delicious.

Rachel’s
Mexican Comfort Casserole with Cashew Queso
Serves 8
Ingredients
2 1/2 c. chopped onions
2 c. chopped peppers (any color or kind — I used green bell and poblano)
3 cloves garlic, minced or thinly sliced
1 yellow squash, sliced
2 zucchini, sliced
1 can fire roasted tomatoes
2-3 chipotle peppers in adobo sauce
4 c. (or 2 16 oz cans) of refried or mashed pinto beans
~12 corn tortillas
Cashew Queso (see below)
Optional garnish: lettuce, tomato, avocado
Directions
Preheat oven to 350.
Saute onions on medium to med-high heat with a little oil and salt for 10 minutes, stirring occasionally. Add the peppers and continue sauteing for 10 more minutes. In the last couple of minutes add the garlic.
In a separate pan, saute zucchini and squash on med-high heat with a little oil and salt & pepper until they just start to brown but are still firm.
Meanwhile, in a food processor or blender combine the fire roasted tomatoes and chipotle peppers in adobe sauce. Pour mixture into a bowl large enough to dip a corn tortilla in.
Now begin layering in a casserole dish (I used two round ones, but you could use one 8 x10 or whatever you have on hand). This recipe is super flexible. If you end up with extra ingredients, just add another layer.
Layer 1: 1/2 of the onion, pepper, and garlic mixture
Layer 2: tortillas dipped in chipotle tomato sauce and topped with a thin layer of more sauce (tear tortillas in half to border edges if needed)
Layer 3: 2 cups of beans
Layer 4: tortillas dipped in chipotle tomato sauce and topped with a thin layer of more sauce
Layer 5: zucchini and squash
Layer 6: tortillas dipped in chipotle tomato sauce and topped with a thin layer of more sauce
Layer 7: 2 cups of beans
Layer 8: 1/2 of the onion, pepper, and garlic mixture
Bake uncovered for 30 minutes. Top with cashew queso, lettuce tomato, and avocado.

Cashew Queso
Note: this is not my recipe. I got it from a friend and I’m unsure of the source.
Ingredients
1 c. raw cashews
1/4 c. sunflower seeds
2 tbsp nutritional yeast
2 tbsp onion powder
1 1/2 tsp salt
1/2 orange roasted bell pepper* (red or yellow will work too, but orange gives the most cheese-like color)
2 c. water
1 tsp lemon juice
Directions
In a food processor, blend cashews, sunflower seeds, nutritional yeast, salt,and onion powder into a fine dust. Add about 1/2 a cup of the water and the roasted bell pepper and blend again. Add the rest of the water and lemon juice. Transfer mixture to a pot and heat on medium heat, stirring pretty often until it has thickened to the consistency you like. If it gets too thick, just add a little more water.
*Making your own roasted peppers is easy. Just placing them directly on on a gas burner flame rotating it a few times (like this) or on a pan under the broiler until charred. Then put it in a bowl tightly covered with plastic wrap for a about five minutes. Rub off most of the skin with a damp paper towel. Voila, roasted peppers!
Sesame-Pecan Salmon with “Avocado Goddess” Salad
Posted: March 30, 2012 Filed under: Fish, Gluten Free, Main Dishes, Salads, Uncategorized, Vegan Options | Tags: avocado, fish, salads, salmon, salmon salad, vegan, vegetarian 5 Comments If I were to find out this morning that I had to host a dozen execs for lunch today, this is the recipe to which I’d turn. It makes a beautiful and amazing-tasting one-bowl dish. Served with some warm crusty bread, it is all you need to impress your guests.
I invented this recipe when I married my husband eight years ago. Greg is from the great Northwest and adores salmon. I grew up in Texas cattle country with a mother who thought all fish tasted like cat food. Needless to say, I never developed a fondness for food with fins. If I were served fish sticks as a kid at school, I’d peel the breading off, eat that, leaving the meat for the disposal. Sad, I know.
It was for the love of Greg, and Greg only, that I determined to figure out how to cook, eat, and hopefully, love fish. This is the recipe that started my love affair with salmon. I served it to my pastor, Hugh Halter, and he scraped his plate cleaning, calling it “praline fish.” The coating isn’t quite like candy, but it is just as hard to resist. Truly this recipe was my gateway drug to the pleasures of fish, and as I continue to blog my favorite recipes, you’ll discover this landlubber has come to embrace the fruit of the sea with gusto.
The salad is easy, too, with a dressing that just adds 3 ingredients (avocado, fresh lime juice, pepper) to your favorite Ranch salad dressing.

Becky's Sesame-Pecan Salad with "Avocado Goddess" Dressing
Becky’s Sesame-Pecan Salmon
Serves 2
2 pieces fresh salmon, skin removed
1/2 c. thick teriyaki sauce (teriyaki sauce often has soy sauce in it that is made from wheat. Gluten free folks may want to make their own. Here’s one gluten free recipe.)
2 T. sweet Thai chili sauce
1/4 c. toasted sesame seeds (these are cheaper and come in larger containers on the Asian aisles of most grocery stores)
1/4 c. pecans, chopped to about the consistency of Grapenuts in food processor or blender
1 T. olive oil
Preheat oven to 350 degrees.
In one shallow wide bowl mix teriyaki and Thai chili sauce. In other similar bowl, mix sesame seeds and ground pecans. Coat both pieces of fish with sauce on all sides, then do the same with the seed-nut mixture. Carefully lay in a square glass baking pan that has been generously coated with olive oil. Pour any left over sauce and nut-seeds over all.

Bake for 10 to 15 minutes or until fish is done. (I prefer mine slightly opaque and moist in the middle.) I also like to broil the fish (watching carefully) for just few seconds to give the topping additional thickness and crunch.
Avocado Goddess Salad
Ingredients:
1 bunch Romaine lettuce, chopped
1 avocado, peeled and cut into thirds
1/2 c. Ranch dressing, any kind you like
1 T. fresh lime juice
1 t. pepper
Directions:
Put about 1 to 1 1/2 cups of chopped Romaine into each of two large salad bowls. (I use big wide pasta bowls.)
Take 2/3 of avocado and cut into slices, arranging evenly on top of the two salads.
Mash the other 1/3 avocado in a small bowl. Add Ranch dressing, lime juice and pepper to this and stir.

Avocado Goddess Dressing
Using a wide spatula, carefully lay one piece of the cooked salmon on top of each salad. Drizzle “Avocado Goddess” dressing over all.
Vegan Options: You could easily make sesame-pecan tofu with slices of pressed tofu marinated in the teriyaki Thai Chili sauce mixture instead of fish and simply substitute vegan ranch dressing to make the Avocado Goddess dressing. This is a great dish for serving both vegans and non-vegans since it wouldn’t take much extra work at all to make both versions.
Chicken Option: You can use this same technique with chicken tenders if you prefer.
Roasted Cauliflower and Kale Curry — Easy Enough for Curry Cowards Like Me
Posted: March 29, 2012 Filed under: Main Dishes, Uncategorized | Tags: cauliflower, coconut, curry, kale, lentils, main dish, roasted garlic, vegan, vegetarian, veggies 2 Comments
I’m a curry coward. It’s exotic. It’s bright yellow. It has a long ingredient list.
So last night I decided to come up with a simple curry that even a curry coward like me can manage to make. I took the easy route and bought a can of curry powder instead of buying ten different spices and making my own. The first batch I made had lots of veggies and chickpeas, but I decided that three ingredients really stood out from the crowd — cauliflower, kale, and roasted garlic. So I made it again for breakfast this morning while the baby was napping. The life of a food blogging mama! This time I just used those two veggies and a whole bulb of roasted garlic. Much easier. Much better.
I don’t know if brown sugar is a classic addition, but I found it really balanced the strong curry flavors nicely. Curry powders can vary from brand to brand, so you may want to taste the seasoning as you go to see if it needs adjustments. Here’s the kind I used.

Roland Pure Indian Hot Madras Curry Powder (I didn't think it was spicy at all)
Are you intimidated about making your own curry too or was I the only curry coward?
What other dishes would you love to make but haven’t because they seem to complicated or overwhelming?

I watched Michael Symon on The Chew sharing tips on plating food and I thought I'd give it a try. Professional, eh?!
Rachel’s
Roasted Cauliflower and Kale Curry
Serves 4
Ingredients
1 bunch of Kale, ribs removed, washed & dried well
1 head of Cauliflower, chopped into “trees”
1 bulb of Garlic
3 tbs Olive Oil, divided
~ 4 tbs Curry Powder, divided
4 tsp Brown Sugar, divided
1 tsp Salt, divided
1 can of Coconut Milk
16 oz Lentils, prepared per package instructions
Directions
Preheat oven to 350 degrees. Cut off the top of the garlic to reveal the top of each clove. Put the bulb on a piece of foil, drizzle olive oil on top, and wrap the clove tight with the foil. Put in the oven (directly on the rack is fine until you get the cauliflower in).
In a large bowl, toss the cauliflower “trees” with about 1 tbs olive oil. Tossing as you go, gradually add 1 tsp curry powder, 1 tsp brown sugar, and 1/2 tsp salt until evenly coated. Place on a large baking sheet sprayed with nonstick spray and put in the oven. (Move the garlic onto the baking sheet at this time.) Set the timer for 20 minutes.
In the same large bowl, toss the kale with 1 tbs olive oil, using your hands to massage it into the leaves. Tossing as you go, gradually add 2 tsp curry powder, 1 tsp brown sugar, and 1/2 tsp salt. Put the kale on a large baking sheet sprayed with nonstick spray. It will be crowded, but that’s okay, we aren’t looking for crisp kale chips so it can be a little crowded. Add the kale to the oven, leaving the garlic and cauliflower in too. Cook everything for 20 more minutes. You might want to give the cauliflower and kale a shake every now and then.
In a small sauce pan, heat 1 tbs olive oil on medium heat and add 3 tbs of curry powder. Stir and cook for about 2 minutes. Add 2 tbs brown sugar and 1 can of coconut milk. Stir.
When the timer goes off, turn the oven off and remove the garlic. You can leave the kale and cauliflower in the oven to stay warm while you finish up the sauce. Carefully (it will be really hot) take the garlic out of the foil and squeeze it into the curry sauce. You can just stir it in if the garlic is really oozy or put it into the blender for a few seconds to evenly incorporate it.
Serve veggies on a bed of lentils and top with curry sauce.
And just like that I’m over my fear of curry and you can be too!
Marinated Portobello Burger
Posted: March 27, 2012 Filed under: Main Dishes, Uncategorized | Tags: dairy-free, meatless, mushroom burger, mushrooms, onions, portobello burger, portobellos, sauteed veggies, spinach, vegan, vegetarian, veggie burger, veggies 3 Comments
Marinated Portobello Burgers
When I was about 12, I went on a ski trip with my family. While hanging out at the base, some older teens hollered out to me and my brothers “Hey, you want some shrooms?”
I giggled and naively said, “Those guys must be on drugs or something. Why would they think we want some mushrooms while we are skiing?”
My big brothers busted out laughing.
I didn’t know how right I had been until they finally stopped laughing to explain to me what the “shrooms” those dudes spoke of were.
Lucky for me, I didn’t like mushrooms and would have turned down the offer even if my big brothers hadn’t been there to fill me in.
Nowadays, I might be in trouble if someone hollers out and offers me some shrooms, though.
It turns out after more than 25 years of hating mushrooms, I’ve discovered I actually love a good shroom!
The first time I ordered a Portobello Burger was shortly after going vegan. It was the only thing on the menu I could eat, so I figured I’d give it a try. It was thick, chewy, flavorless and spongy. I stayed away from portobellos after that and eased my way into the land of shrooms with baby bellas sauteed in evoo and garlic.
Recently we were at the new plant-based cafe in Dallas, VSPot, and I decided to try their marinated portobello burger. Some people at the neighboring table were raving about it, so I thought I’d give the portobello one more go. It was so succulent it almost melted in my mouth. The mushroom was cooked down really thin so you would never have guessed you were biting into a thick spongy portobello cap.
Tonight I made my own portobello burger and I have to say, it was awesome. The flavors are quite different than the one we had at the VSpot and I didn’t manage to get it quite as thin, but it will definitely hold me over until our next visit!
Wanna shroom?

Rachel’s
Marinated Portobello Burger
Serves 4
Ingredients
4 Portobello Mushrooms, stems removed and gently wiped clean with a damp sponge
4 Buns (I used Whole Grain Ciabatta Sandwich Rolls from our store’s bakery)
1/4 cup Apple Cider Vinegar
1/2 cup of Braggs Aminos (or soy sauce)
1/4 cup Olive Oil
1/4 tsp pepper
1/4 tsp sugar
1/2 tsp crushed red pepper
Topping suggestions: sauteed spinach, caramelized red onions, roasted red peppers
Mix the marinade in a bowl. Pour into a gallon sized zip top bag and add the portobello caps. Shake it up to cover the mushrooms and place in the refrigerator. I let mine marinate for about 5 hours, but I think you could go as little as an hour if you’re short on time or as long as 8-10 if you want to marinate them while you’re at work.
Heat a skillet on medium heat with evoo covering the bottom. Put the mushroom caps in 1-2 at a time bottoms down and with a spatula or the bottom of a sauce pan, gently hold the mushrooms down. Don’t apply too much pressure at first or you’ll tear the edges. Turn the mushrooms over and continue applying gentle pressure. Repeat turning back and forth every few minutes for about 10 minutes until the mushroom cap is only a few centimeters thick.
I ate mine on ciabatta rolls that I smeared with Vegenaise (vegan mayo) mixed with minced garlic and toasted on a lightly oiled saute pan (this gives the bread a nice crunch), topped with sauteed spinach and garlic and caramelized red onions. I thought I was going to need a protein like some beans to add to this, but I was plenty full after one mushroom burger and a side of sauteed yellow squash and zucchini.
This was printed from: We Laugh, We Cry, We Cook
The site URL: http://welaughwecrywecook.com
The Title: Marinated Portobello Burger
The URL:https://welaughwecrywecook.com/2012/03/27/marinated-portobello-burger
© Copyright 2012 – All Rights Reserved


