
Easy, Scrumptious Apple Dumpling Cobbler
Posted: February 23, 2015 Filed under: Desserts, Fruit Dishes, Uncategorized | Tags: apple, apple dumplings, apples, butter, cinnamon, cobbler, dumplins, ice cream, lemon, pastry, pie crust, sugar Leave a comment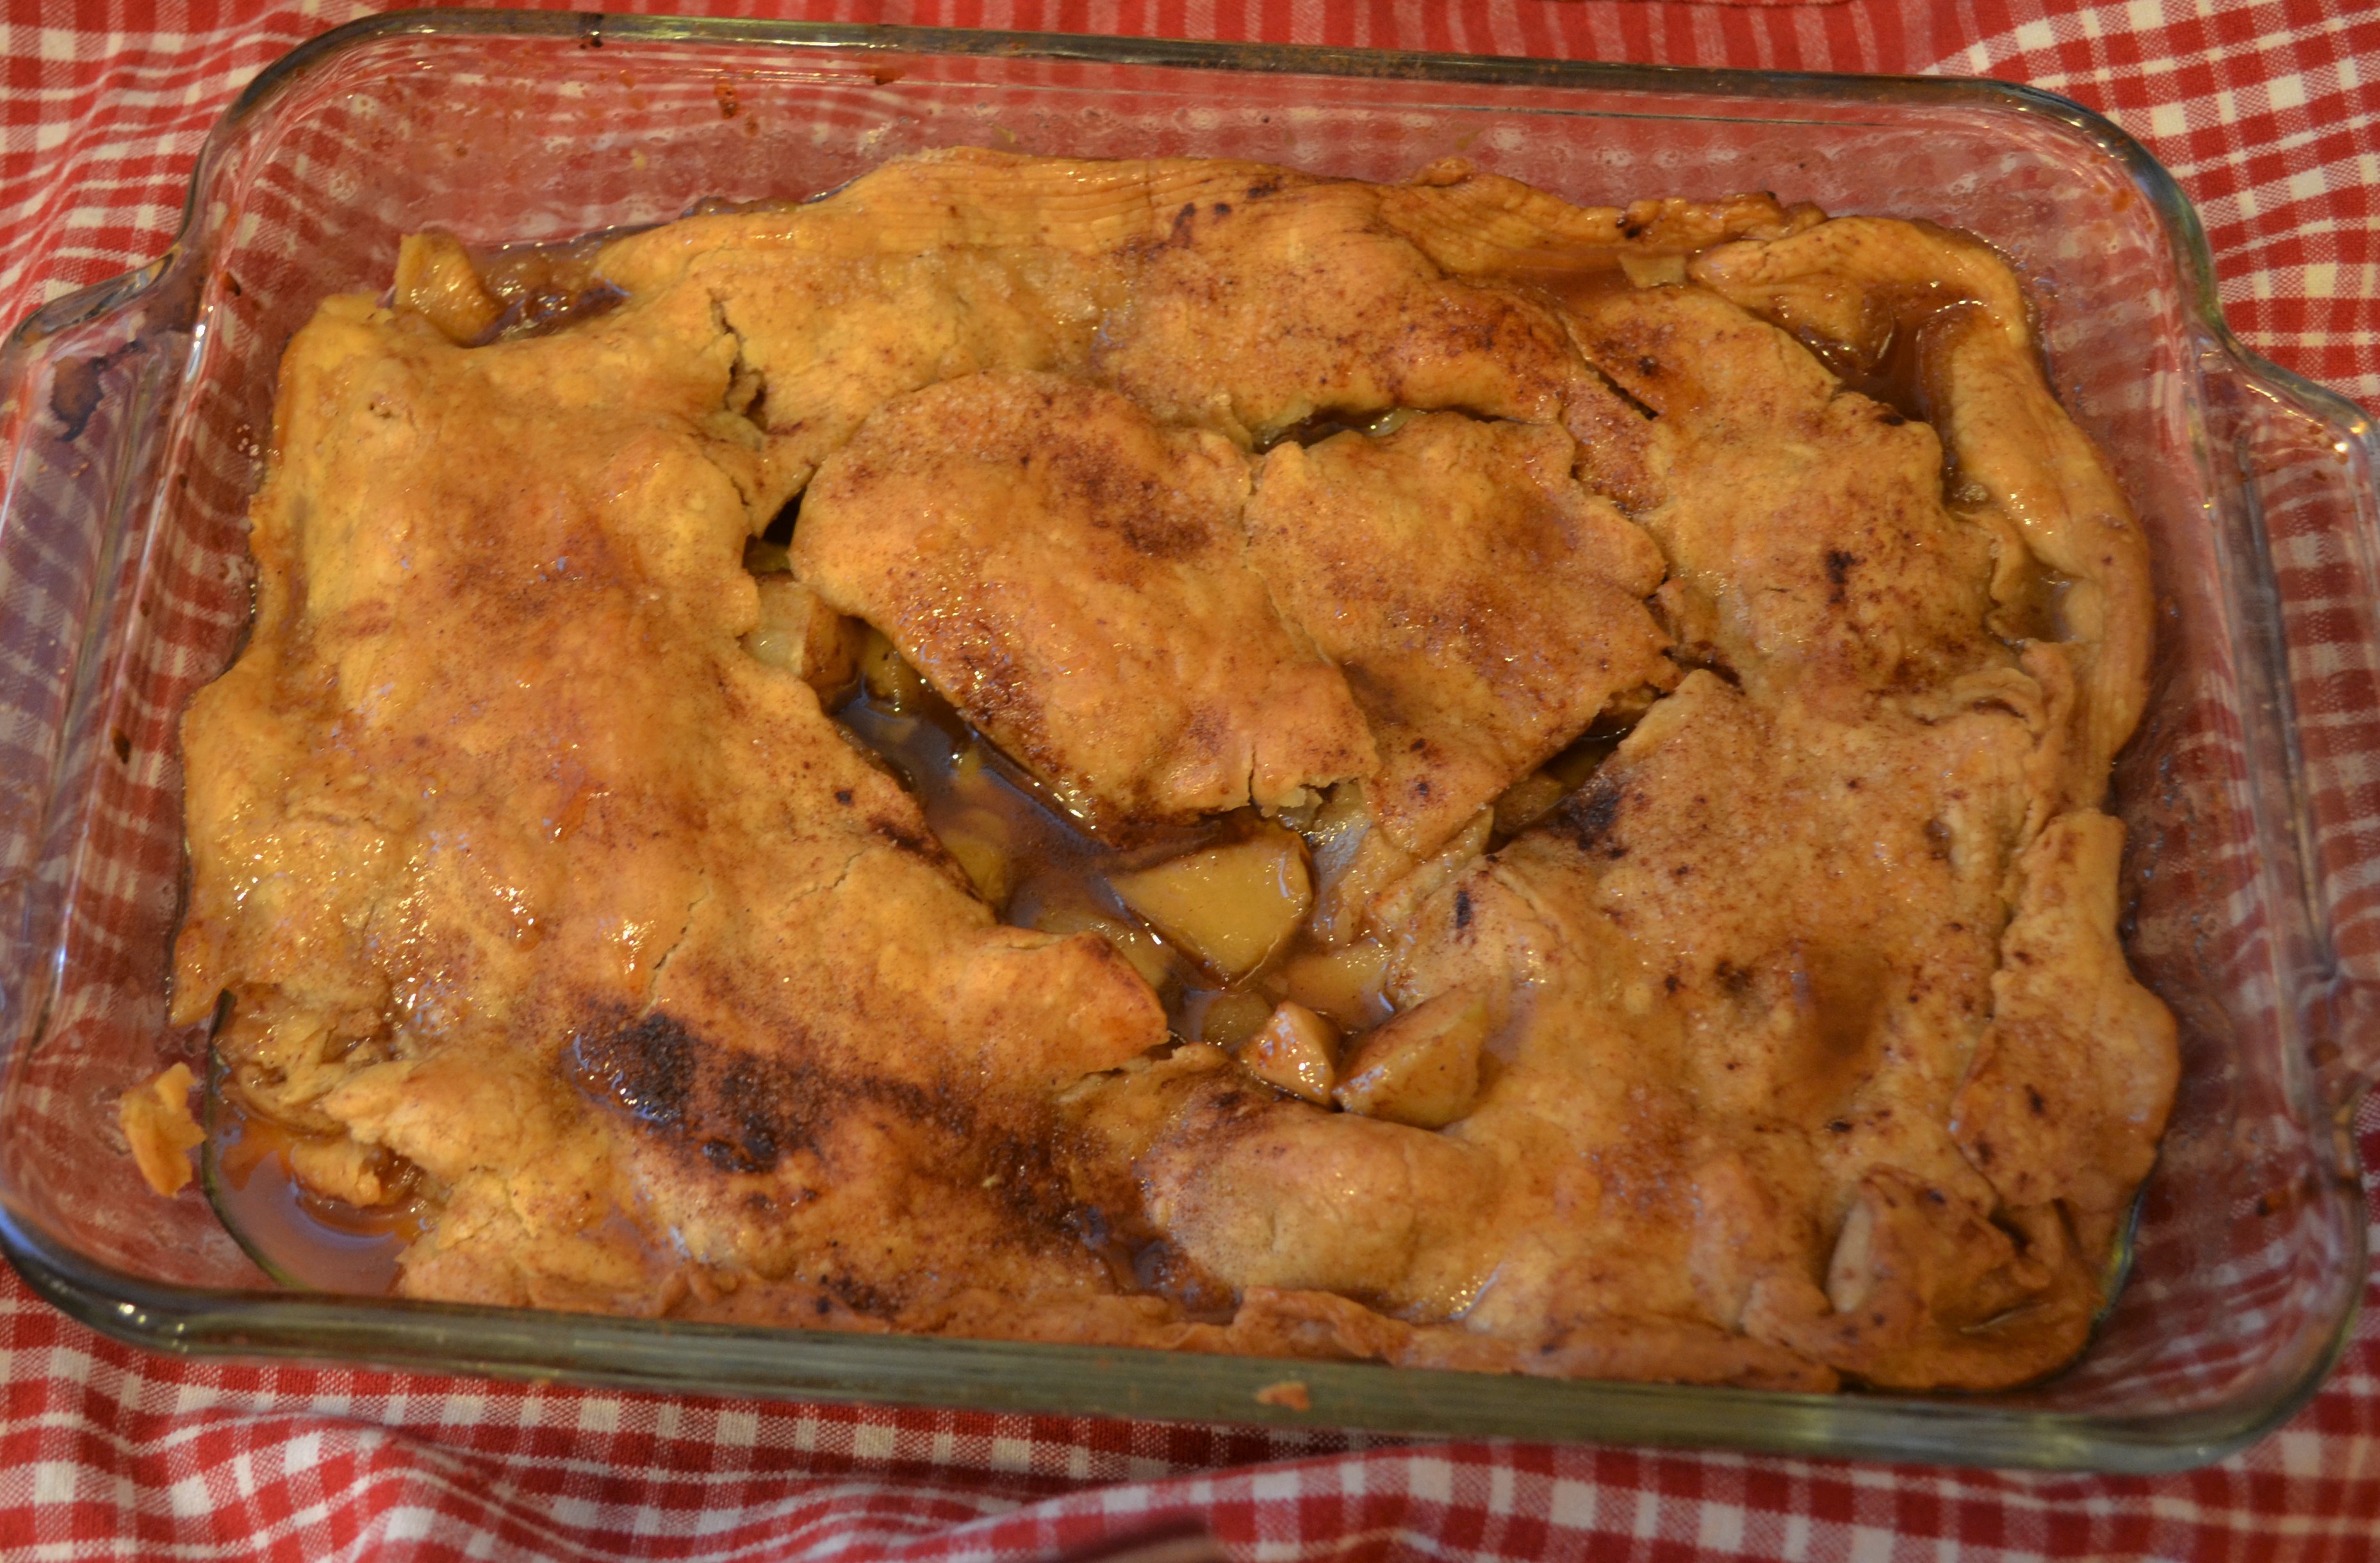
(Becky, the Mama.)
What is it about being snowed in that turns even makes even the most anti-cooking folks fire up the oven and don an apron? Here’s a recipe that is not only easy to make, and scrumptious, but will make your house smell like Pure Love.
I know, I know… the last recipe I posted was an apple dessert, too. But as you read in that post, I had somehow purchased THREE huge bags of apples and so, forgive me, but since I am still up to my ears in apples…. here’s another fabulous apple recipe I created that used up the last of my surplus. You’ll take one bite and think, “Oh. My. Goodness. This tastes like my grandmother’s home-made apple dumplings.” (And if you didn’t have an Apple Dumpling-Baking-Granny, the Apple Dumplings at Cracker Barrel are a pretty close second.)
A few decades ago, my mother went through a spell of baking Apple Dumplings from a recipe in the red and white checked Better & Homes and Gardens Cookbook. They were delicious! People raved about them and begged for more. But they were also a LOT of trouble. For my taste they were also a little too sweet and there was too much pastry-to-apples ratio.
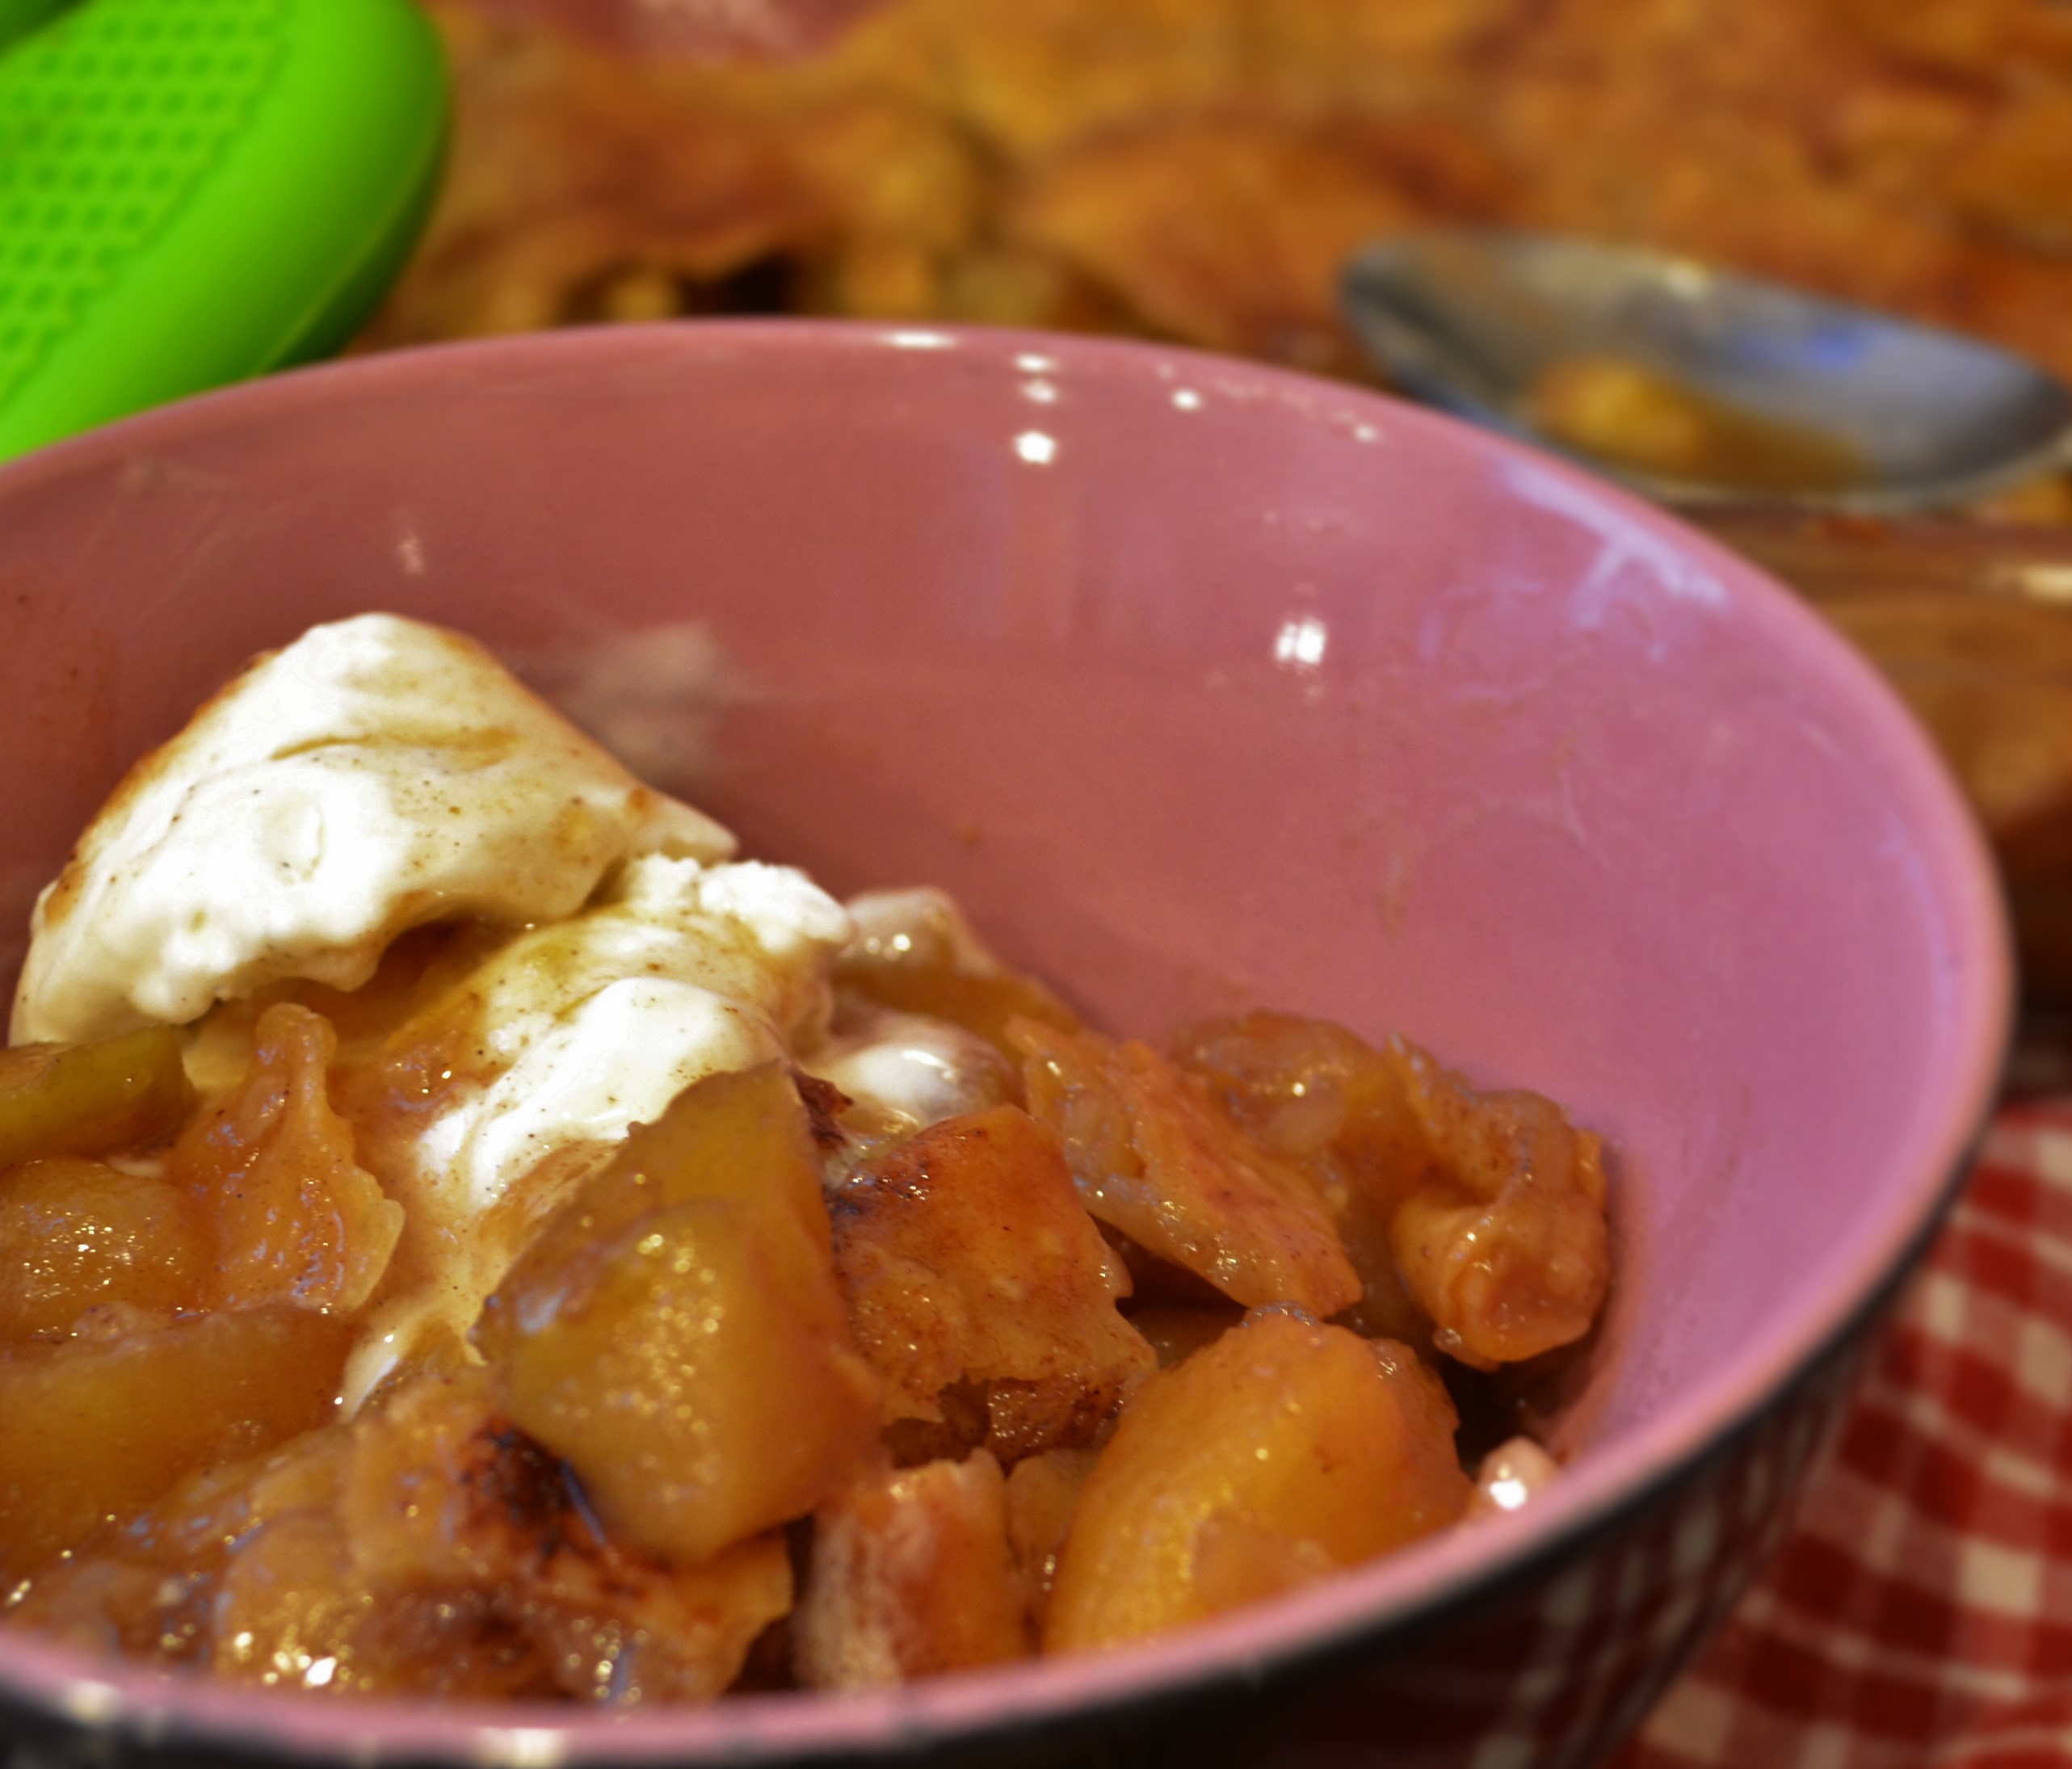
This recipe is ridiculously fast and easy and creates a just-right-sweet “cobbler” of apples that make their own “dumplin’ syrup” and is topped with just one flaky pastry crust (thank you Pillsbury for making this part simple, too). Serve warm with a dollop of vanilla ice cream and you’ll be in Apple Dumplin’ Gang Heaven.
One hint: the only time-consuming part of this dish is peeling and chopping apples. To make this effort go faster, conscript every able-bodied adult and child over 8 years-old to come in the kitchen and peel at least 2 apples each, while you do the chopping. Promise them they will be sweetly rewarded for their labor.
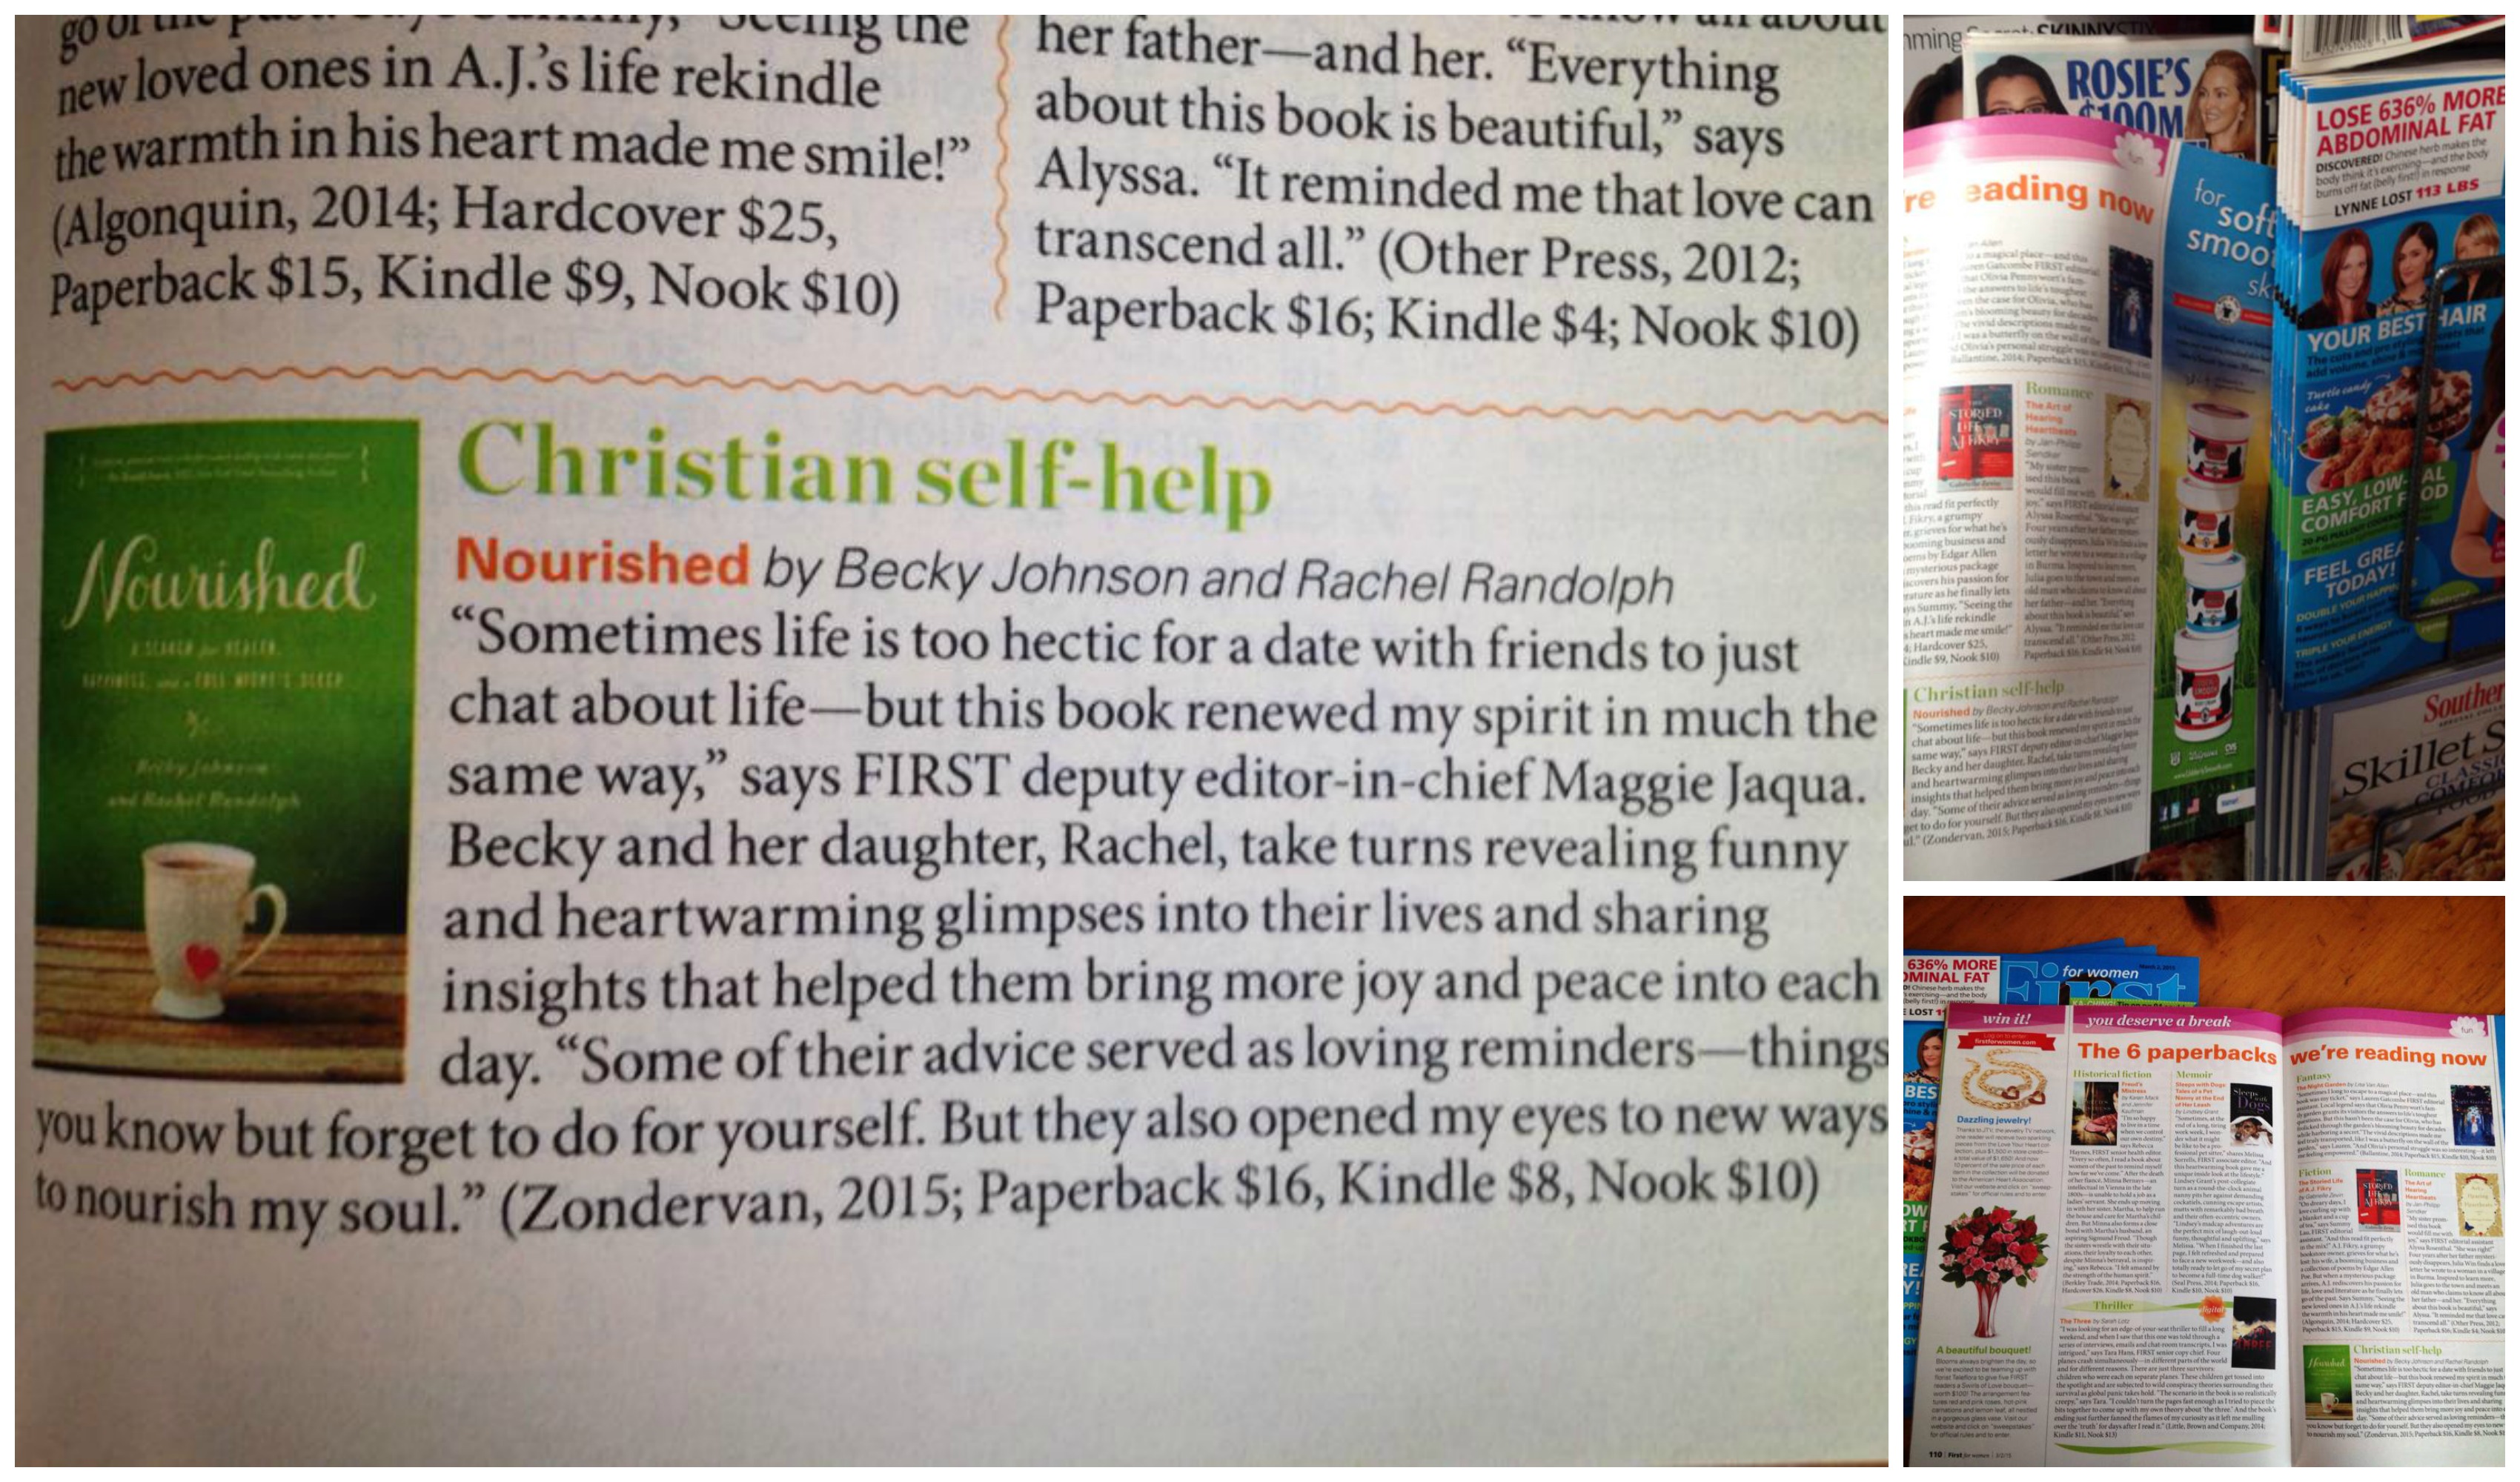
Finally, a little bit of fun news from “First Magazine for Women” (you will often see this at grocery check-out counters). Last week the editor of the magazine gave a lovely review for our book, Nourished. Here’s a picture of the article:
As long as you are huddled up inside eating dumplings this week you might as well buy a copy of our funny, uplifting, practical book to cozy up and read as well. 🙂 And our heart-felt thanks to those of you who have already read the book and perhaps posted a review on your blog or on Amazon or sent us a note or email. We are soooo thankful for your encouragement! Be sure to join us on our Facebook Fan Page, too, at We Laugh, We Cry, We Cook.
Apple Dumpling Cobbler
6 to 8 peeled, chopped apples (about teaspoon size pieces) to make about 6 cups total
1/3 cup brown sugar
1/3 cup white sugar
2 t. cinnamon
1/2 t. nutmeg
1 small to medium fresh lemon
1/2 t. salt
1 T. flour
2 T. butter
1 Pillsbury refrigerated pie crust
Sugar and Cinnamon to sprinkle on top (about 1 T. sugar and 1 t. cinnamon, but just eyeball it to your liking)
Directions
Turn oven to 350 degrees
In a large mixing bowl put apples, brown and white sugars, flour, spices and salt. Mix thoroughly. Butter a 9 by 11 casserole pan and pour the apple mixture into it. Squeeze a fresh lemon over the top of the apples and then dot with butter. Place one Pillsbury refrigerated pie crust on top of the apples, tearing it and patching it (pinch pieces together) to create a rustic, “quilted-together” pastry crust as shown below. Sprinkle with cinnamon and sugar. Note that you just kind of loosely fold the edges and tuck them around the apples. I also cut a heart shape in the middle, though as you can see, I am not a pastry artist. No worries about it looking messy, it will come out delicious and beautiful.
 Bake for about 30 to 40 minutes or until crust is golden and flaky and apples pierce easily with a fork and the juices are golden brown and syrupy. Serve warm, using a big spoon to place in bowls, and top with ice cream.

Easy Rustic Cherry Blueberry Pastry-Style Cobbler
Posted: January 19, 2014 Filed under: Desserts, Fruit Dishes | Tags: blueberries, cobbler, dark sweet cherries, lemon, pastry, pie crust, sugar 3 Comments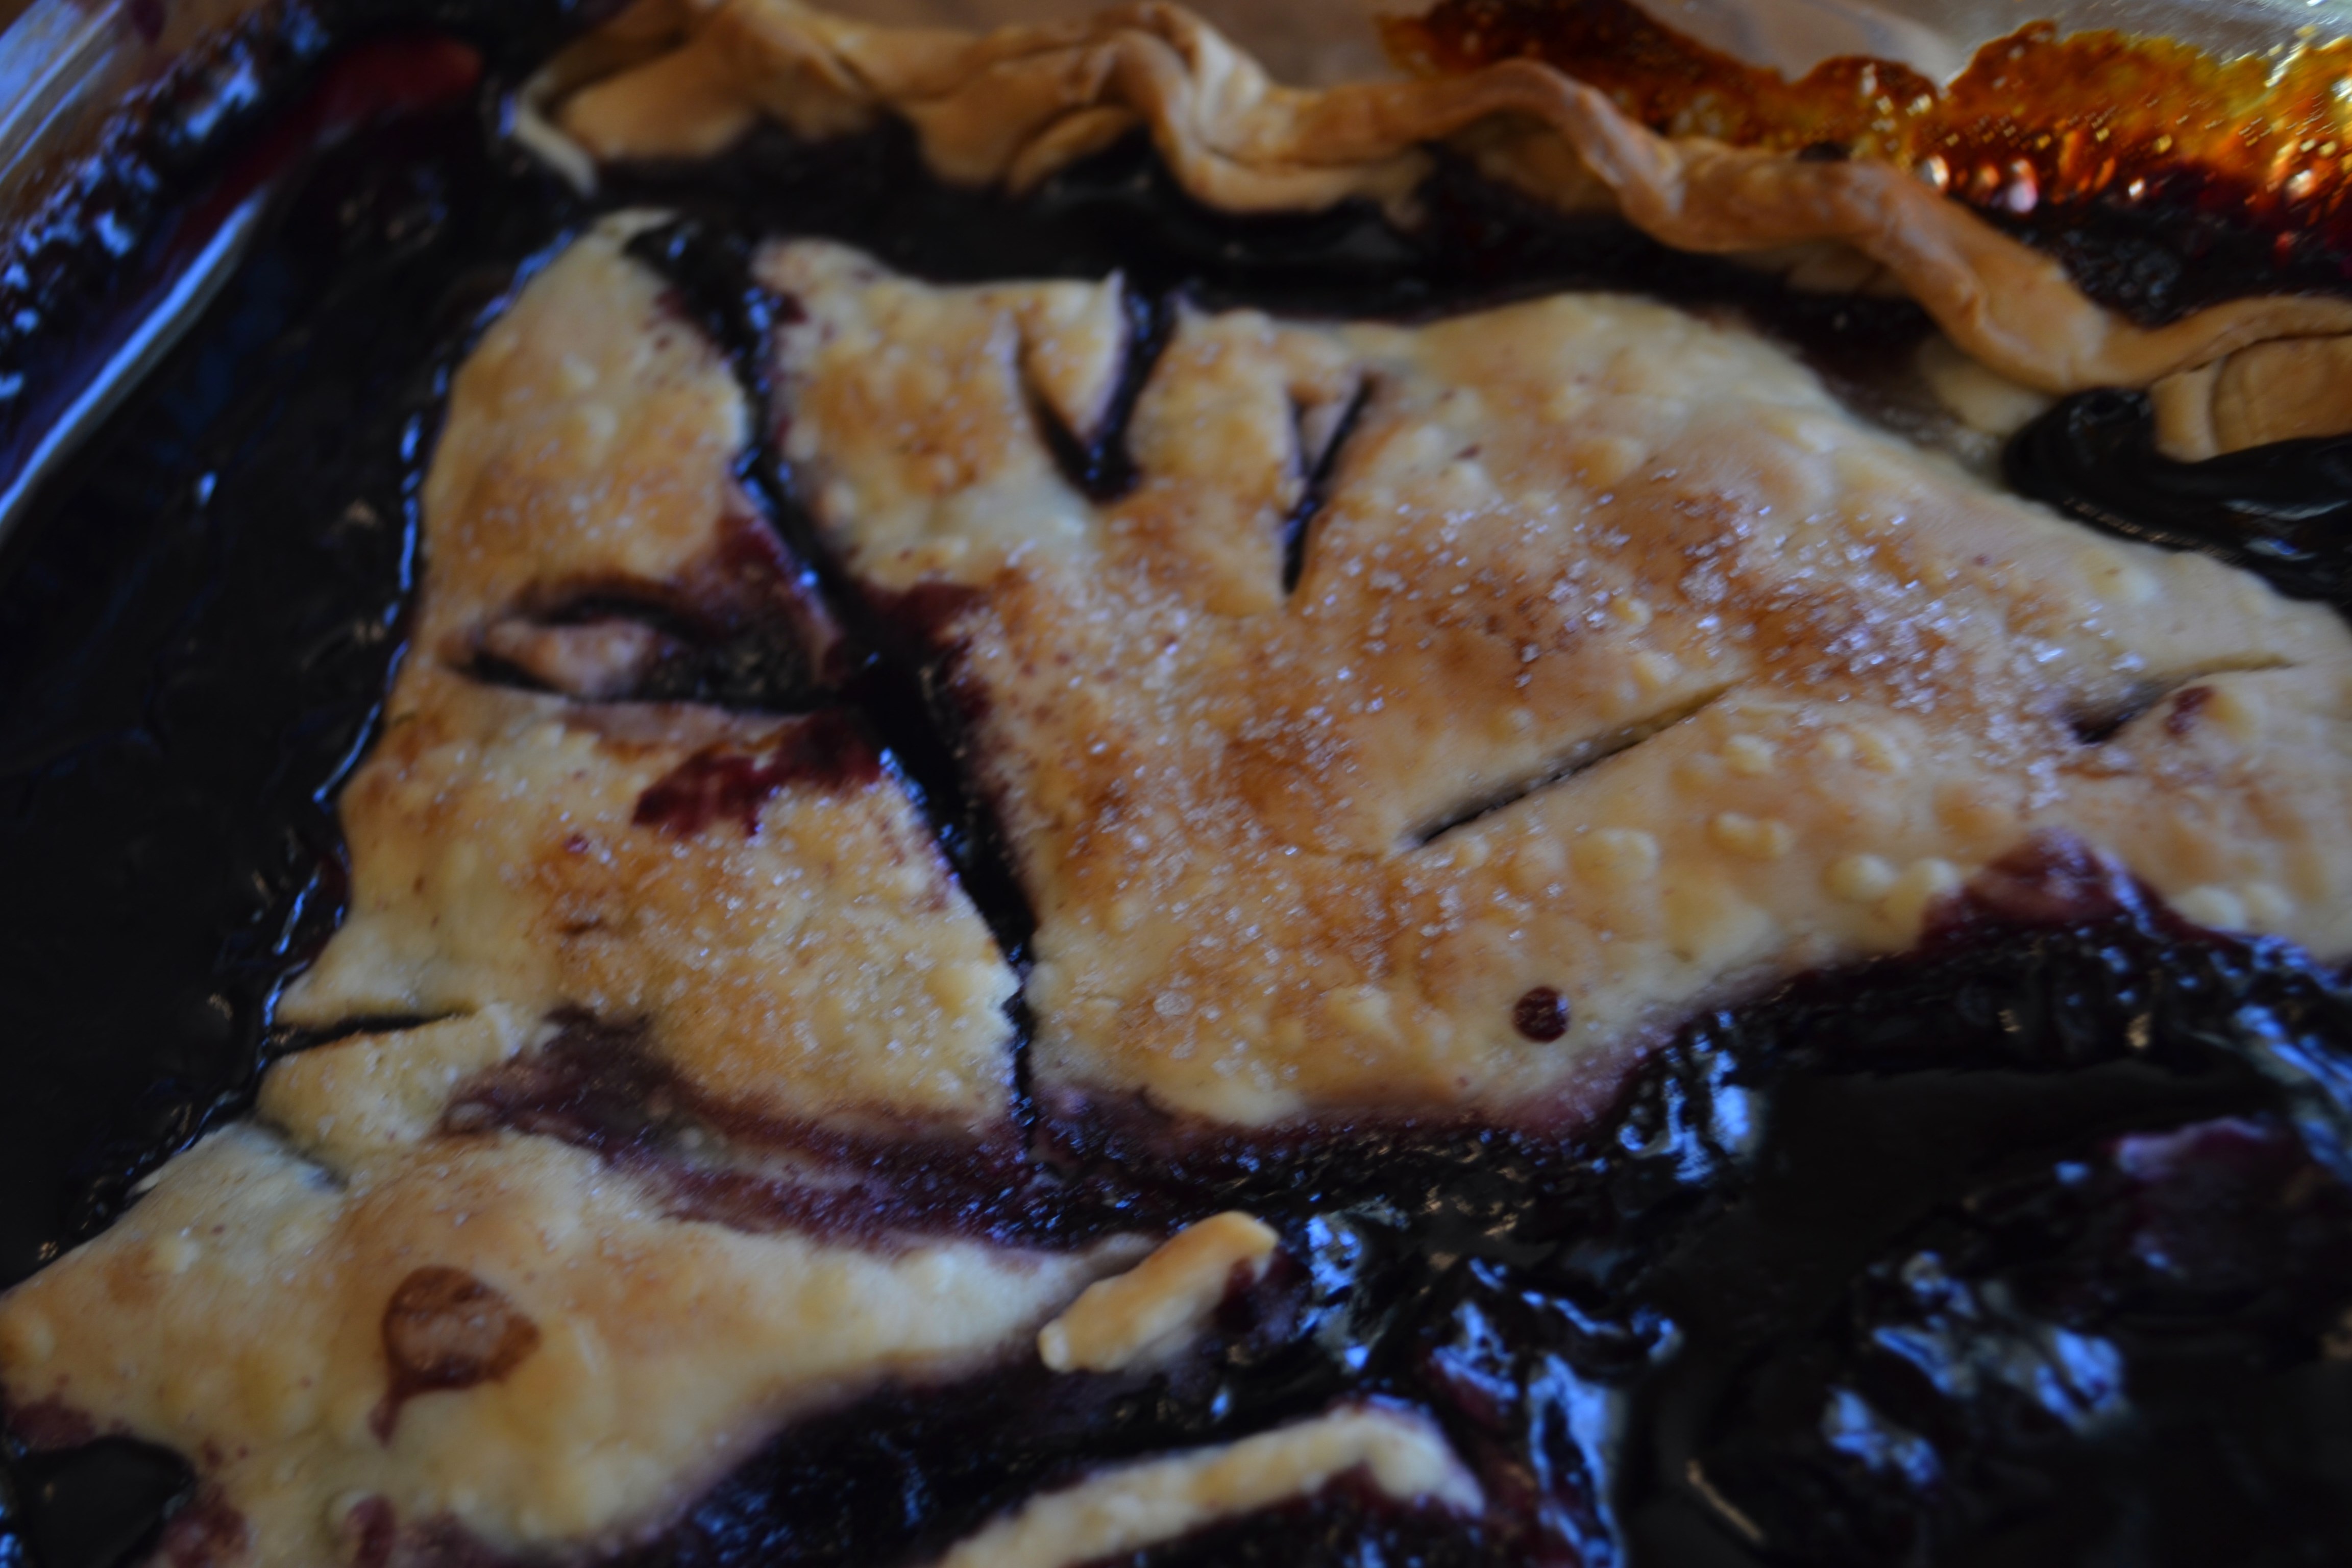
(Becky, the Mama.) I just returned from bringing this simple cobbler to my pastor Hugh Halter’s new ranch house for a pot luck lunch on the back porch. It is mid-January but I do believe God decided to borrow a perfect Spring Day from April, and drop it on us today as an early treat. Hugh is also a passionate author and storyteller (his latest book, Flesh,just released this week), and we share a mutual love of cooking and experimenting in the kitchen. Today he made a yummy creamy lentil soup and a delicious quinoa salad with cranberries, diced sweet potatoes and pears with a light vinaigrette. What can I say? The man knows his way around the Bible, a horse barn and the kitchen.
So it was no small compliment when he strode out to the back porch and hollered out, “Becky Johnson! Did you make that cobbler?”
“I did,” I said.
“Well, it just changed my life. That might be the best dessert I’ve ever tasted.”
I thought about calling this “Change Your Life Cobbler,” but decided that might be over-promising a wee bit. But I will tell you that there are few desserts you can make that will garner as many kudos, for as little trouble to make, as this recipe. It is one of my standard throw-together-in-a-hurry desserts for a crowd.
Using frozen fruit and Pillsbury refrigerated pie crusts, you can assemble this dish in about five minutes. It does take about 45 minutes to an hour to cook, however. It’s nice to pop in the oven if you are having company for dinner, while you prepare the rest of the meal. Or if you are having folks over for dessert only, pop it in the oven then you can go take a nice bath and get yourself ready for their arrival. A little Blue Bell vanilla ice cream on top never hurt anybody. Some of the crust may sink a little into the berries as it cooks. No worries as I think this makes the cobbler tastes even better, with the pastry having different textures. You want it look rustic and free-formed, like a farmer’s wife just made it.
Try this cobbler with other combinations of fruit, fresh or frozen. Peaches, Apples, Rhubarb, and Raspberries would also be delicious. If you like you can add a little cinnamon or nutmeg, vanilla or almond flavoring for variety.
Easy Rustic Cherry Blueberry Pastry-Style Cobbler
4 cups frozen blueberries (you may also use fresh if in season and on sale)
2 1/2 cups frozen dark sweet pitted cherries
1 1/2 cups sugar (plus 2 more T. for sprinkling on top later)
1/2 c. flour
1/2 teaspoon salt
Juice of one fresh lemon
2 T. butter
2 Pillsbury refrigerated pie crusts, unrolled
Directions:
Preheat Oven to 375 degrees.
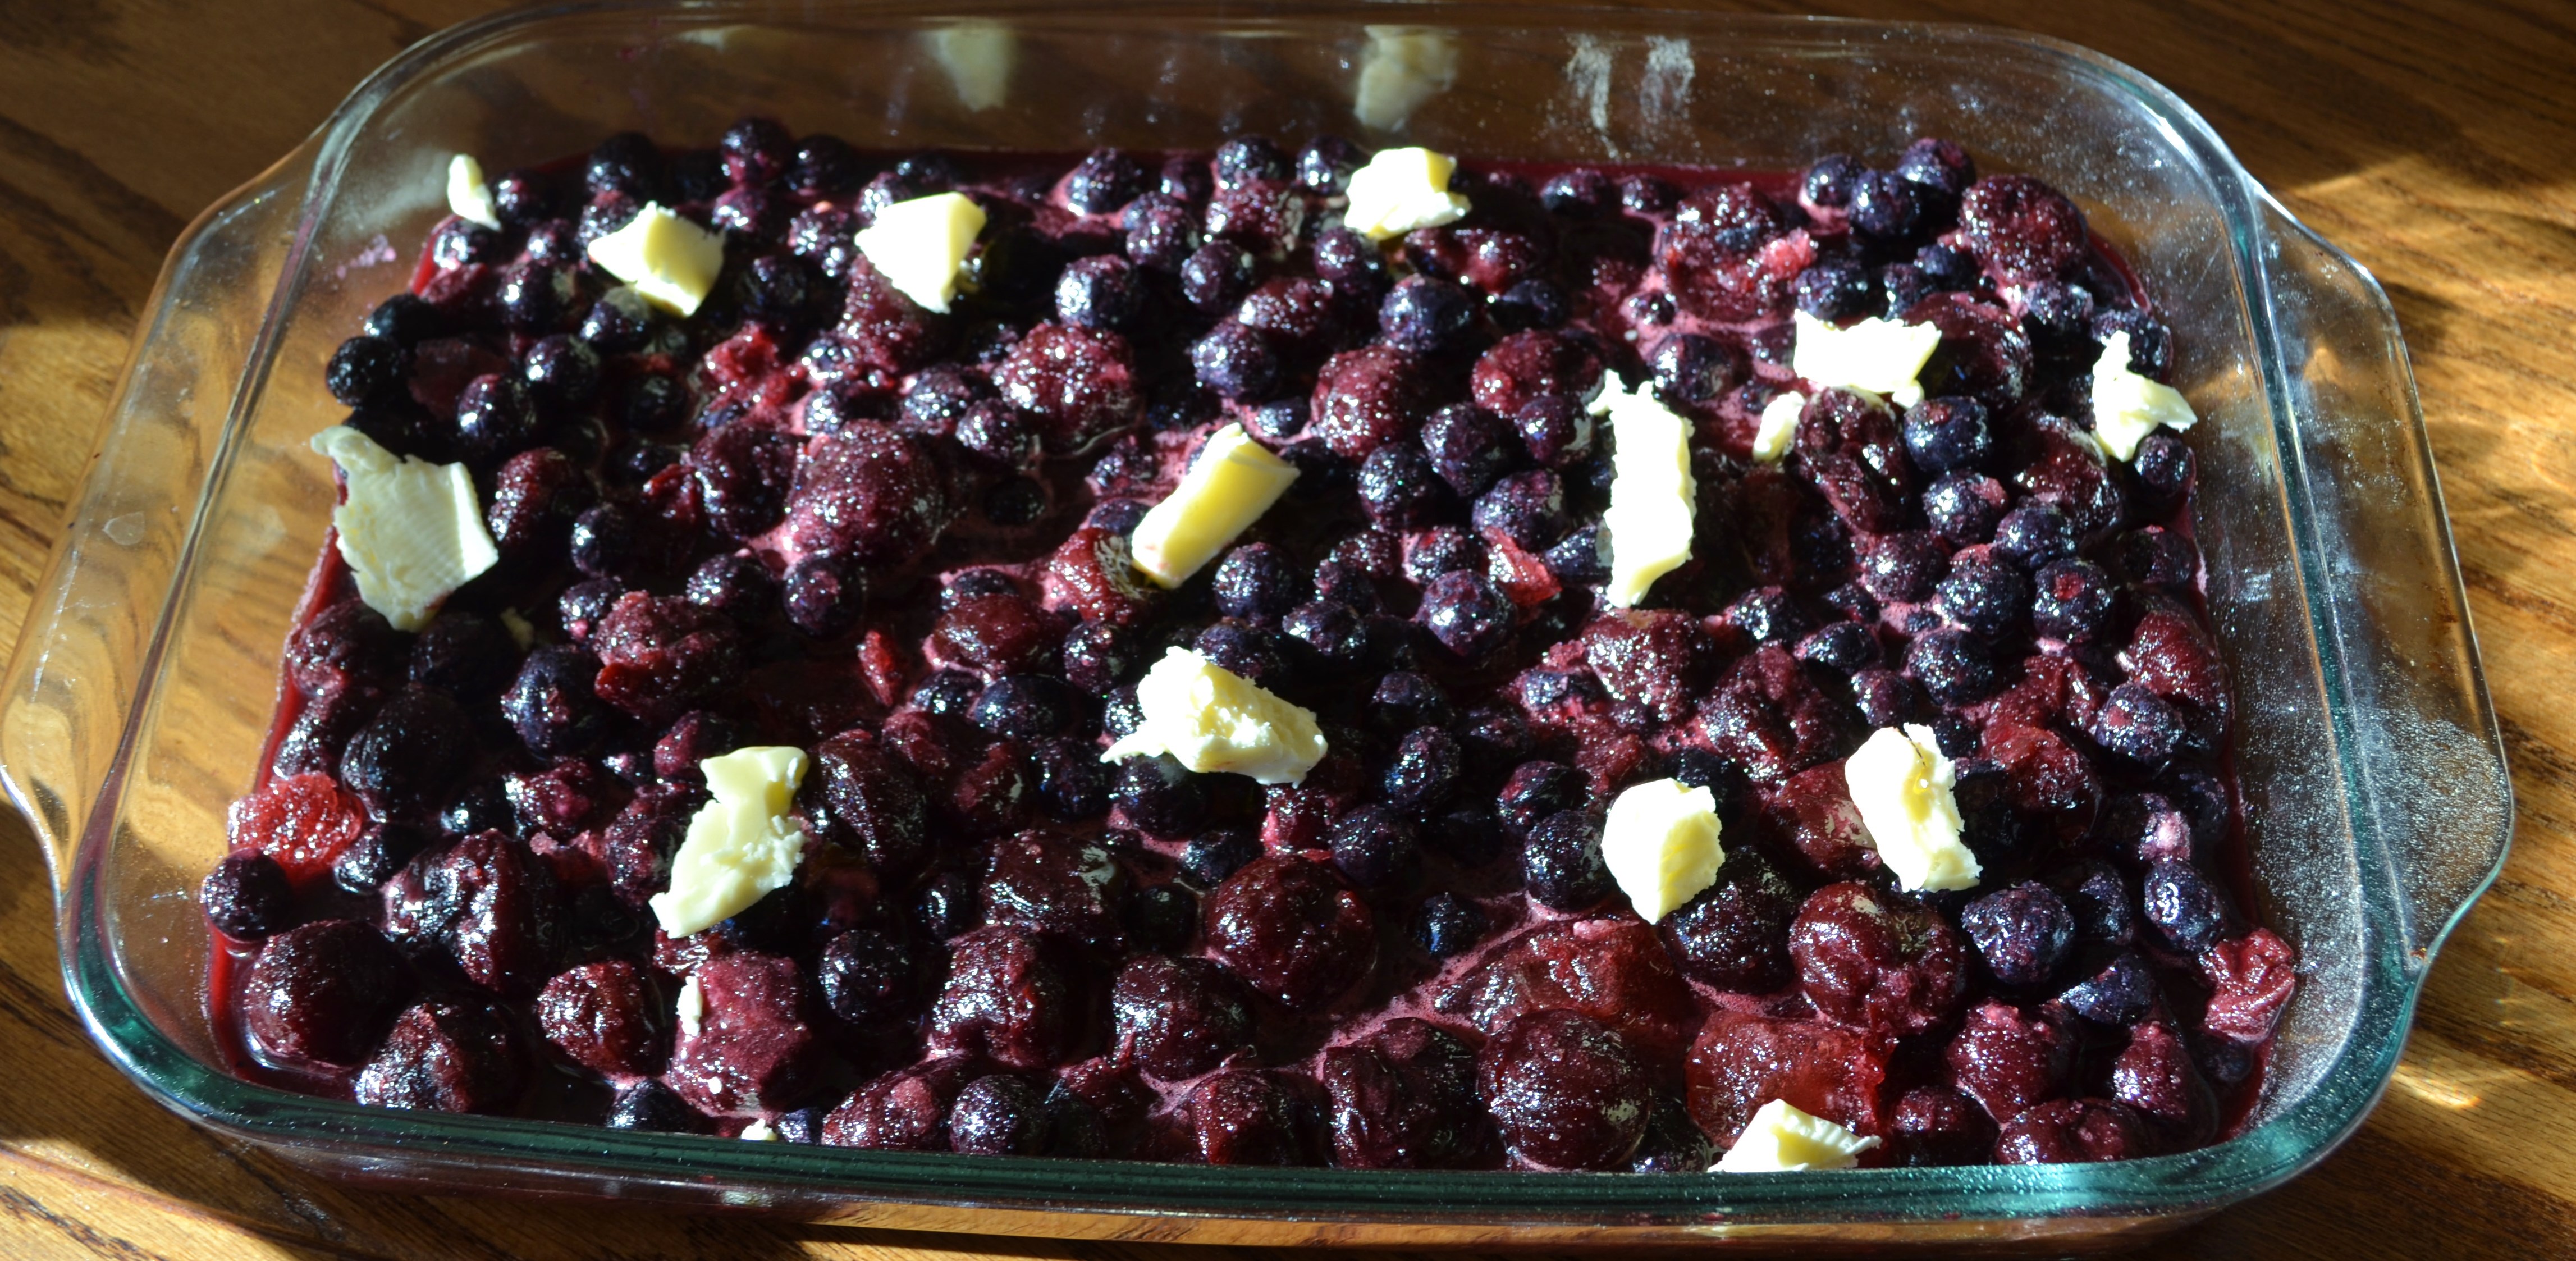
Put the fruit in the biggest bowl you have (can be frozen or thawed at this point). Toss with sugar, flour, salt and lemon juice. Pour into a lightly greased, large, oblong Pyrex pan.
Take small pinches of the butter and dot it all over the top of the fruit.
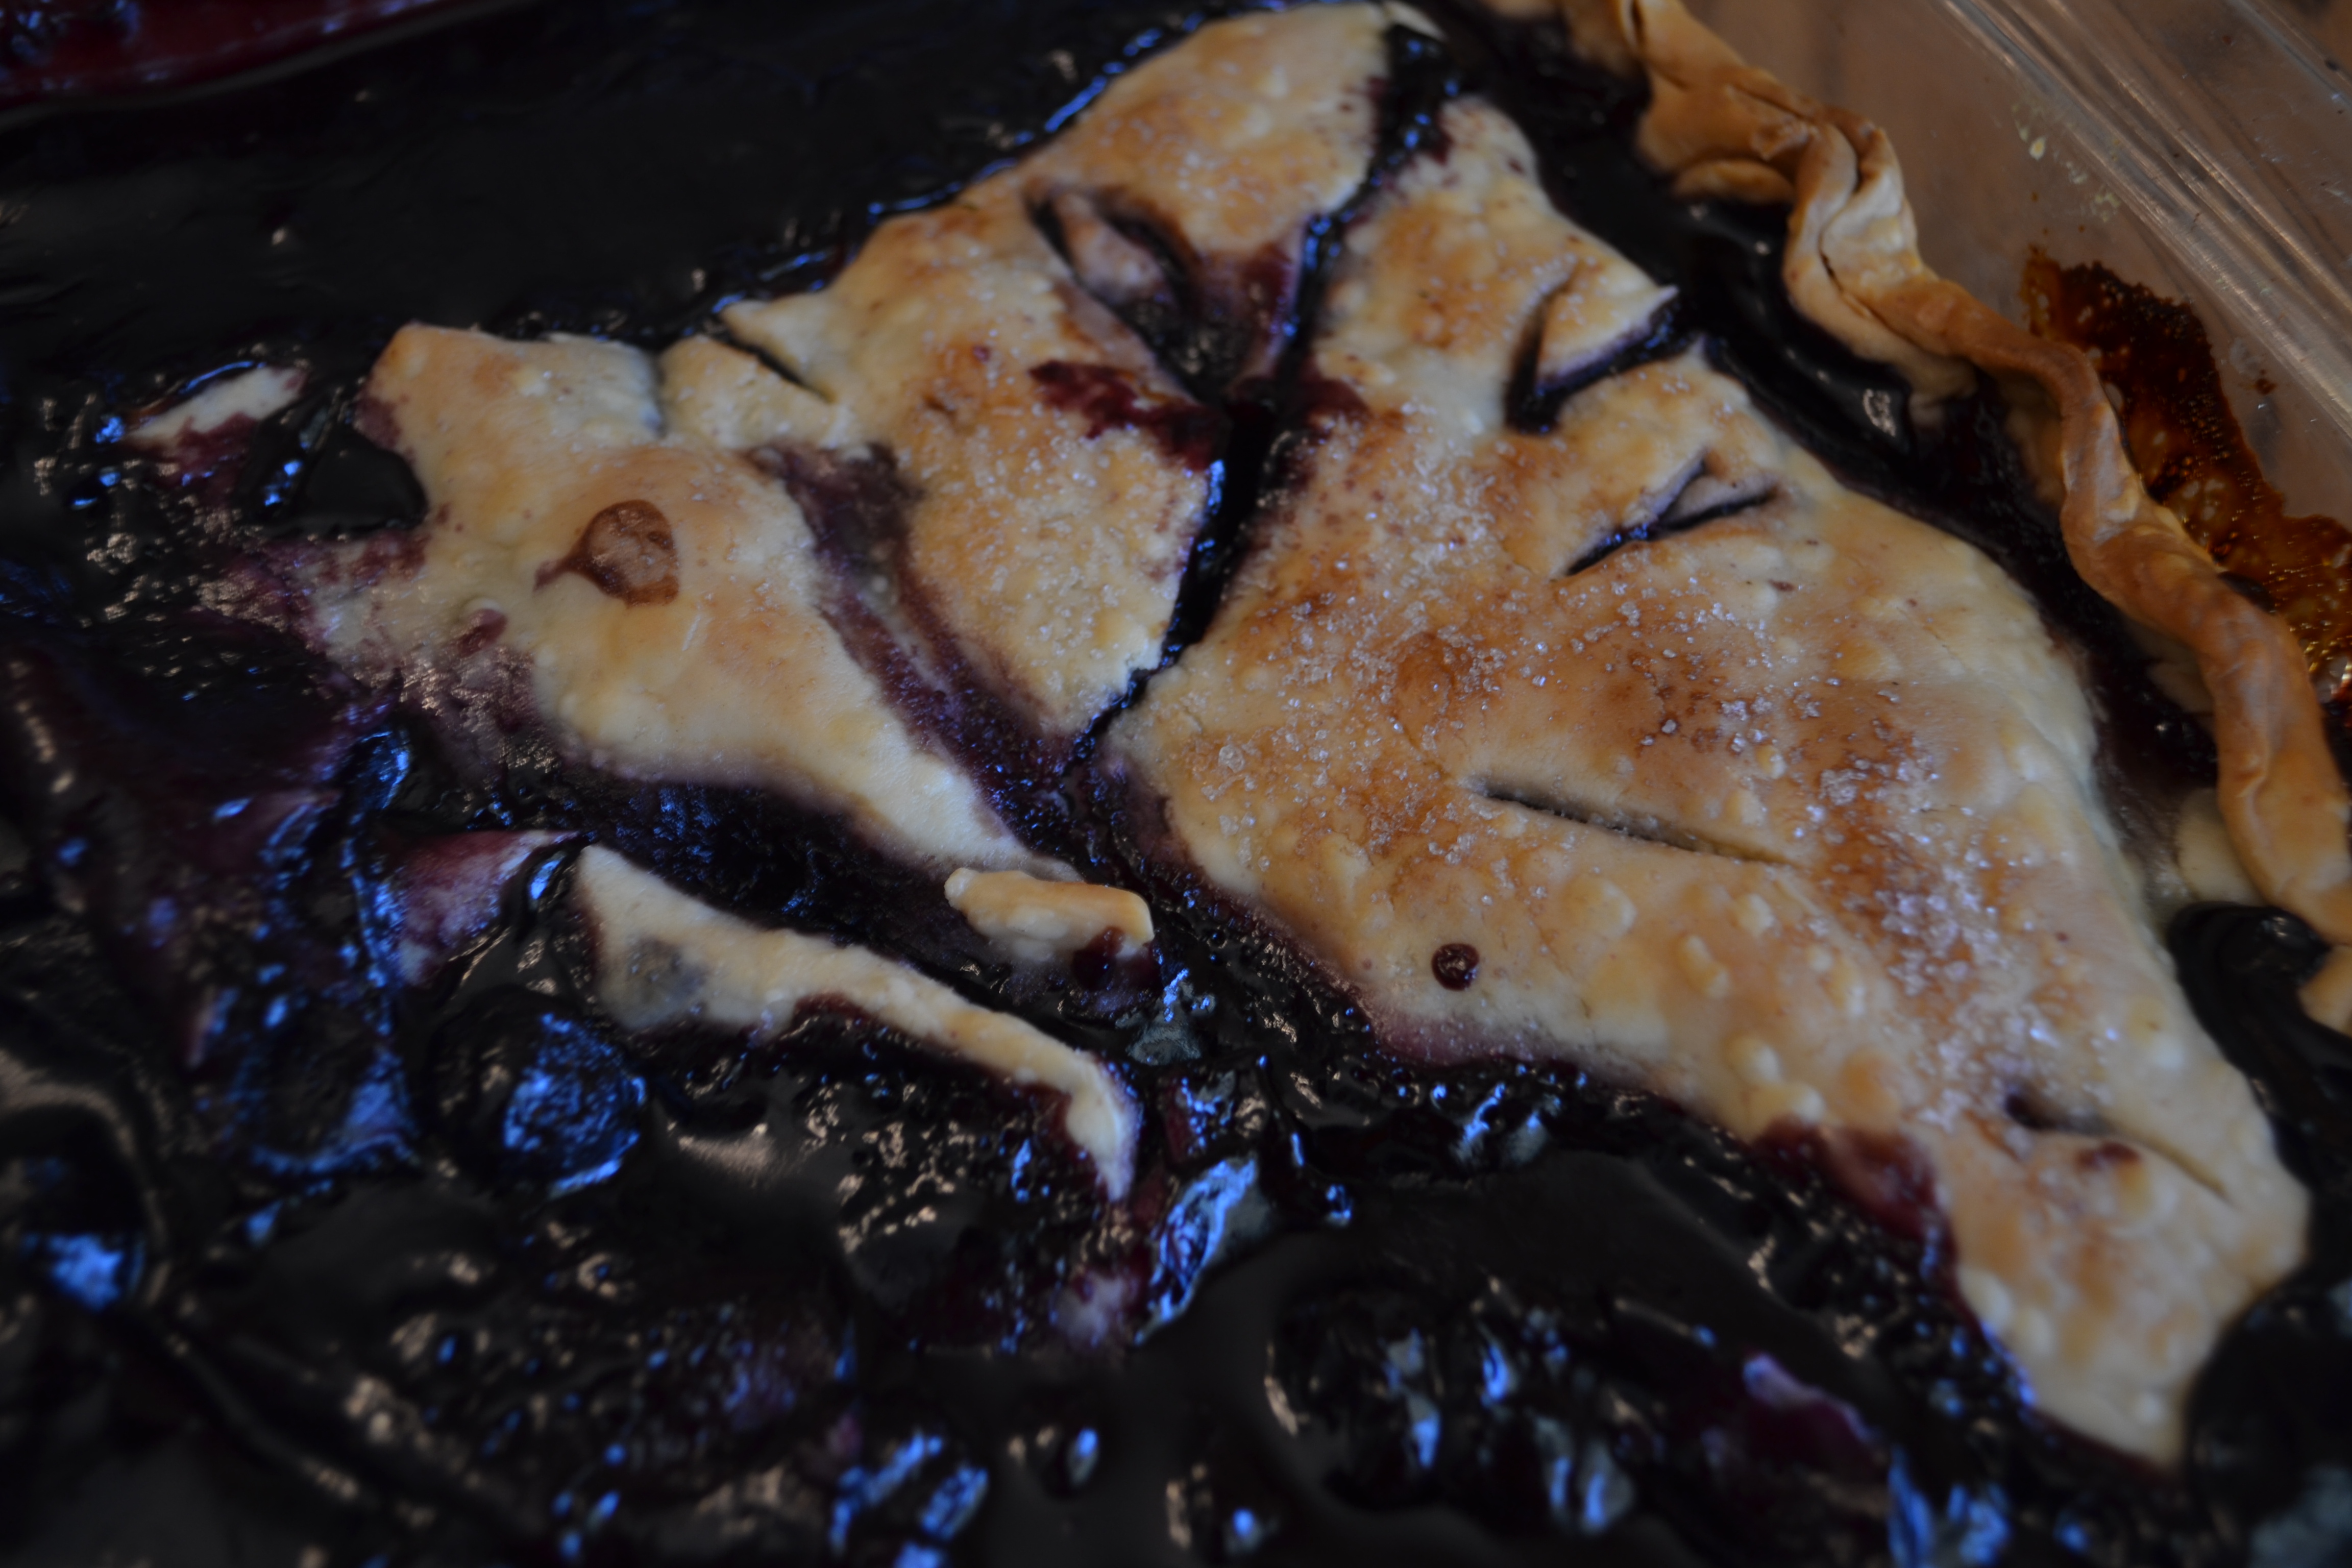
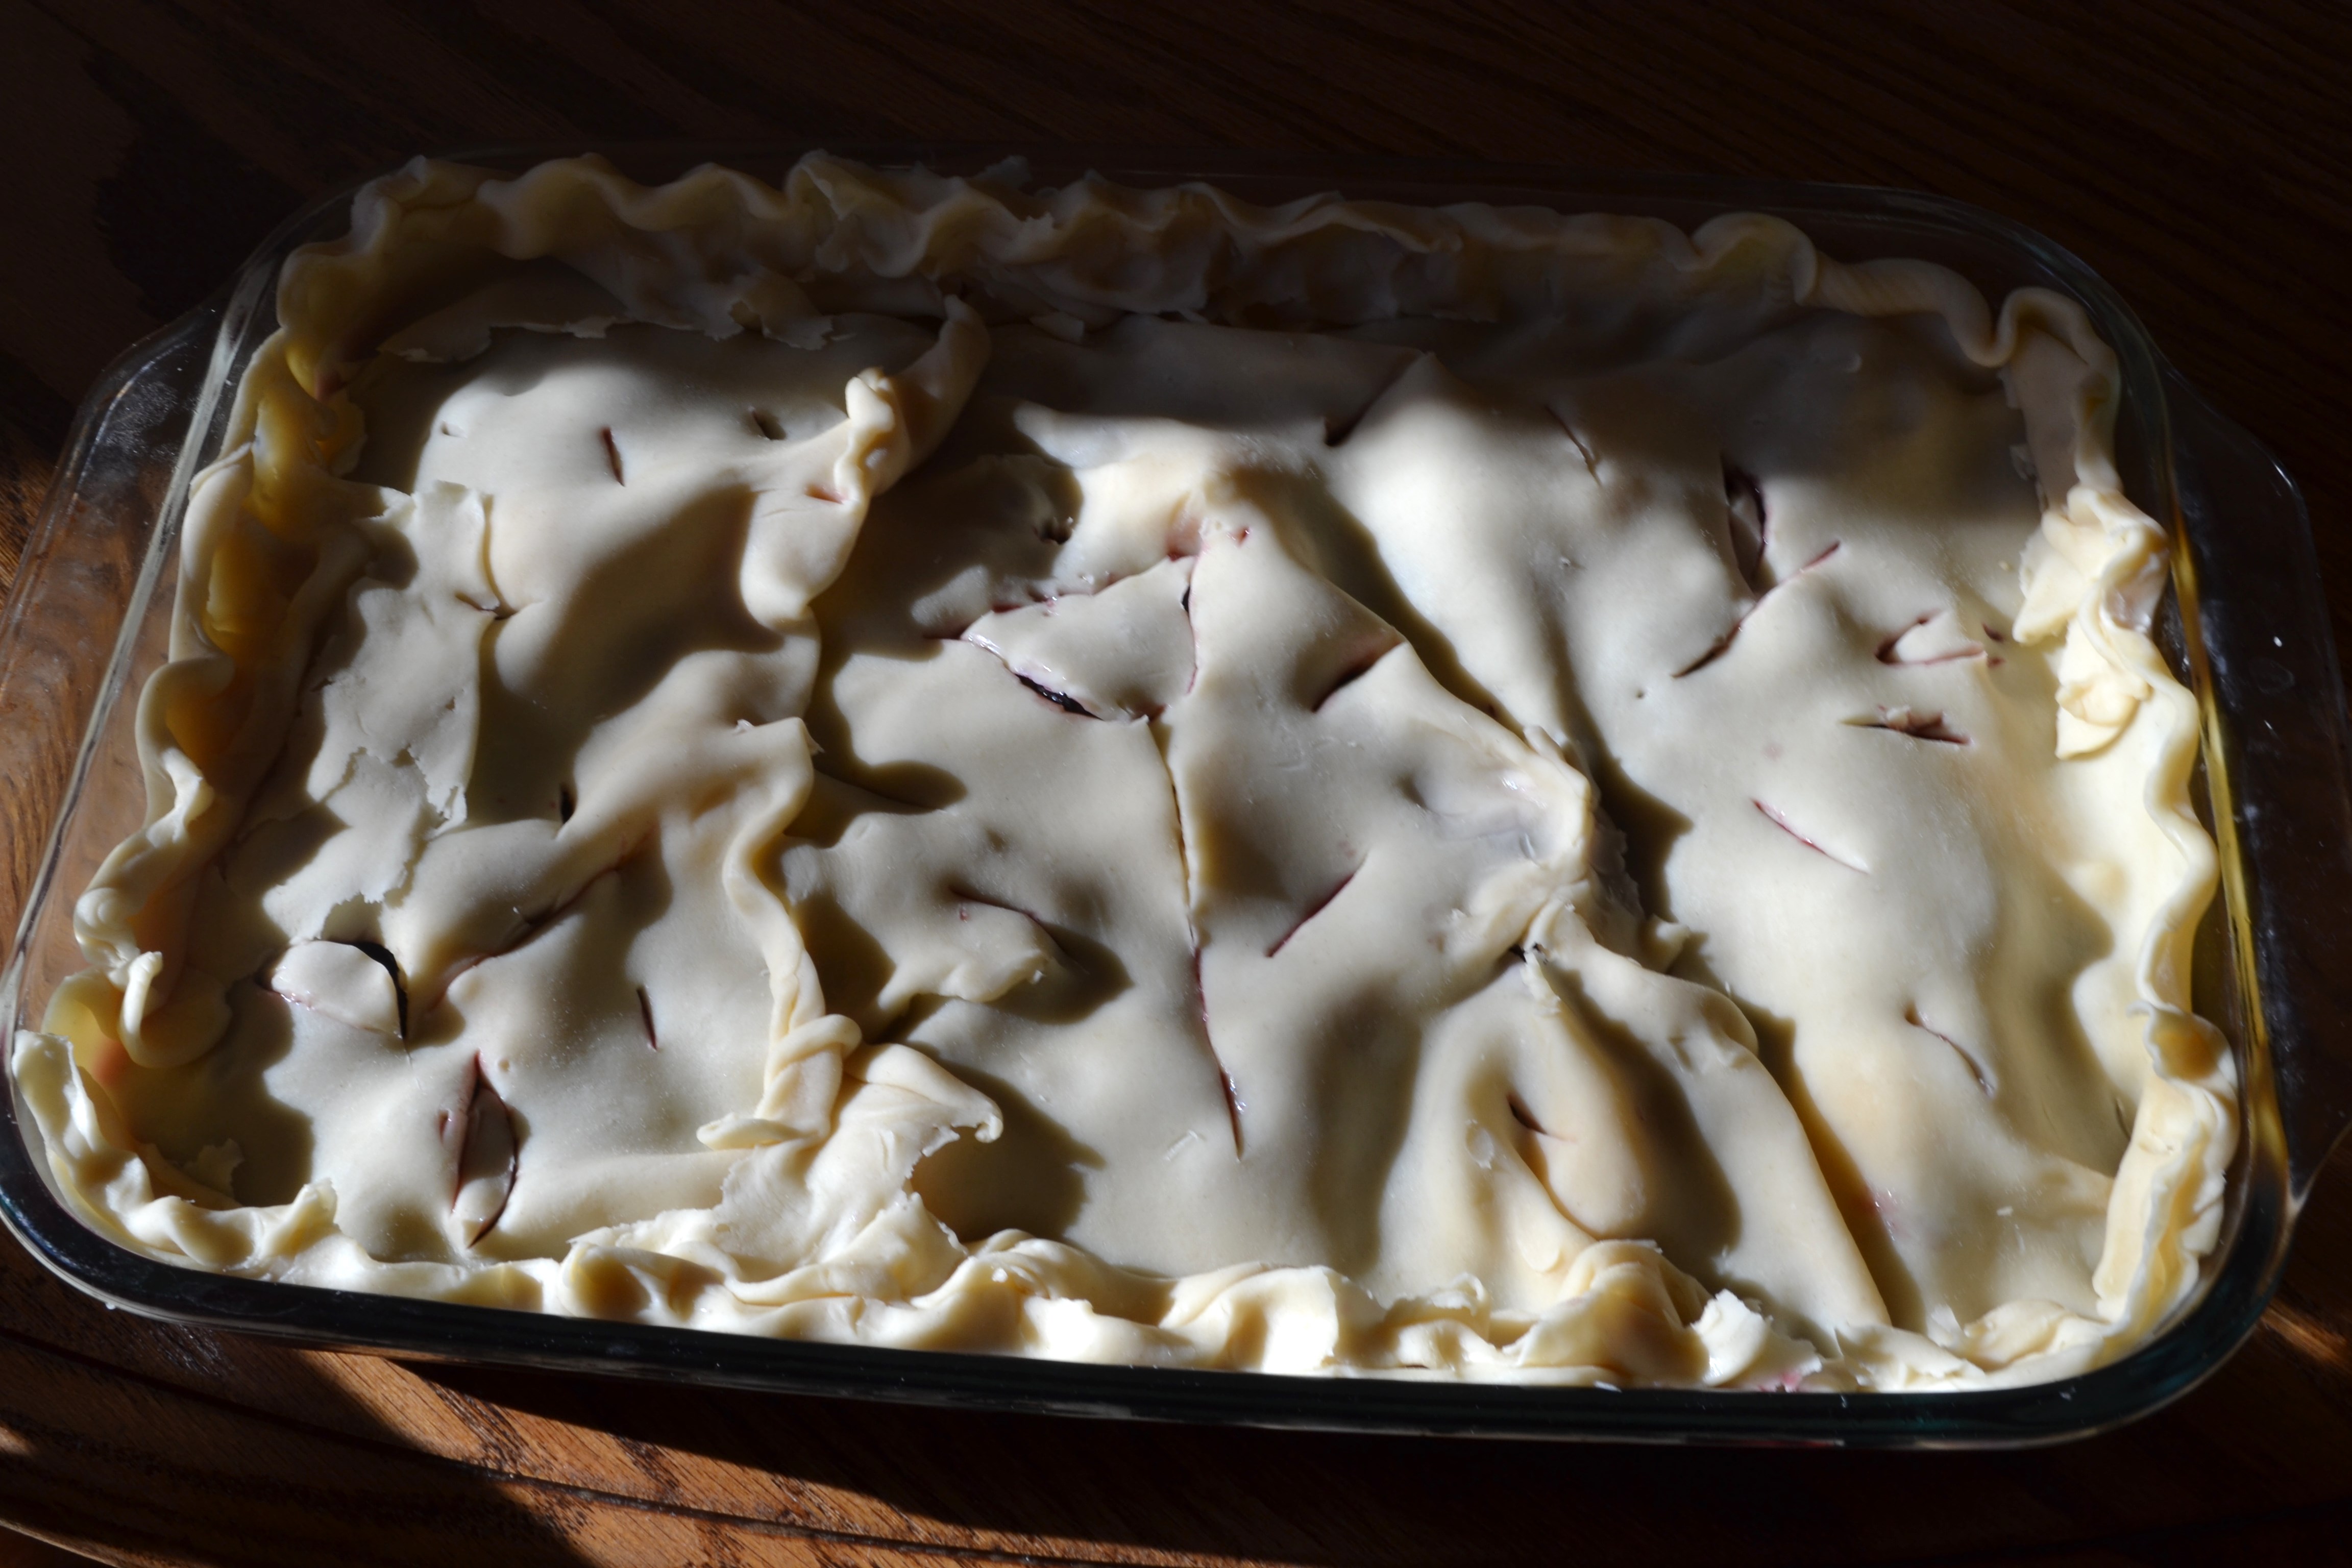
Place one pie crust at the end of the pan, and lightly tuck it in to place. Tear the other pie crust in pieces to fit the oblong plan as best you can, and pinch any seams together, free form, like a patchwork quilt. I like to make an edge and flute it a little bit, but do not worry about making it perfect. Using a sharp paring knife, cut a few designs in the pastry to allow the juice to steam through. Sprinkle the top top of the pastry with 2 T. sugar.
Bake for 1 hour if the fruit is frozen, for about 45 minutes if thawed. You want the pastry to be very golden and juice to be thickened. Let it sit at least 15 to 30 minutes before serving. Is wonderful plain or with a bit of whipped cream or vanilla ice cream.
Rustic Iron Skillet Pot Pie
Posted: April 6, 2012 Filed under: Beef, Chicken, Main Dishes, Uncategorized, Vegan, Vegan Options, Vegetarian | Tags: beef pot pie, chicken pot pie, gravy, iron skillet pot pie, pie crust, pot pie, rustic pot pie, vegan pot pie, vegetarian pot pie, veggie pot pie 4 Comments
Homestyle Iron Skillet Pot Pie
My daughter is usually somewhat appalled at the disorganization in my refrigerator, along with the occasional discovery of leftovers-turned-science experiments lurking in its dark recesses.
On her last visit to Denver, her husband Jared was hungry and I told him, “Just look in the fridge and see what looks good to you. You never know what you might find.” To which Rachel immediately deadpanned, “Or what might jump out at you.”
So before I accidentally create new life forms from my leftovers, I really do try to use them up in more timely fashion these days. There are certain recipes I go-to when I need to use up the food I have on hand at the end of the week. This easy version of pot pie is one of the most successful and requested ones.
It is a little slice of flaky, creamy, hot home-style goodness. I don’t know why pot pie tastes so much better in an iron skillet than in a pie pan, but it does. And you’ll be amazed how easy it is, how fast it cooks up and comes together. (However, if you don’t have an iron skillet, it is still pretty darn amazing in a deep dish pie pan.)

Becky’s
Rustic Iron Skillet Pot Pie
Serves 4 to 5
Ingredients
1 pie crust, your favorite recipe, or refrigerated version or vegan version. (Click link for a great flaky vegan recipe!)
1/4 c. flour
2 T. olive oil
2 T. butter or Earth Balance (vegan)
1 1/2 c. chicken, veggie, or beef broth
2 potatoes, peeled and diced
4 medium carrots, peeled and diced
1/4 c. teriyaki sauce
1/2 t. grated garlic
1/2 c. frozen corn
1/2 c. frozen peas
Any other bits of leftover cooked veggies you have on hand. (I had about a 1/2 c cooked mushrooms to toss into the mix tonight, along with some leftover sauteed onions & peppers.)
Leftover diced cooked meat: chicken or beef, or any combination to make 1 1/2 to 2 cups, depending on how much you like and how much room is left in the skillet! (I diced a large cooked chicken breast and a cup of diced leftover roast. I often use leftover Rotisserie chicken meat for this dish.)
For Vegans: Use 1 can drained kidney beans and 1 can drained butter beans in place of meat. The kidney beans add a nice firmness and color and the butter beans are big and creamy and well, buttery. The combination makes a very tasty veggie pot pie. If you have a favorite vegan meat substitute, this could also be used.
Salt & Pepper to taste
Directions:
Preheat to 400 degrees.
Cook diced potatoes and carrots in about two cups water with dash of salt, turning burner to high to get a boil going, then down to medium heat to let them simmer.
While potatoes and carrots are cooking, mix 1/4 c. flour with 2 T. oil and 2 T. butter (Earth Balance for Vegans) in bottom of 10 inch iron skillet. Cook and stir constantly on medium heat until a paste forms (happens quickly), and while stirring with one hand (use a whisk), pour 2 1/2. cups veggie, beef or chicken broth slowly into skillet to make thickened gravy. (If you are new to gravy-making it helps to have a partner do the slow pouring of broth while you whisk.)
To the simmering gravy add:
2 T. teriyaki sauce
1/2 t. grated garlic
1/2 c. frozen corn
1/2 c. frozen peas
Any other leftover veggies you have on hand. (I had about a 1/2 c cooked mushrooms to toss in to the mix tonight, along with some leftover sauteed onions & peppers.)
To this add the drained, cooked carrots and potatoes. Gravy should be pretty thick and creamy (about consistency of heavy cream); adjust to desired thickness by simmering more to thicken, or adding a little more broth to thin. (You can add a splash of half-in-half or cream if you want a more creamy gravy.)
At this point, add salt and pepper to taste. Stir. Remove from burner.
Place uncooked pie crust over the top of the hot gravy-veggie mixture and carefully (that skillet is hot!) tuck the edges of the pie crust just inside the cast iron pan as pictured. Cut decorative slits in pie crust with a sharp knife to allow steam to escape.
Transfer skillet (using potholders) to 400 degree oven for 20 minutes or until crust is flaky and golden.
Serve pot pie at the table in the skillet, with big spoon to let each person dip out what they want. (Be sure to wrap a tea towel around handle of iron skillet so nobody burns themselves touching it.) Best served and eaten in bowls to catch every drop of goodness. Serve with a simple side of sliced fresh fruit and you’ve got dinner!
Variations: Some people prefer more “crust” with their pot pie. I love pie crust, too, but too often the bottom of pot pies can be soggy. So I will simply cook an extra round of pie dough, flat, on a cookie sheet, break it up in about 2 inch pieces, and serve in a bowl at the table, allowing “pie crust” lovers to add more crispy crusts to their bowl if desired. No soggy bottoms!


