
Black Forest Greek Yogurt Parfaits
Posted: February 6, 2013 Filed under: Appetizers, Desserts, Fruit Dishes, Snacks, Uncategorized, Vegan, Vegan Options, Vegetarian | Tags: Black Forest, cherries, cherry preserves, coconut yogurt, dark sweet cherries, Fage's yogurt, Greek yogurt, Hershey's chocolate syrup, mini chocolate chips, parfait, parfaits, So Delicious yogurt, yoghurt, yogurt 2 Comments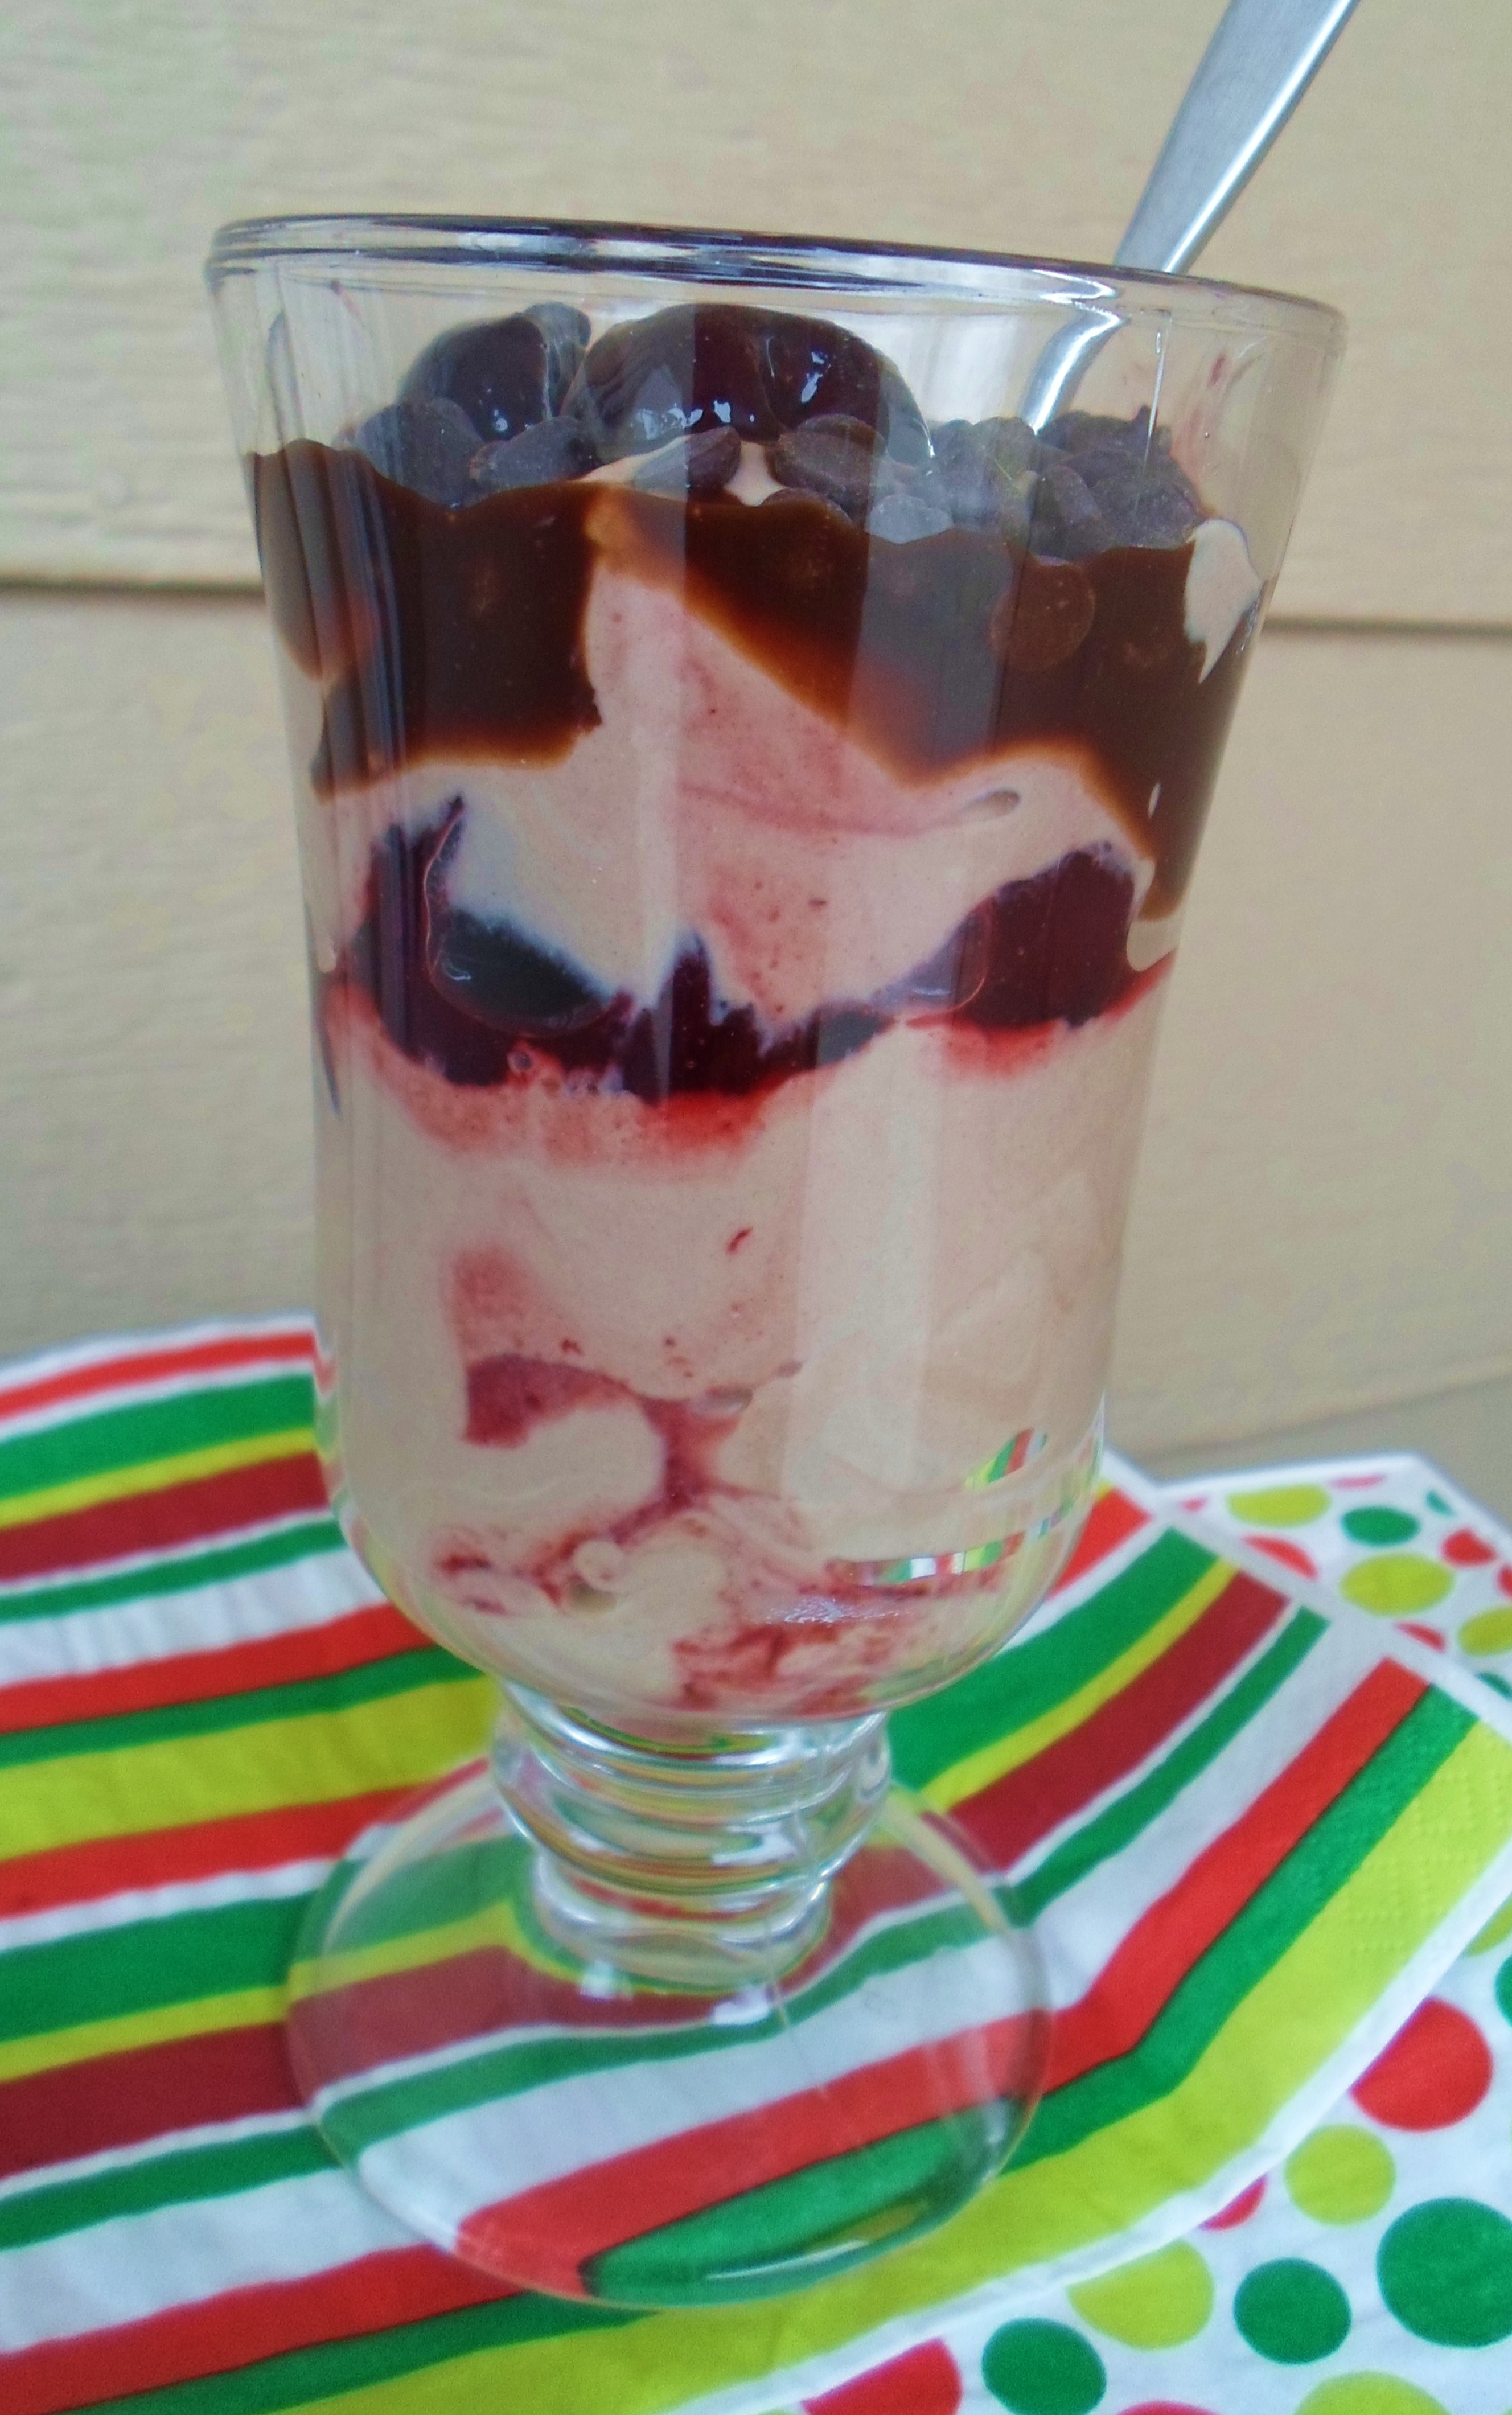
“……even if you don’t know anybody, and you don’t know what’s gonna happen next, you should have your box of chocolates with you. You should eat your bowl of cherries. And that is what life is.”
― C. JoyBell C.
(Becky, the Mama.)
By the amount of Greek yogurt occupying grocer’s refrigerator shelves these days, I’m not the only one in love with its rich, creamy, tart texture and taste. I don’t even buy sour cream anymore and honestly can’t tell the difference. The 2% Fage brand is my favorite; so smooth with just the right amount of fat so that no one misses the cream.
Two of my favorite foods are sweet dark cherries and chocolate. (I agree with Dave Barry who says, “Your hand and your mouth agreed many years ago that, as far as chocolate is concerned, there is no need to involve your brain.”) So it is no surprise that Black Forest Cake is one of my favorite treats, but alas, it doesn’t have many redeeming nutritional assets. So I come up with this quick, easy, decadent Black Forest Parfait, using my favorite Greek yogurt in place of a pudding. It was love at first bite. In fact, I just made a batch of them for everyone in our family as snack, to a happy chorus of “mmm.. mmms…yum, that’s good!”
It’s a dessert you can feel good about enjoying and sharing because the chocolate adds antioxidants, the yogurt is a great source of calcium and protein, and cherries are in the top 20 foods with the highest amount of antioxidants. Also, cherries are one of the few foods that have melatonin in them, for a restful night’s sleep. Finally, by starting with unsweetened yogurt, you can control the sweetness to your own taste.
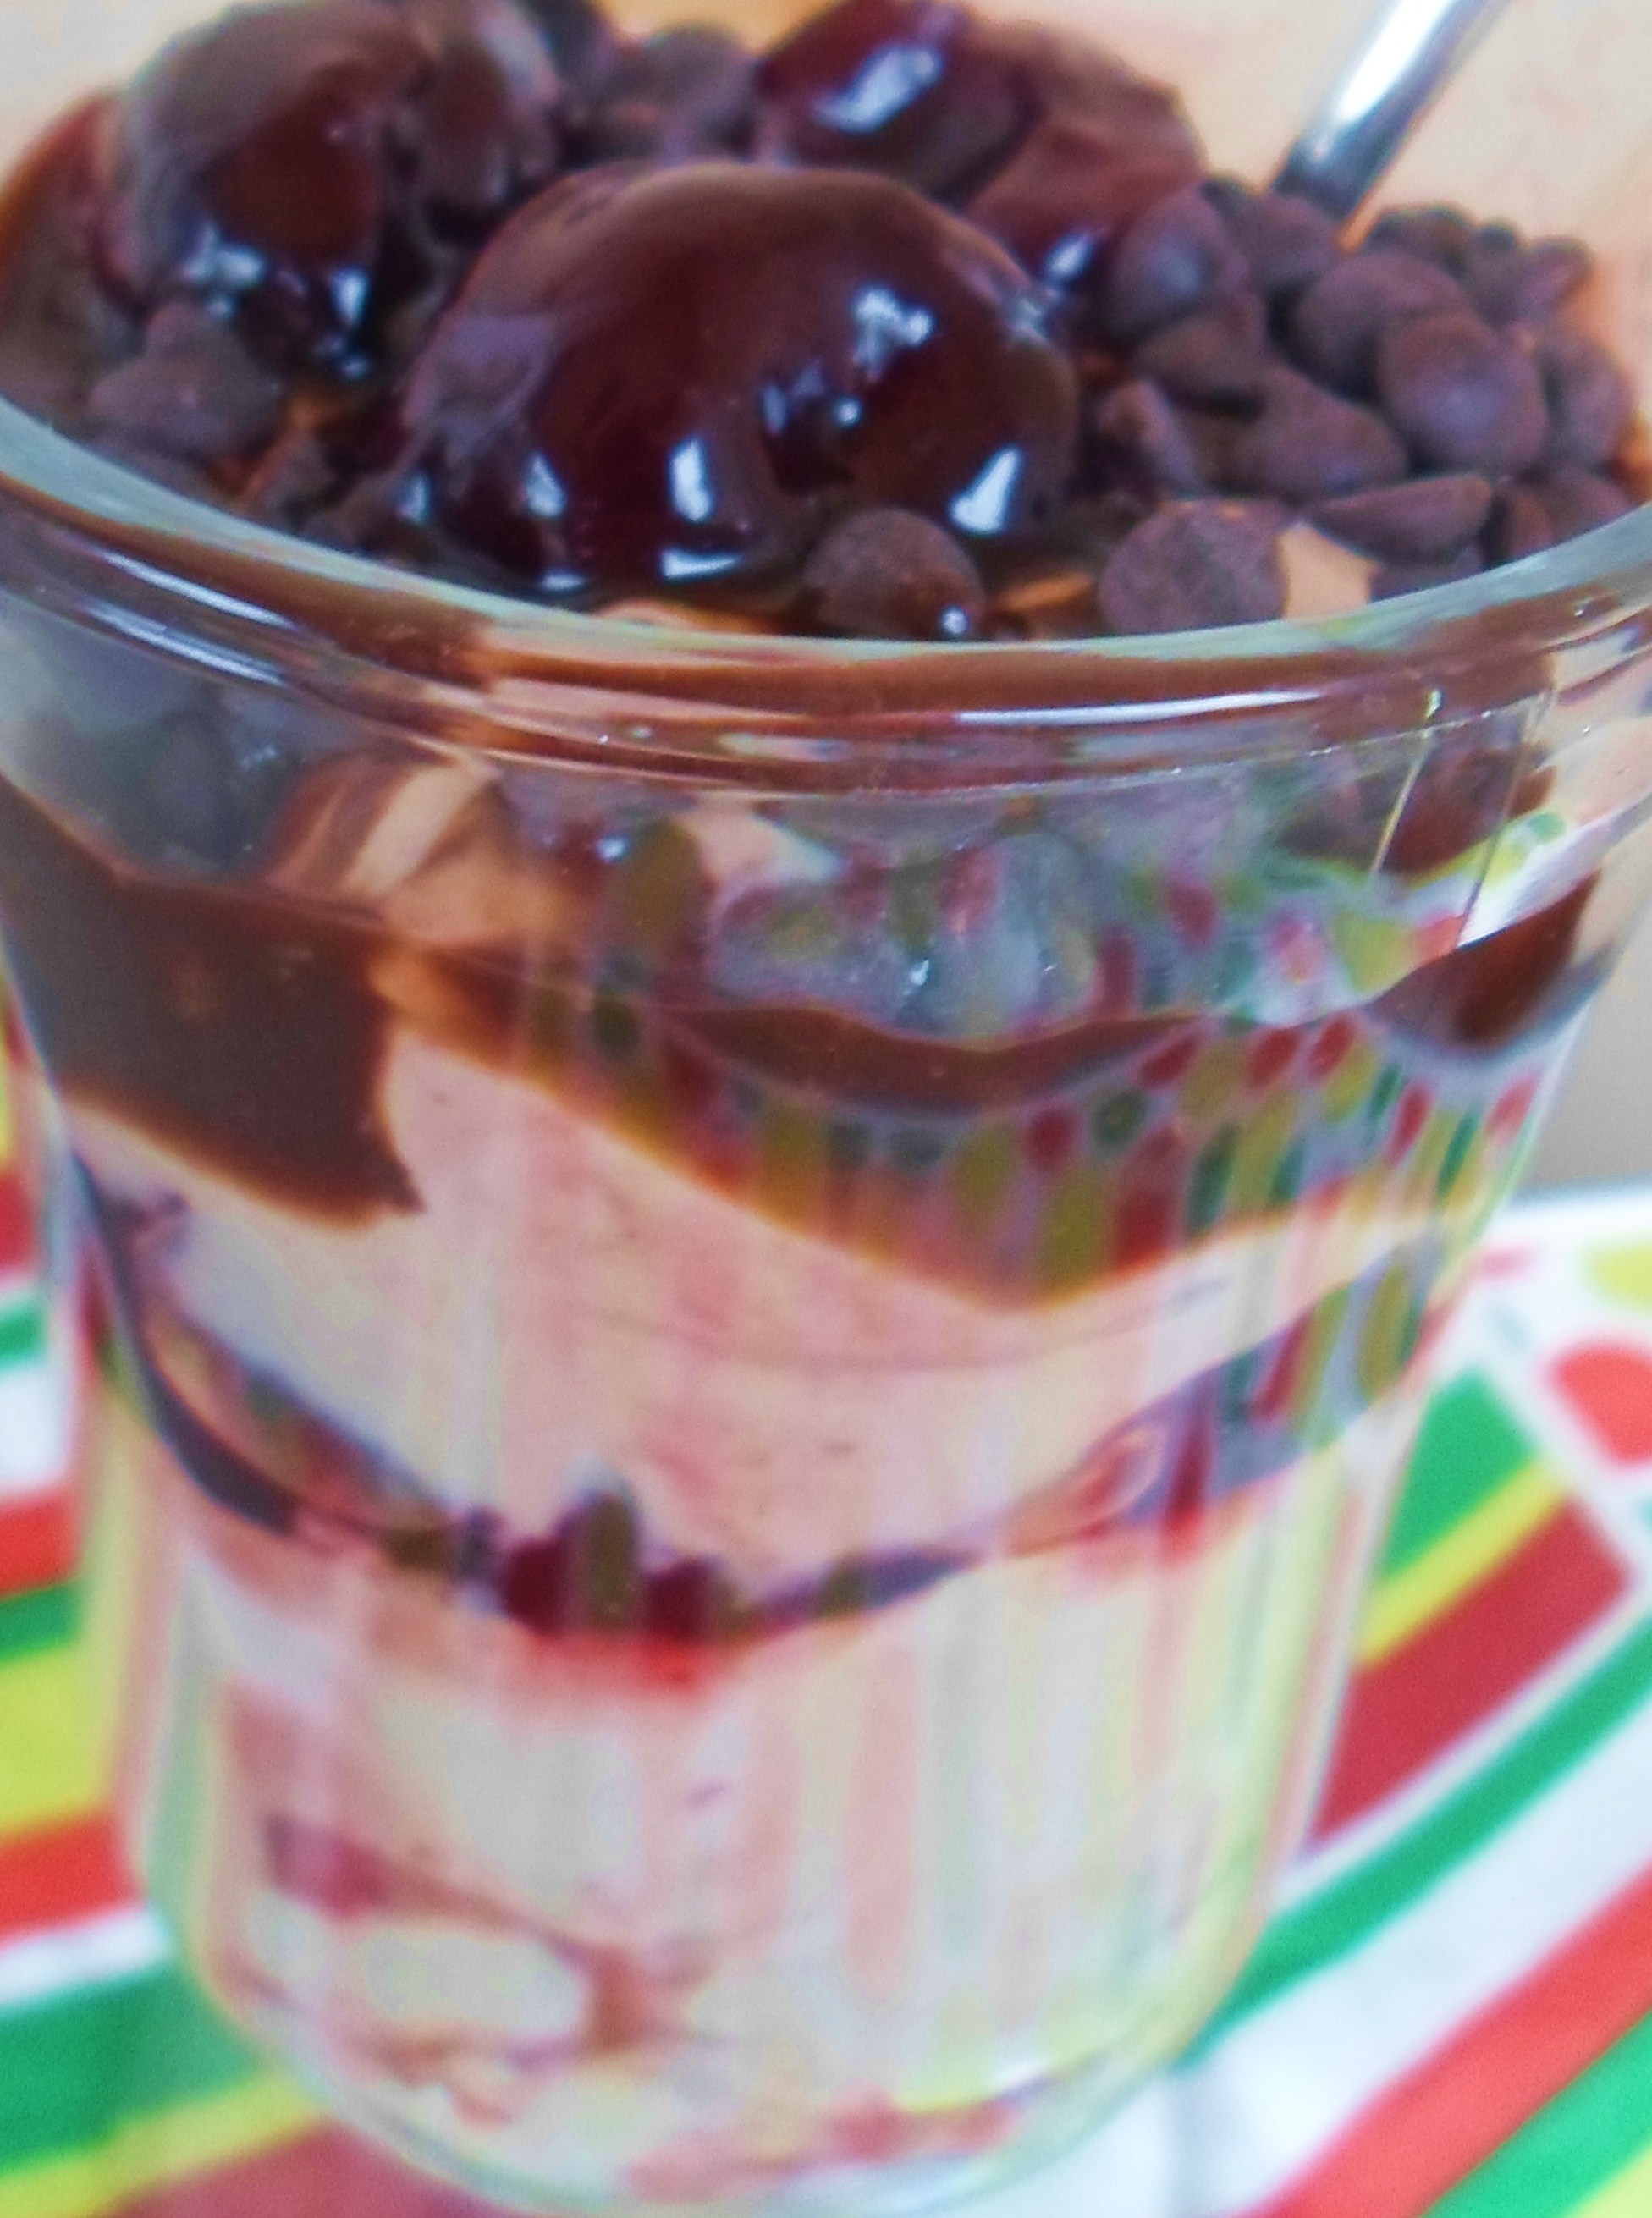
Black Forest Greek Yogurt Parfaits
Makes 2 parfaits
Ingredients
1 1/3 cups plain unsweetened Greek yogurt (Vegans can substitute So Delicious Coconut Milk “Greek Yogurt”)
1/4 c. Hershey chocolate syrup, plus a little some for decorating parfait tops (Vegans need to use a milk-free chocolate syrup)
Agave nectar to taste
2 T. mini chocolate chips (vegans use vegan chocolate chip)
1/2 c. dark sweet cherries (frozen, pitted; if they are large, cut them in half)
2 T. cherry preserves I love Bonne Maman French preserves, now available in most grocery stores. They do not have any corn syrup and are full of fruit!
Directions:
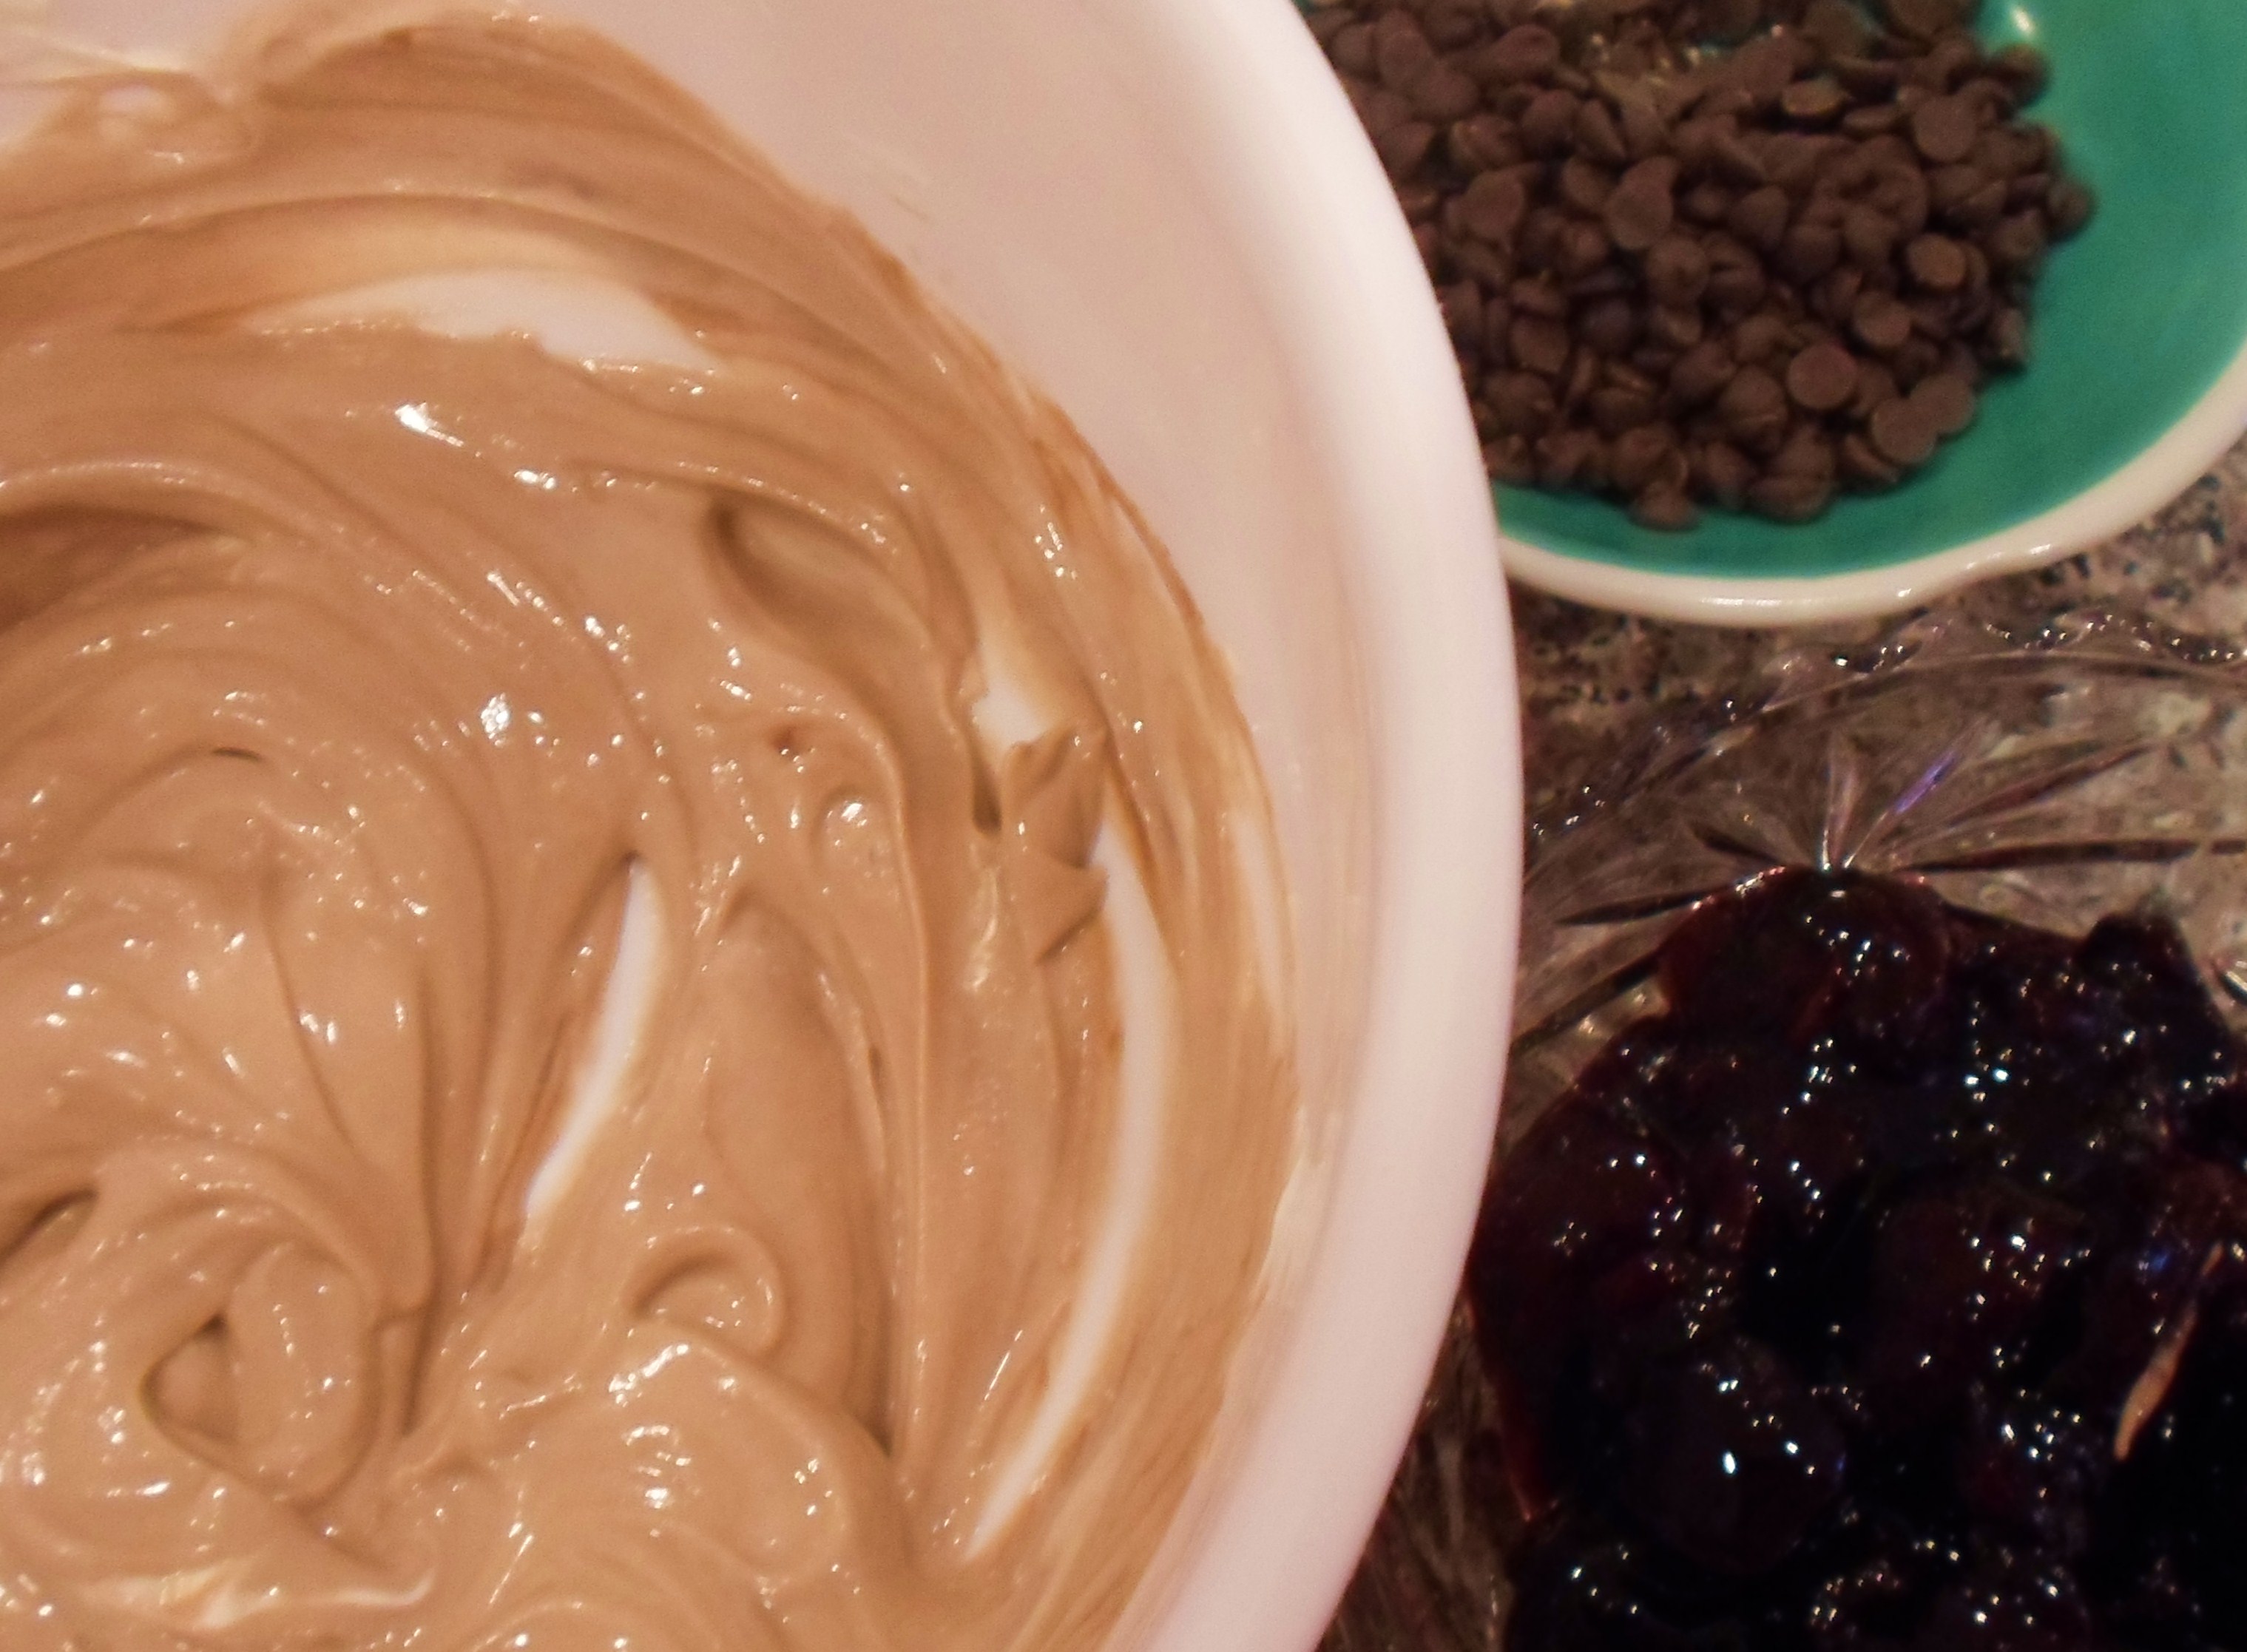
In one bowl mix yogurt with chocolate syrup. Add agave nectar if you like until it is as sweet as you prefer. In another small bowl mix the cherries and preserves.
In a tall clear mug or parfait glass, put about 1/3 cup of chocolate yogurt mixture, then put a layer of the cherry mixture on next, about 1/4 cup. (Reserve about a Tablespoon to decorate top). Follow this with another layer of chocolate yogurt (about 1/3 cup) and a nice squiggle of chocolate syrup. Top with 1 T. mini chocolate chips and a dollop of cherry mixture for decoration on top. Repeat in another mug or parfait glass.
This was printed from: We Laugh, We Cry, We Cook
The site URL: http://welaughwecrywecook.com
The Title:Black Forest Greek Yogurt Parfaits
The URL: http://wp.me/p1UwM9-SW
This was printed from: We Laugh, We Cry, We Cook
Golden Parmesan Chickpeas & Garlic Slices
Posted: January 27, 2013 Filed under: Appetizers, Main Dishes, Sides, Snacks, Uncategorized, Vegan, Vegan Options, Vegetarian, Veggies | Tags: agave nectar, chick peas, football party, garbanzo beans, garbanzos, garlic, olive oil, Parmesan cheese, sea salt, Super Bowl Snacks Leave a comment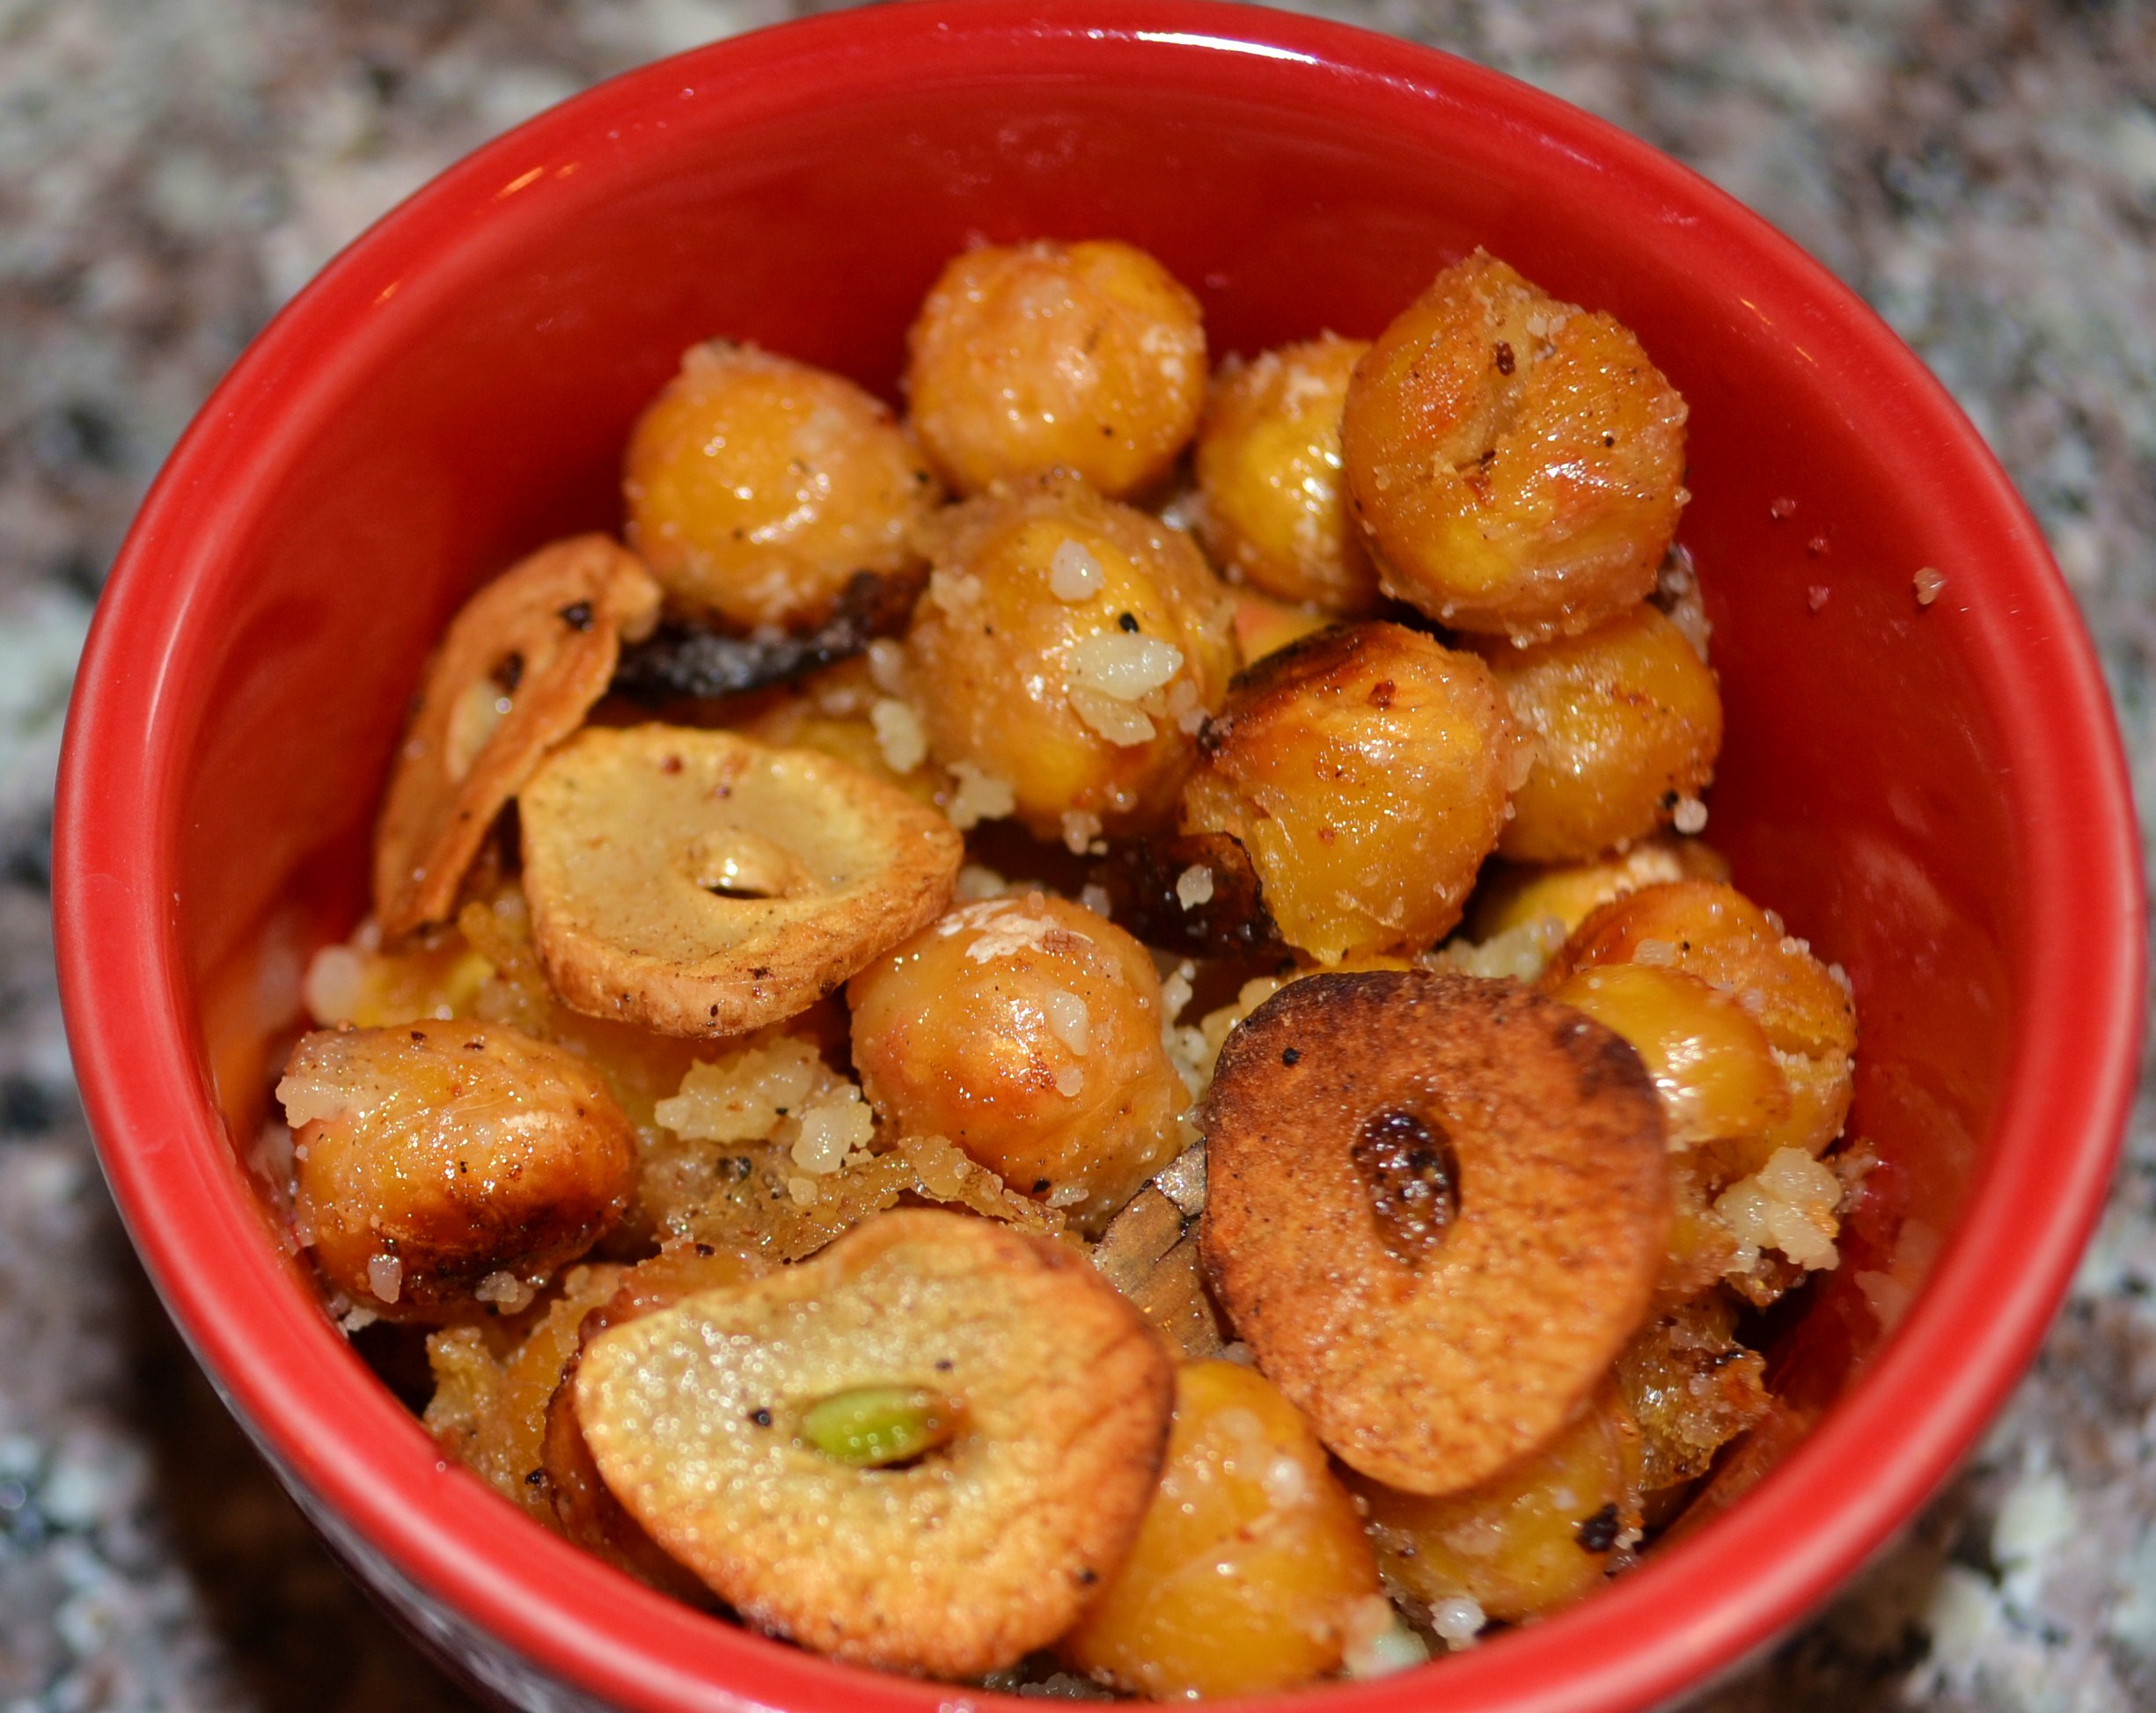
(Becky, the Mama.)
So, this is the story of how I ended up eating an ENTIRE CAN of garbanzo beans (chickpeas) in one sitting yesterday.
My daughter’s slow and steady vegan influence upon me seems to have caught fire of late. Either that or I had some really awful meat-based meals last week. We went away to a hotel for fives days so that I could finish up my part of some detailed edits on our upcoming memoir, We Laugh, We Cry, We Cook.
During my self-imposed confinement I ordered an “Asian Salad” from the hotel café –which turned out to be tasteless squares of chicken tossed in wilty Iceberg lettuce with a thick flavorless mayo-based dressing. Later, hope still afloat, I ordered a gyro, which was made from salt-less pre-cooked dry roast beef chips smothered a sauce that tasted of thickened water. I arrived home a few days later with a sudden and strange aversion to anything cut from cow or fowl. I almost kissed my fridge and pantry, so happy was I not to be at the mercy of restaurant cooks who are lacking in taste buds.
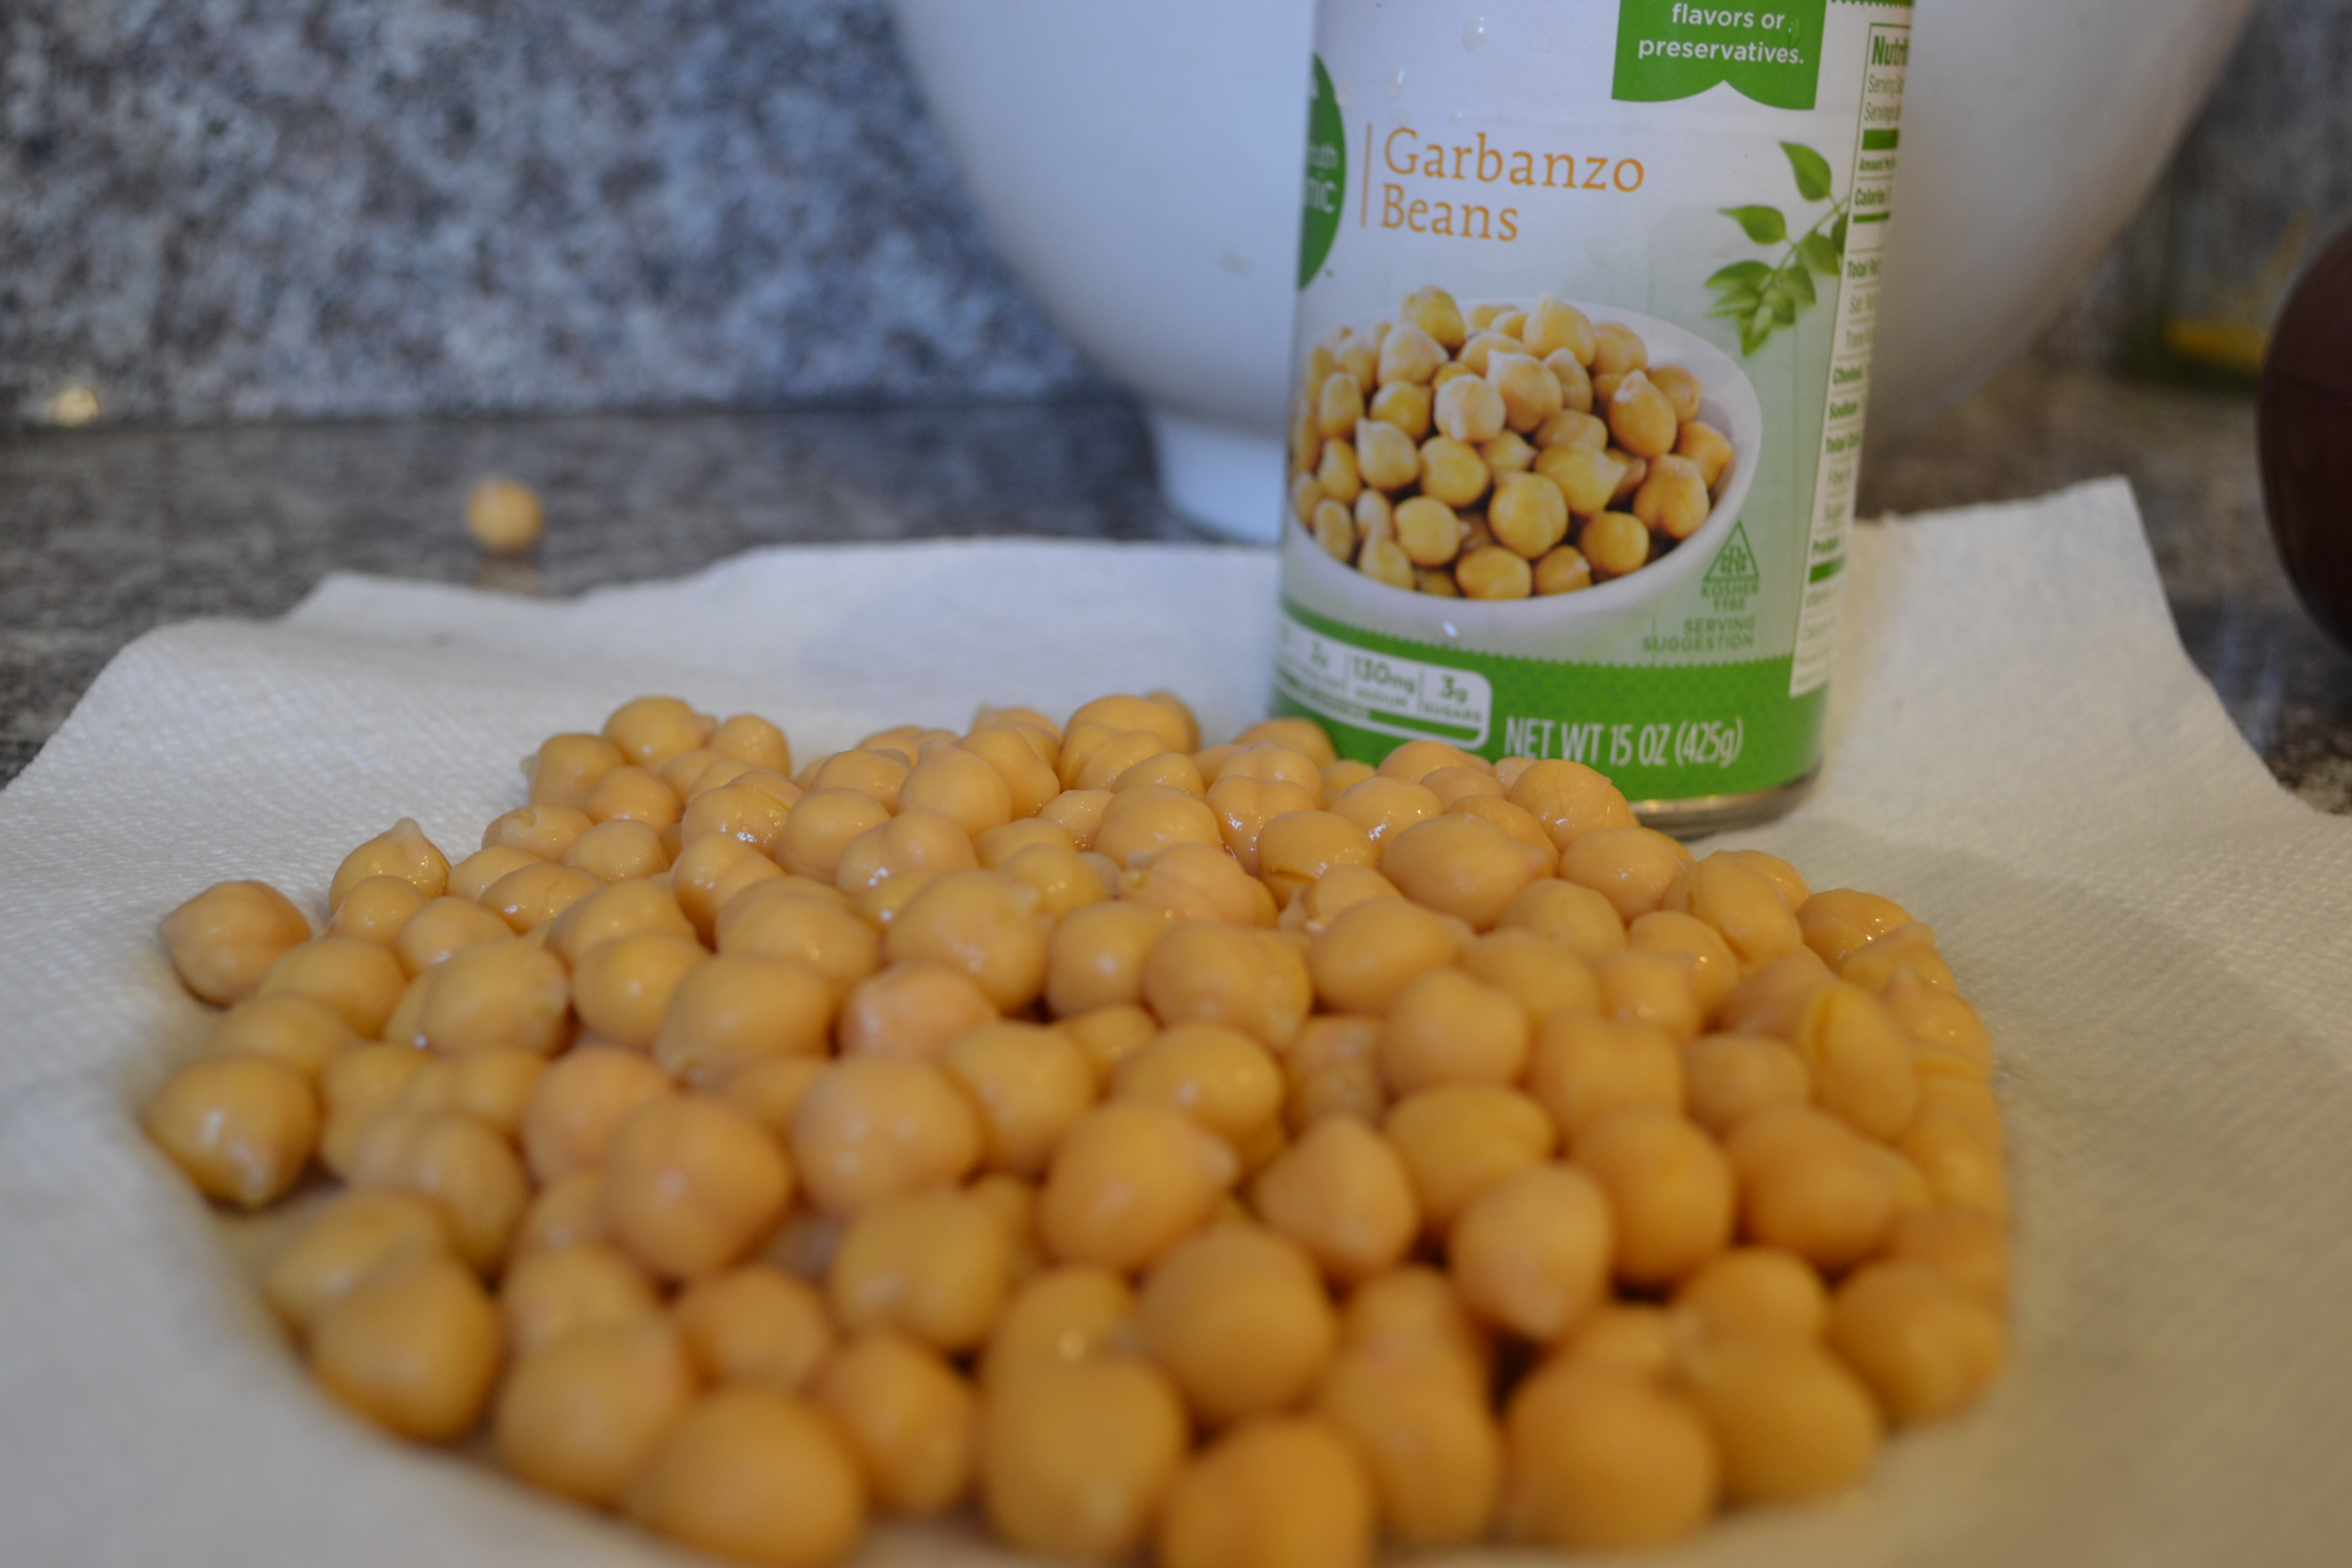
Searching for a quick meatless meal, I remembered that Rachel roasts chick peas in the oven with a little olive oil and seasoning. They are yummy and easy. “I’ll make some roasted chickpeas!” I said to myself. “I’ll get loads of protein and fiber and I won’t have to eat meat today.” (There are 7 grams of protein and 6 grams of fiber in ½ cup of garbanzos, and a scant 125 calories.)
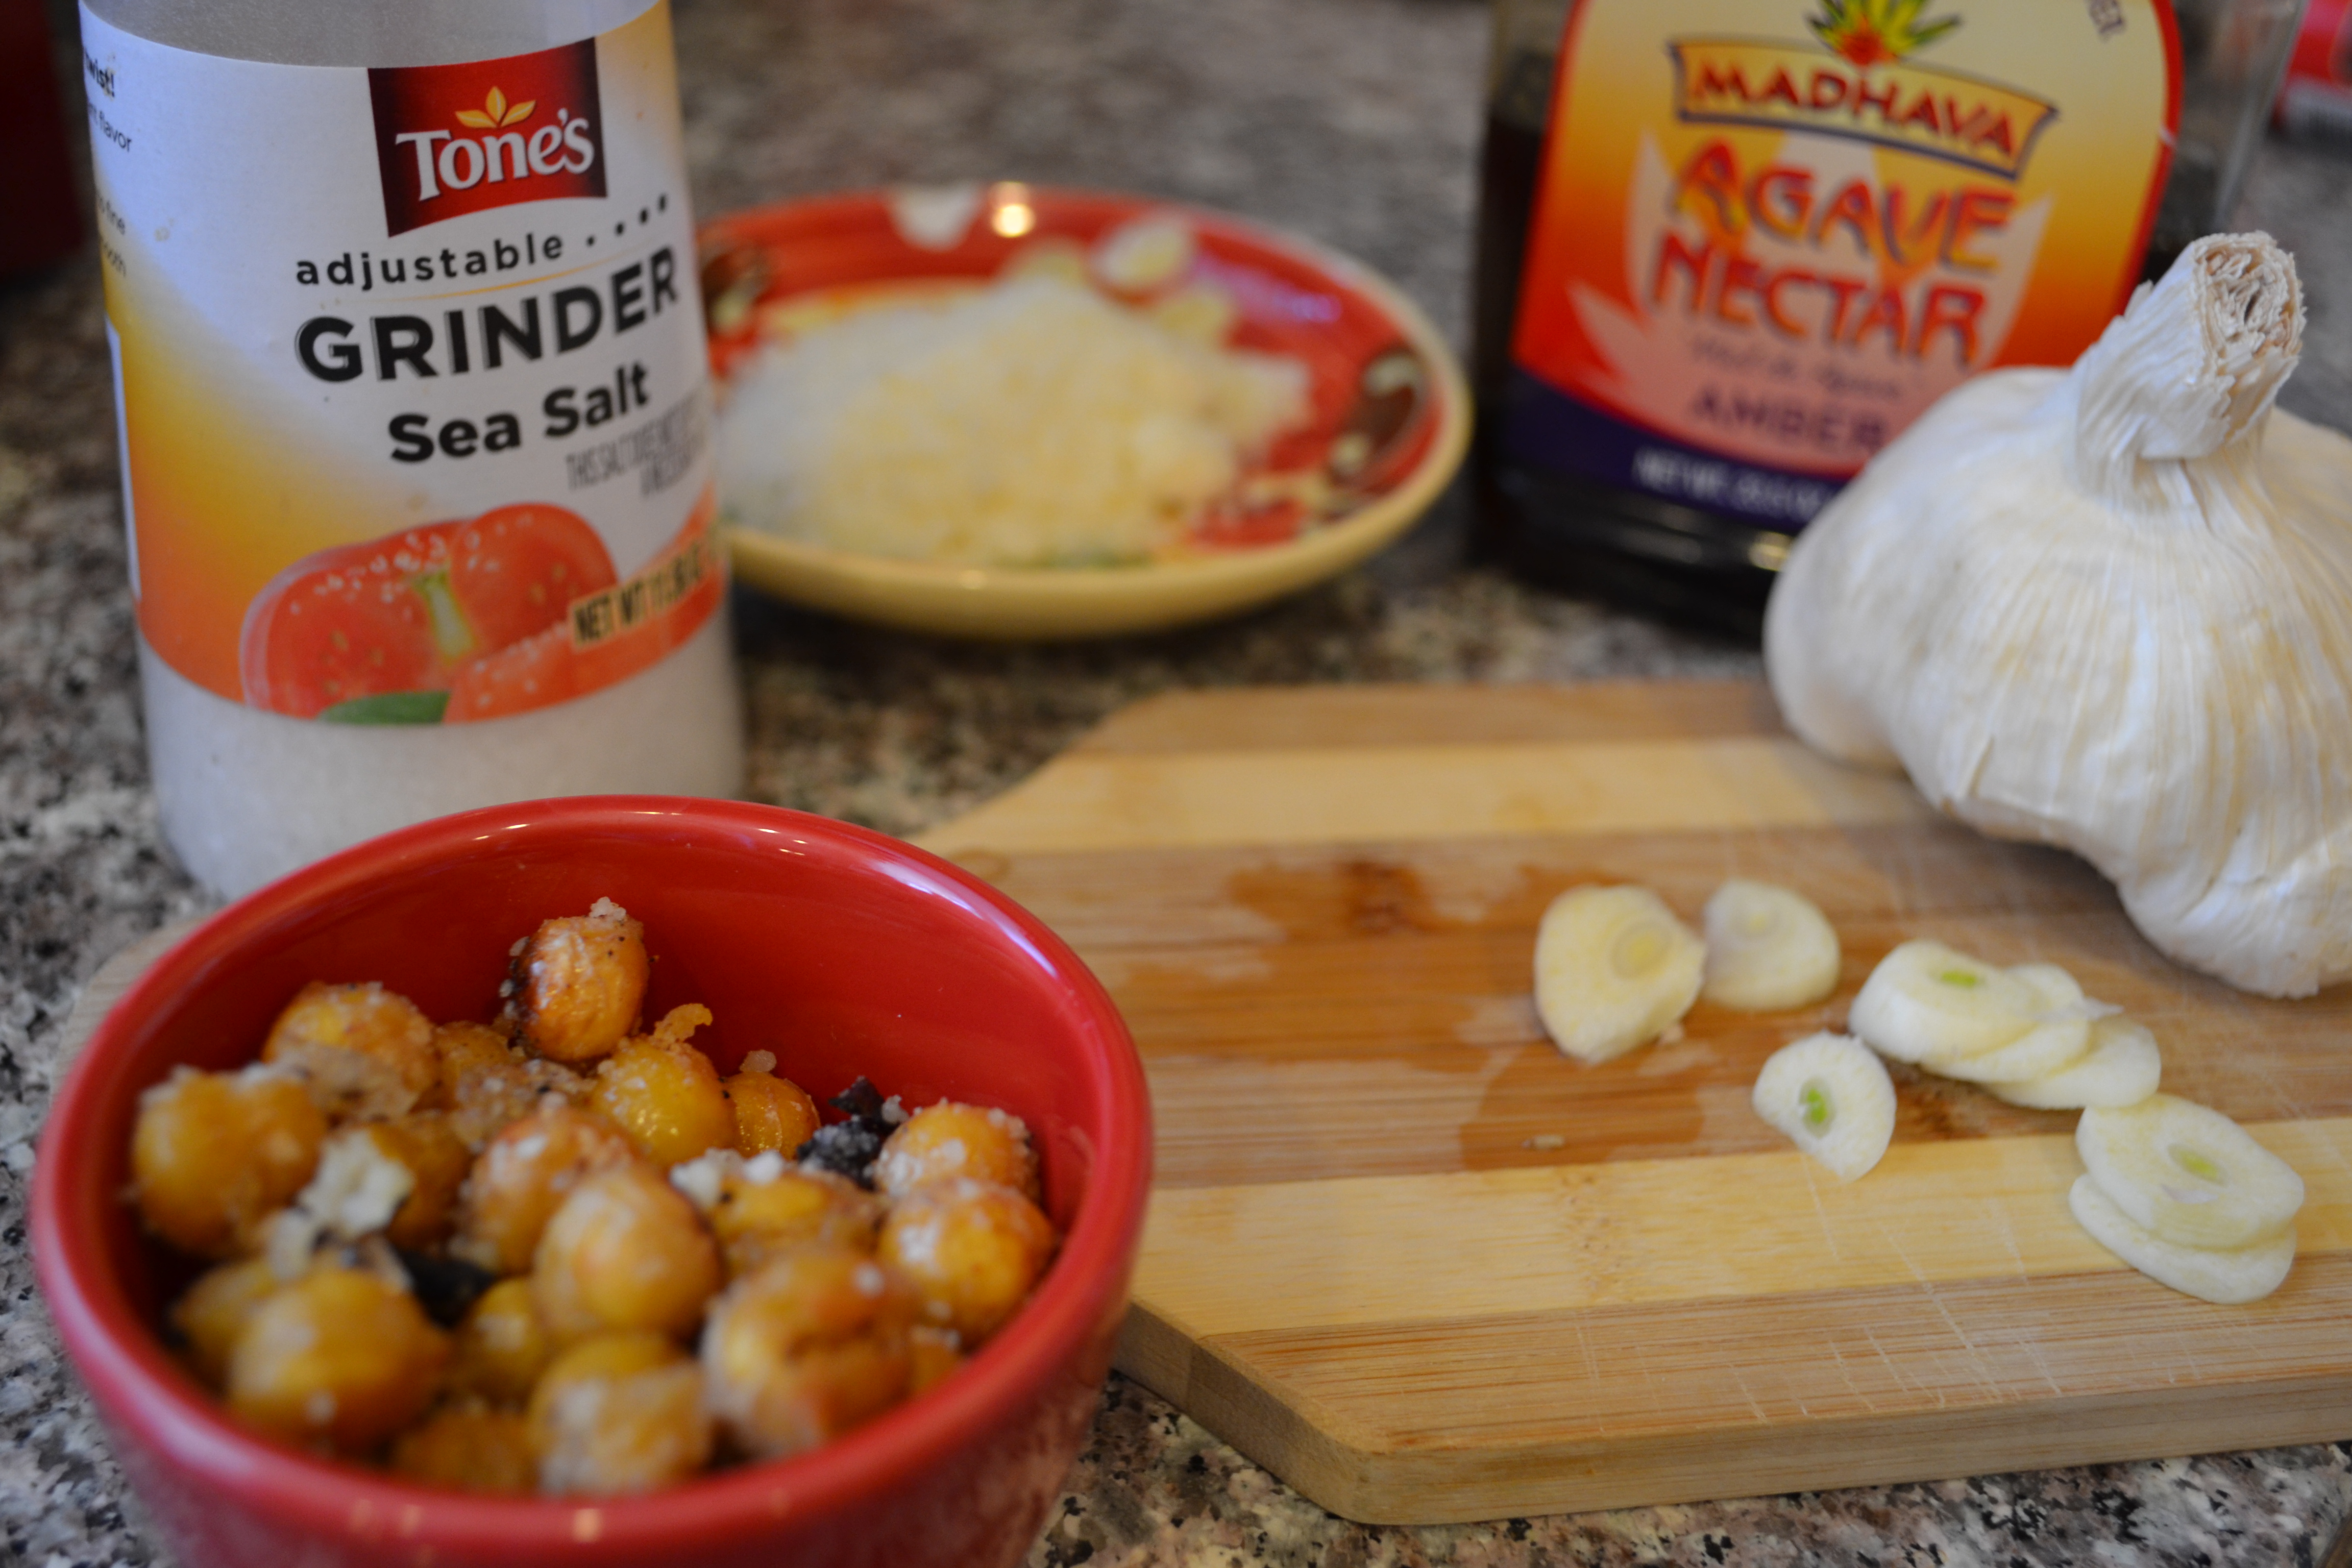
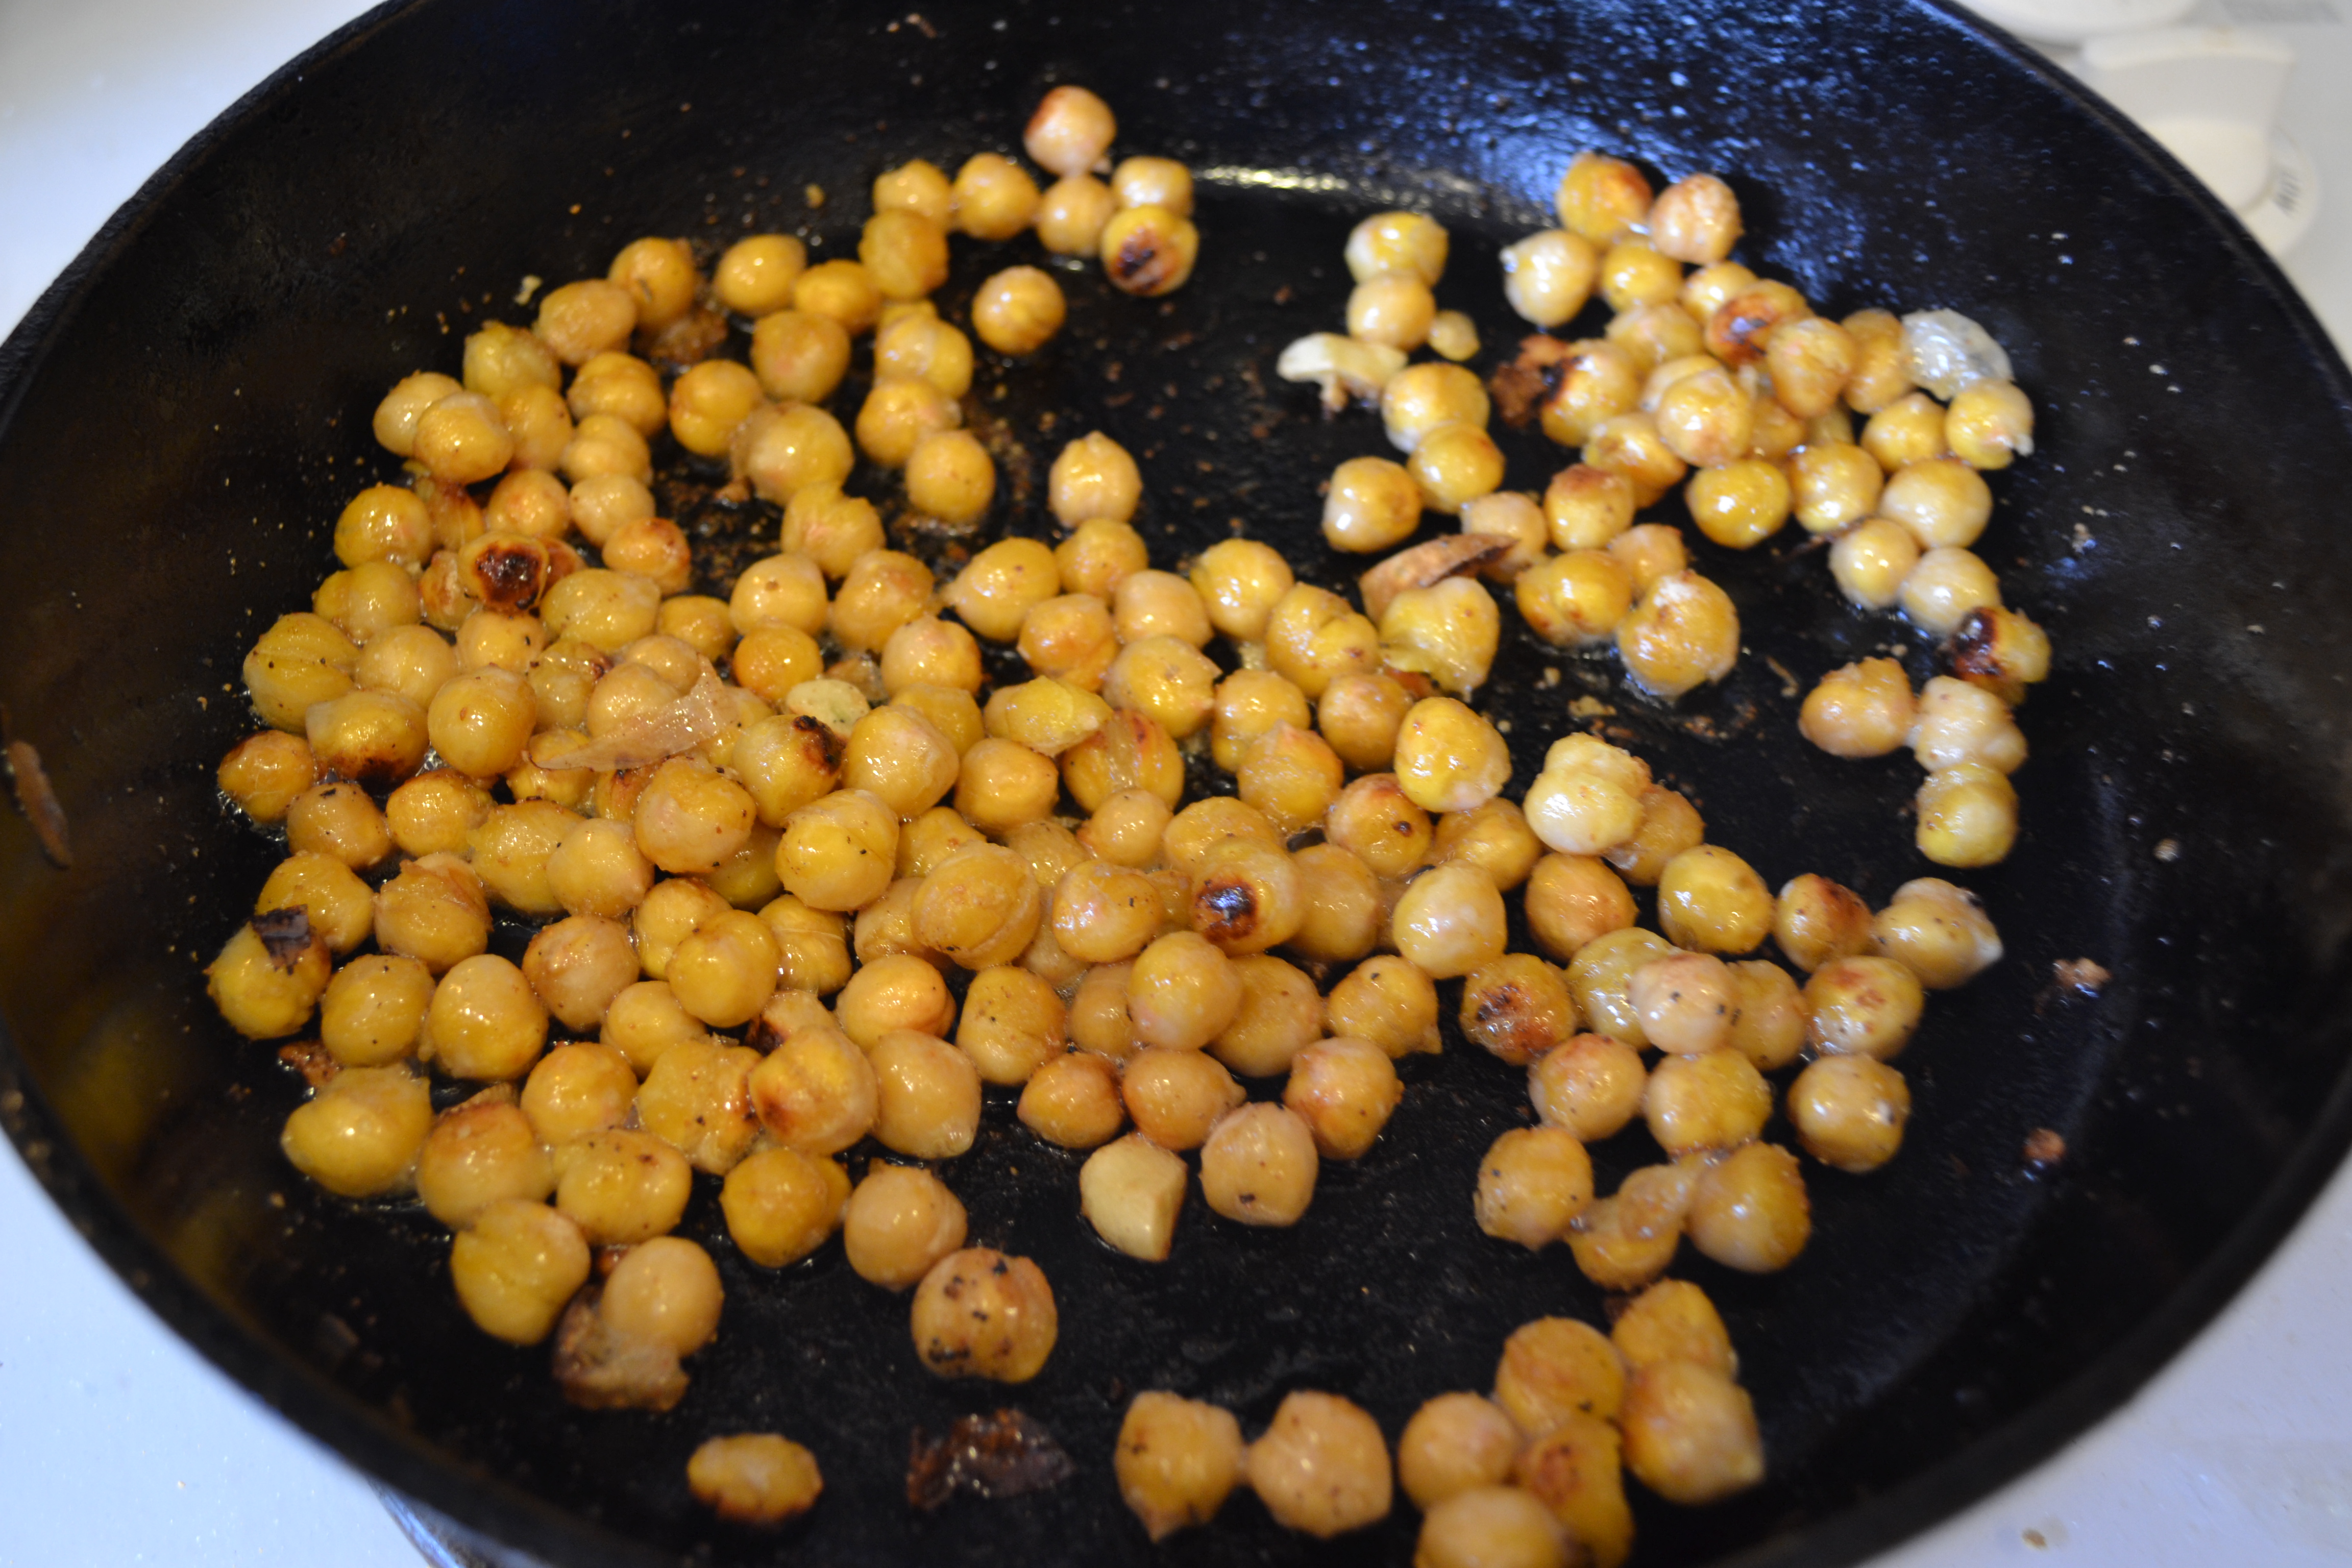
Well, one idea led to another and by the time I finished, I created a snack that I could not stop eating until every single bean (or pea) was gone. It began when I decided to try sautéing the garbanzos in olive oil in my trusty iron skillet. Then I threw in some sliced fresh garlic near the end of the cooking time so they could turn a golden brown (but not burn) and add extra flavor and crunch. After draining them on a paper towel, I squiggled a touch of agave nectar over them to give the beans and garlic a light sweet, sticky surface then sprinkled them with sea salt and Parmesan cheese.
These little snacks have it all going on: some crunch, some chewiness, some garlic, some salty and savory, and just a hint of sweet. They can be eaten out of hand or tossed on a salad or atop a pasta for a quick vegan or vegetarian treat.
They would go fantastic with an ice cold beer at a Super Bowl party this weekend for vegans, vegetarians and omnivores alike. (Although vegans will need to use Vegan Parmesan Cheese, found at most health food stores. I keep this on hand for Rachel and Jared and it’s quite tasty.)
Golden Parmesan Chickpeas & Garlic Slices
Ingredients
1 16 oz can chick peas (or garbanzo beans), drained (I do this on a paper towel to get them as dry as possible)
¼ cup olive oil
3 to 5 garlic cloves (depending on how garlicky you like your food) peeled and sliced thin
2 t. agave nectar
Sea Salt to taste
Parmesan Cheese to taste (start with 1 Tablespoon and add more if you like)
Directions
Pour oil into a skillet and heat until very hot. Put chickpeas in skillet and let them get brown on most sides. Just before the chickpeas are ready to take out of the skillet, add the garlic slices and sauté until brown. (If the pain is dry, you can add more oil at any time.)
Drain the chick peas and garlic on a paper towel. Put into a bowl and gently toss with agave nectar. Add sea salt and Parmesan cheese to taste. Serve warm or at room temperature. Excellent source of protein and fiber atop salads, sandwiches or pasta.
This was printed from: We Laugh, We Cry, We Cook
The site URL: http://welaughwecrywecook.com
The Title:Golden Parmesan Chick Peas & Garlic Slices
The URL: http://wp.me/p1UwM9-Ss
This was printed from: We Laugh, We Cry, We Cook
Marinated Portobello Pizzas
Posted: January 10, 2013 Filed under: Appetizers, Gluten Free, Italian, Main Dishes, Pasta, Sides, Uncategorized, Vegan Options, Vegetarian, Veggies | Tags: balsamic, cheese, Italian dressing, mozzarella, Parmesan, pepperoni, pizza, pizzas, Portobello 2 Comments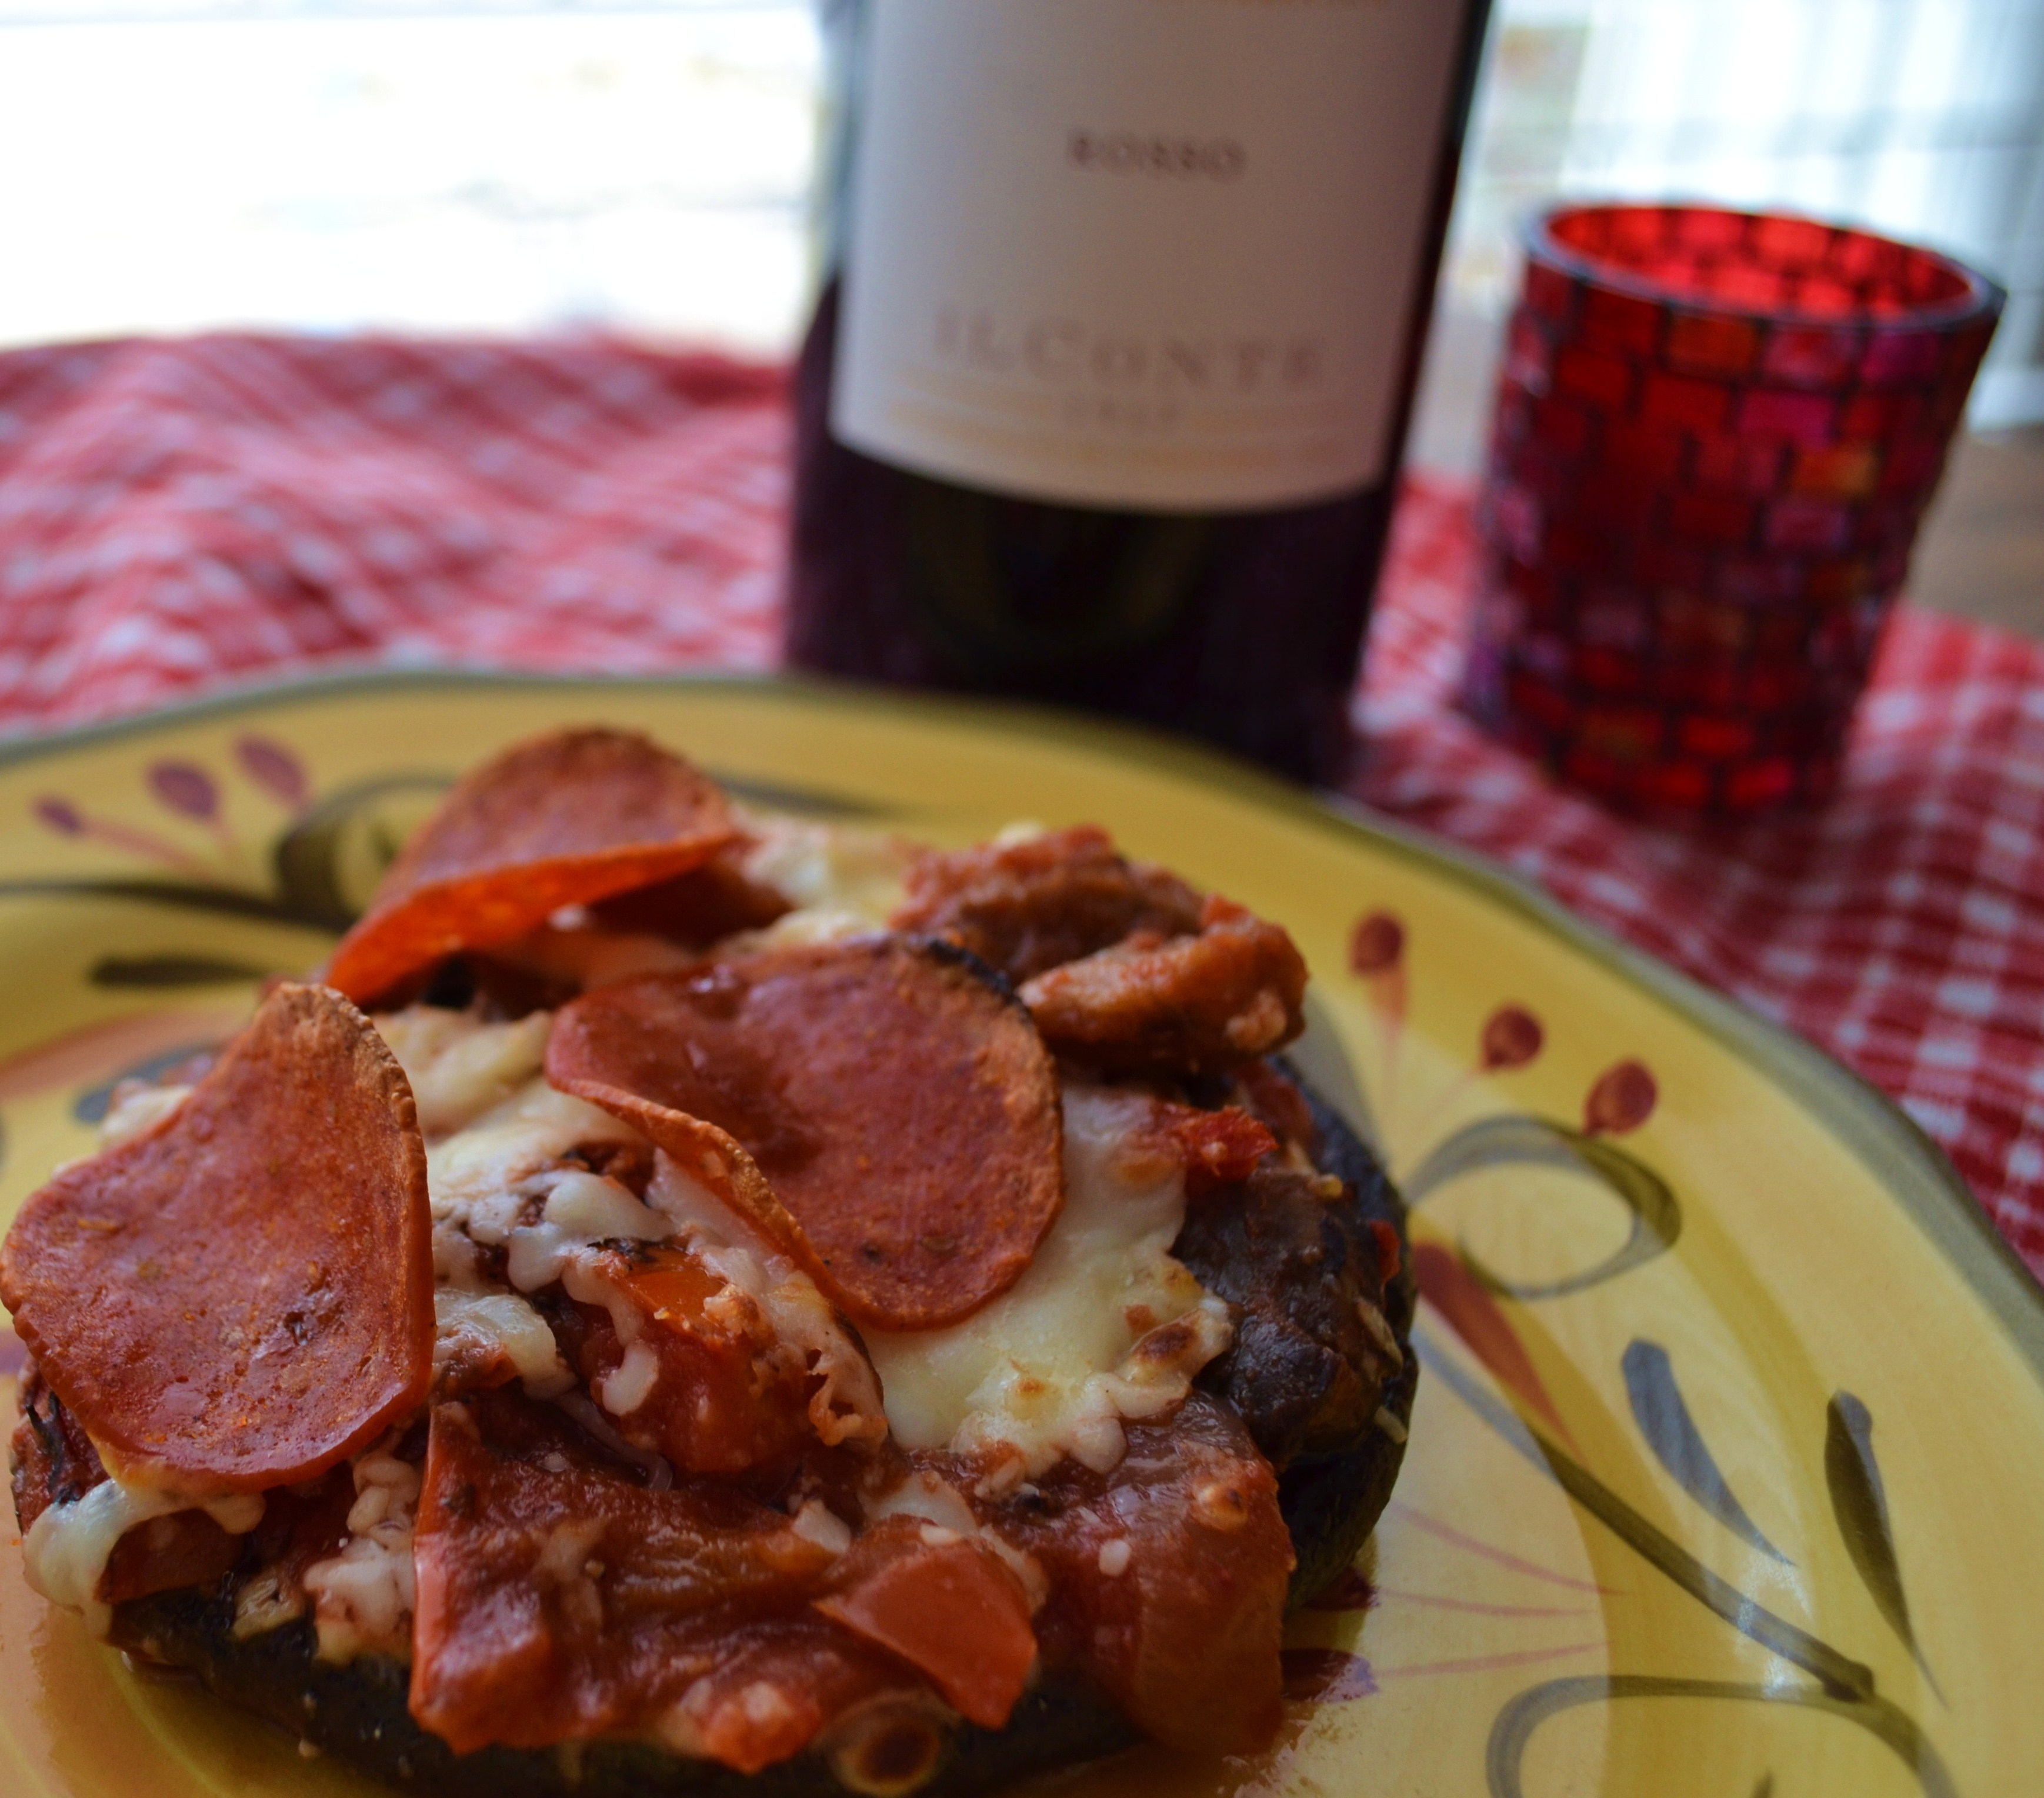
(Becky, the Mama.)
As long as I can remember I have wanted to be Italian. I look Italian. I FEEL the inner, fiery passions of an Italian. I love the way every little word in Italian sounds like music, or a romantic flirtation.
I met a beautiful grandmother from Sicily a few years ago, at a friend’s house in Denver, and after chatting a bit, she asked me if I was Italian. Be still il mio cuore (my heart).
I said, “No, but I really, really want to be.” What I didn’t say, but what I wanted to say was, “I want to live under the Tuscan sun by day, and I want the moon to hit my eye like a big pizza pie at night. I want to eat gelato and drink café in a piazza.” (And I want an excuse to use words “gelato,” “café” and “piazza” in a sentence every day.)
This lovely lady, immediately recognizing my Inner Sophia Loren said, with a wave of her hand, “No worries, I will make you Sicilian.”
“You will?”
“Yes,” she said, and then she ceremoniously took my face in her two cupped hands, looked in my eyes and said, “Now you are Sicilian.”
Poof!
So there ya go.
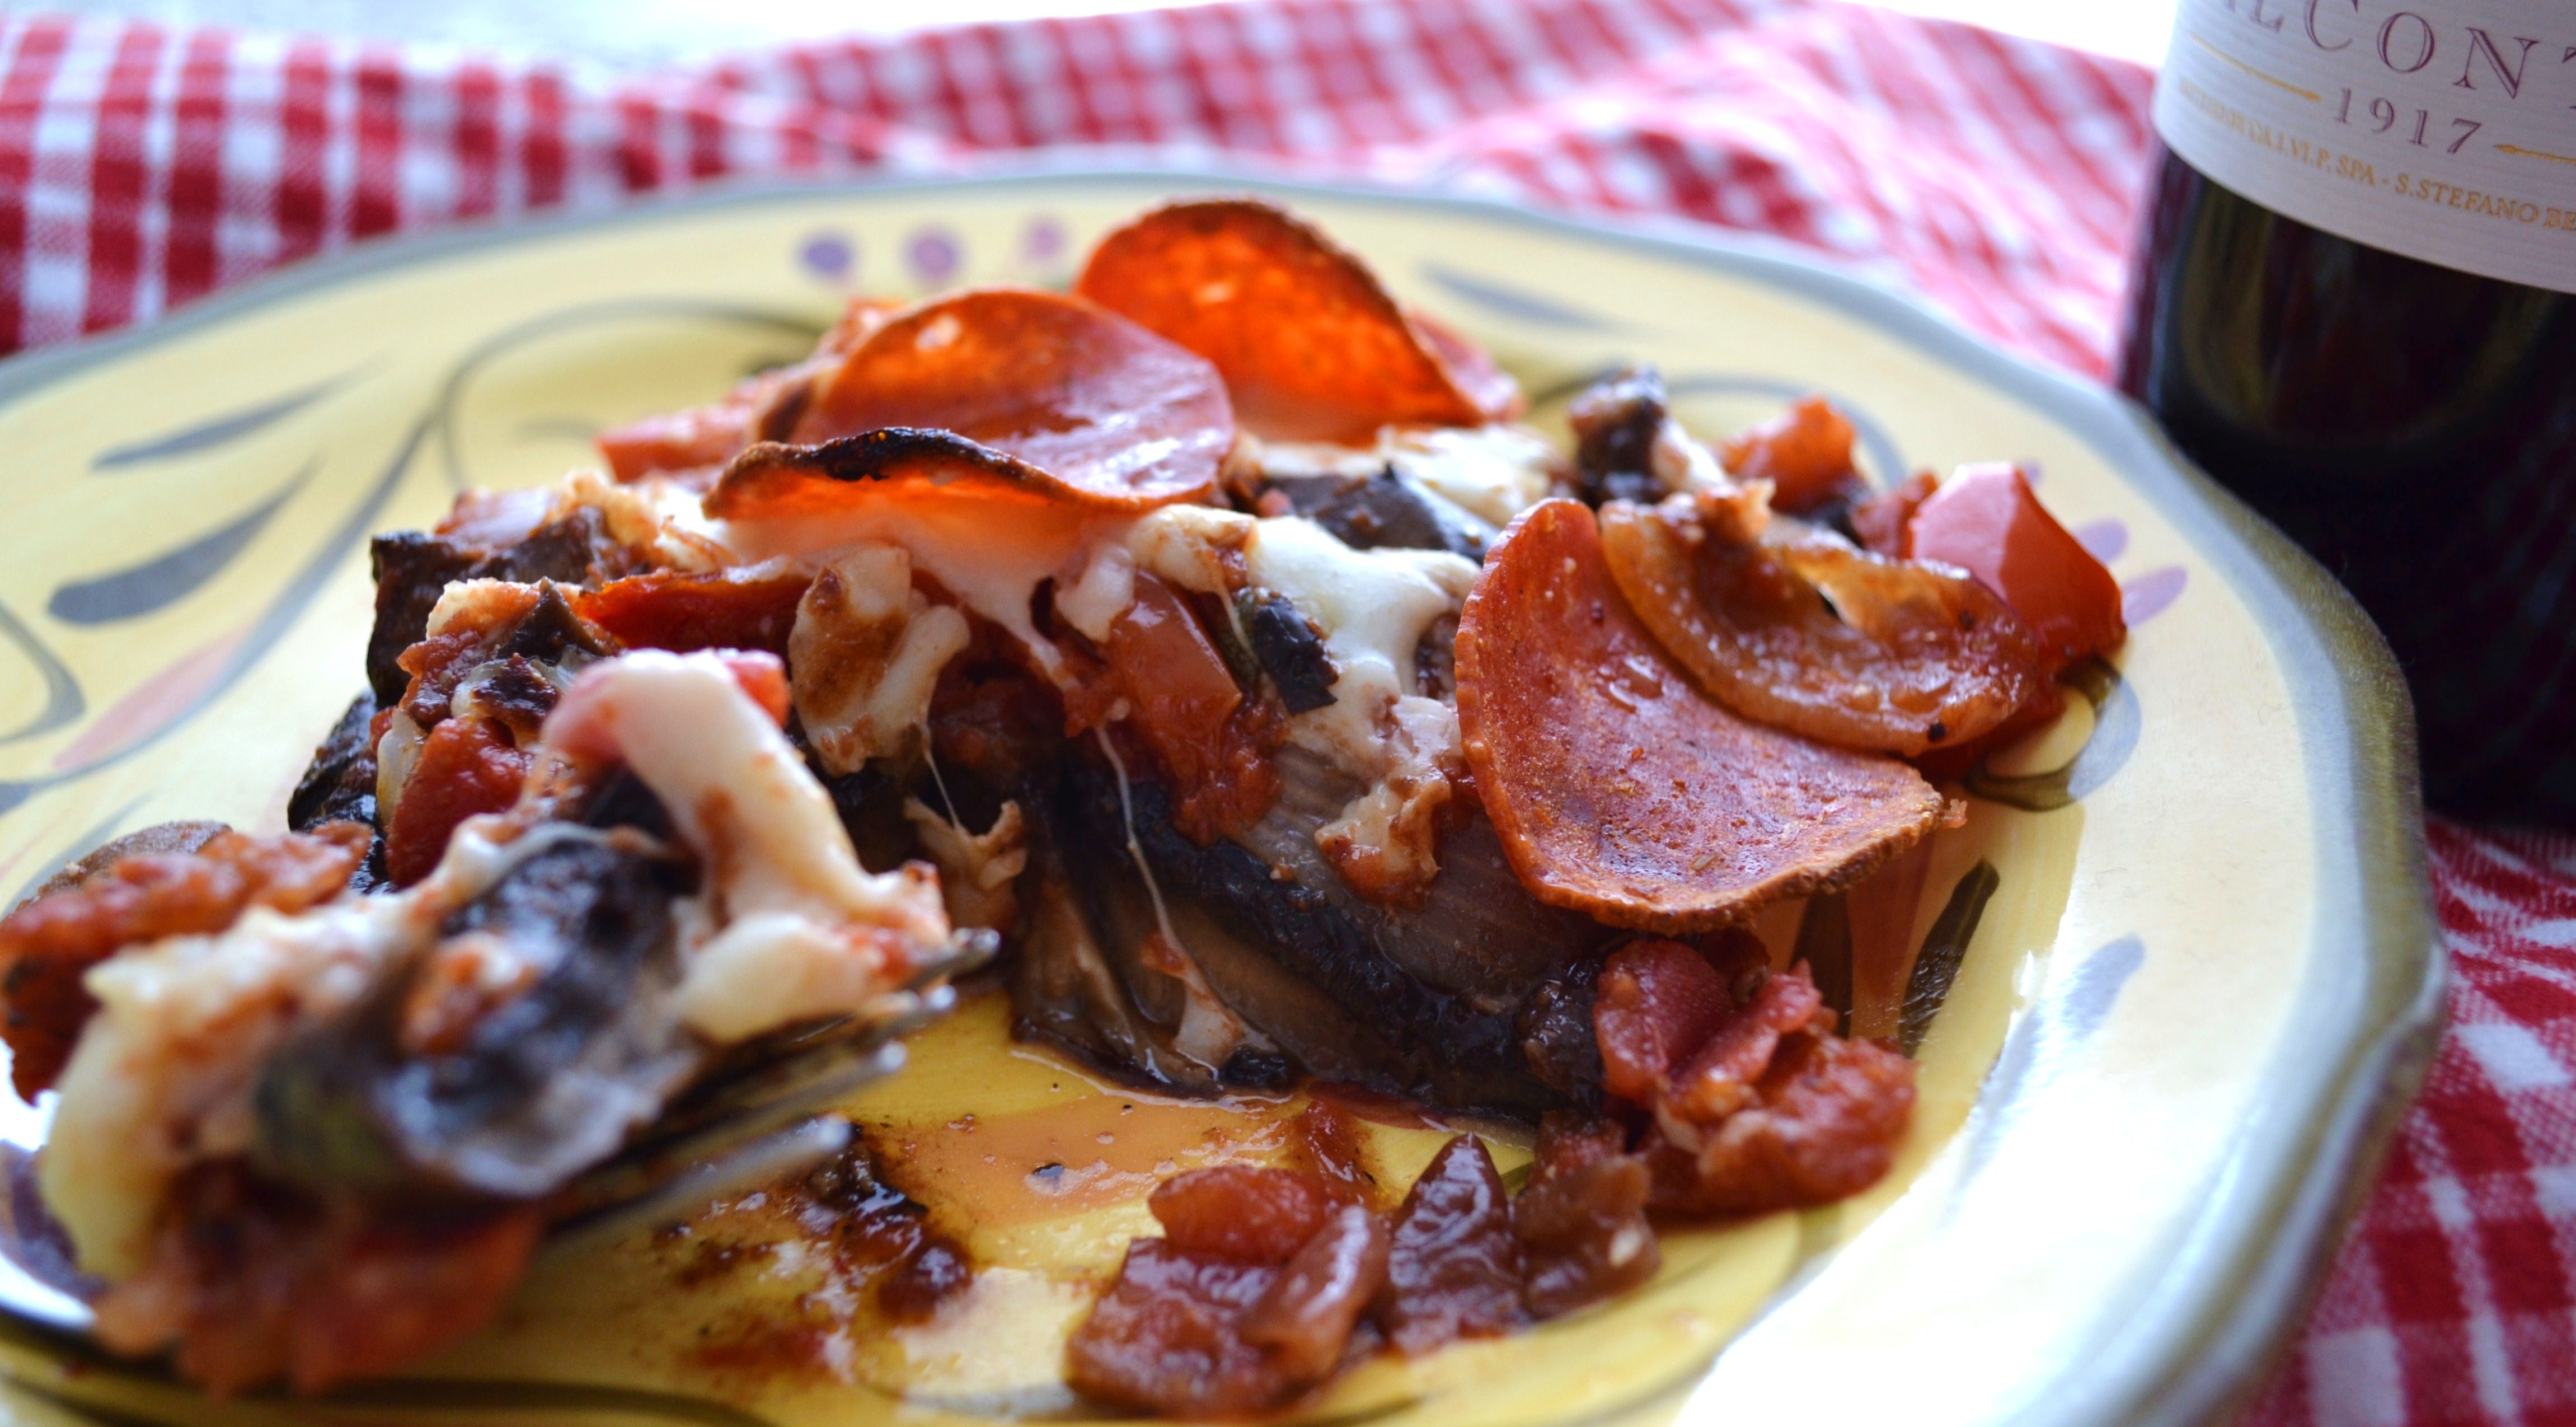
In honor of my bestowed-upon Sicilian-Italian-ness, I offer these beautiful little marinated Portobello pizzas for your eating and snacking pleasure today. You can fill them with anything you have on hand that you enjoy, the possibilities are endless: mozzarella, tomato and fresh basil; goat cheese, sun-dried tomatoes and pesto; chopped veggies and lentils in a marinara sauce with vegan cheeses; humus and olives and red roasted peppers; chicken, asparagus and Alfredo sauce. I could go on and on, as we Italians are prone to do.
I filled these Portobellos with a rich home-made marina sauce I mixed with some leftover diced roasted veggies. Then I sprinkled them with mozzarella and Parmesan and topped with a few slices of turkey pepperoni.
Muah! Easy, pretty and delizioso! If you think ahead, try to pop the mushrooms into the marinade as soon as you bring them home from the grocer. The longer they marinate the better they taste! I ended up marinating these for almost 3 days. They were so juicy and flavorful.
This recipe has almost no carbs, is gluten free, and can easily be adjusted to be vegan or vegetarian. If you have lots of people over for a party who are all on special diets (and who isn’t these days? ) you can even make them to order. (Or let your guests make their own.)
Marinated Portobello Pizzas
Makes 2 Portobello Pizzas
Ingredients:
1/3 cup of your favorite Italian or balsamic salad dressing
2 large Portobello mushrooms
½ cup of your favorite marinara or spaghetti sauce (mixed with any chopped leftover veggies you like)
2 T. grated mozzarella cheese (or a slice of fresh buffalo mozzarella)
2 T. Parmesan cheese
6 to 8 slices of turkey pepperoni (it has 70% less fat that regular pepperoni and the same amount of flavor)
Directions:
Marinate the mushrooms in the dressing for at least four hours or up to several days in a tightly covered container. (Put in fridge if you are marinating more than 4 hours. Otherwise you can leave the mushrooms to marinate on the counter top.)
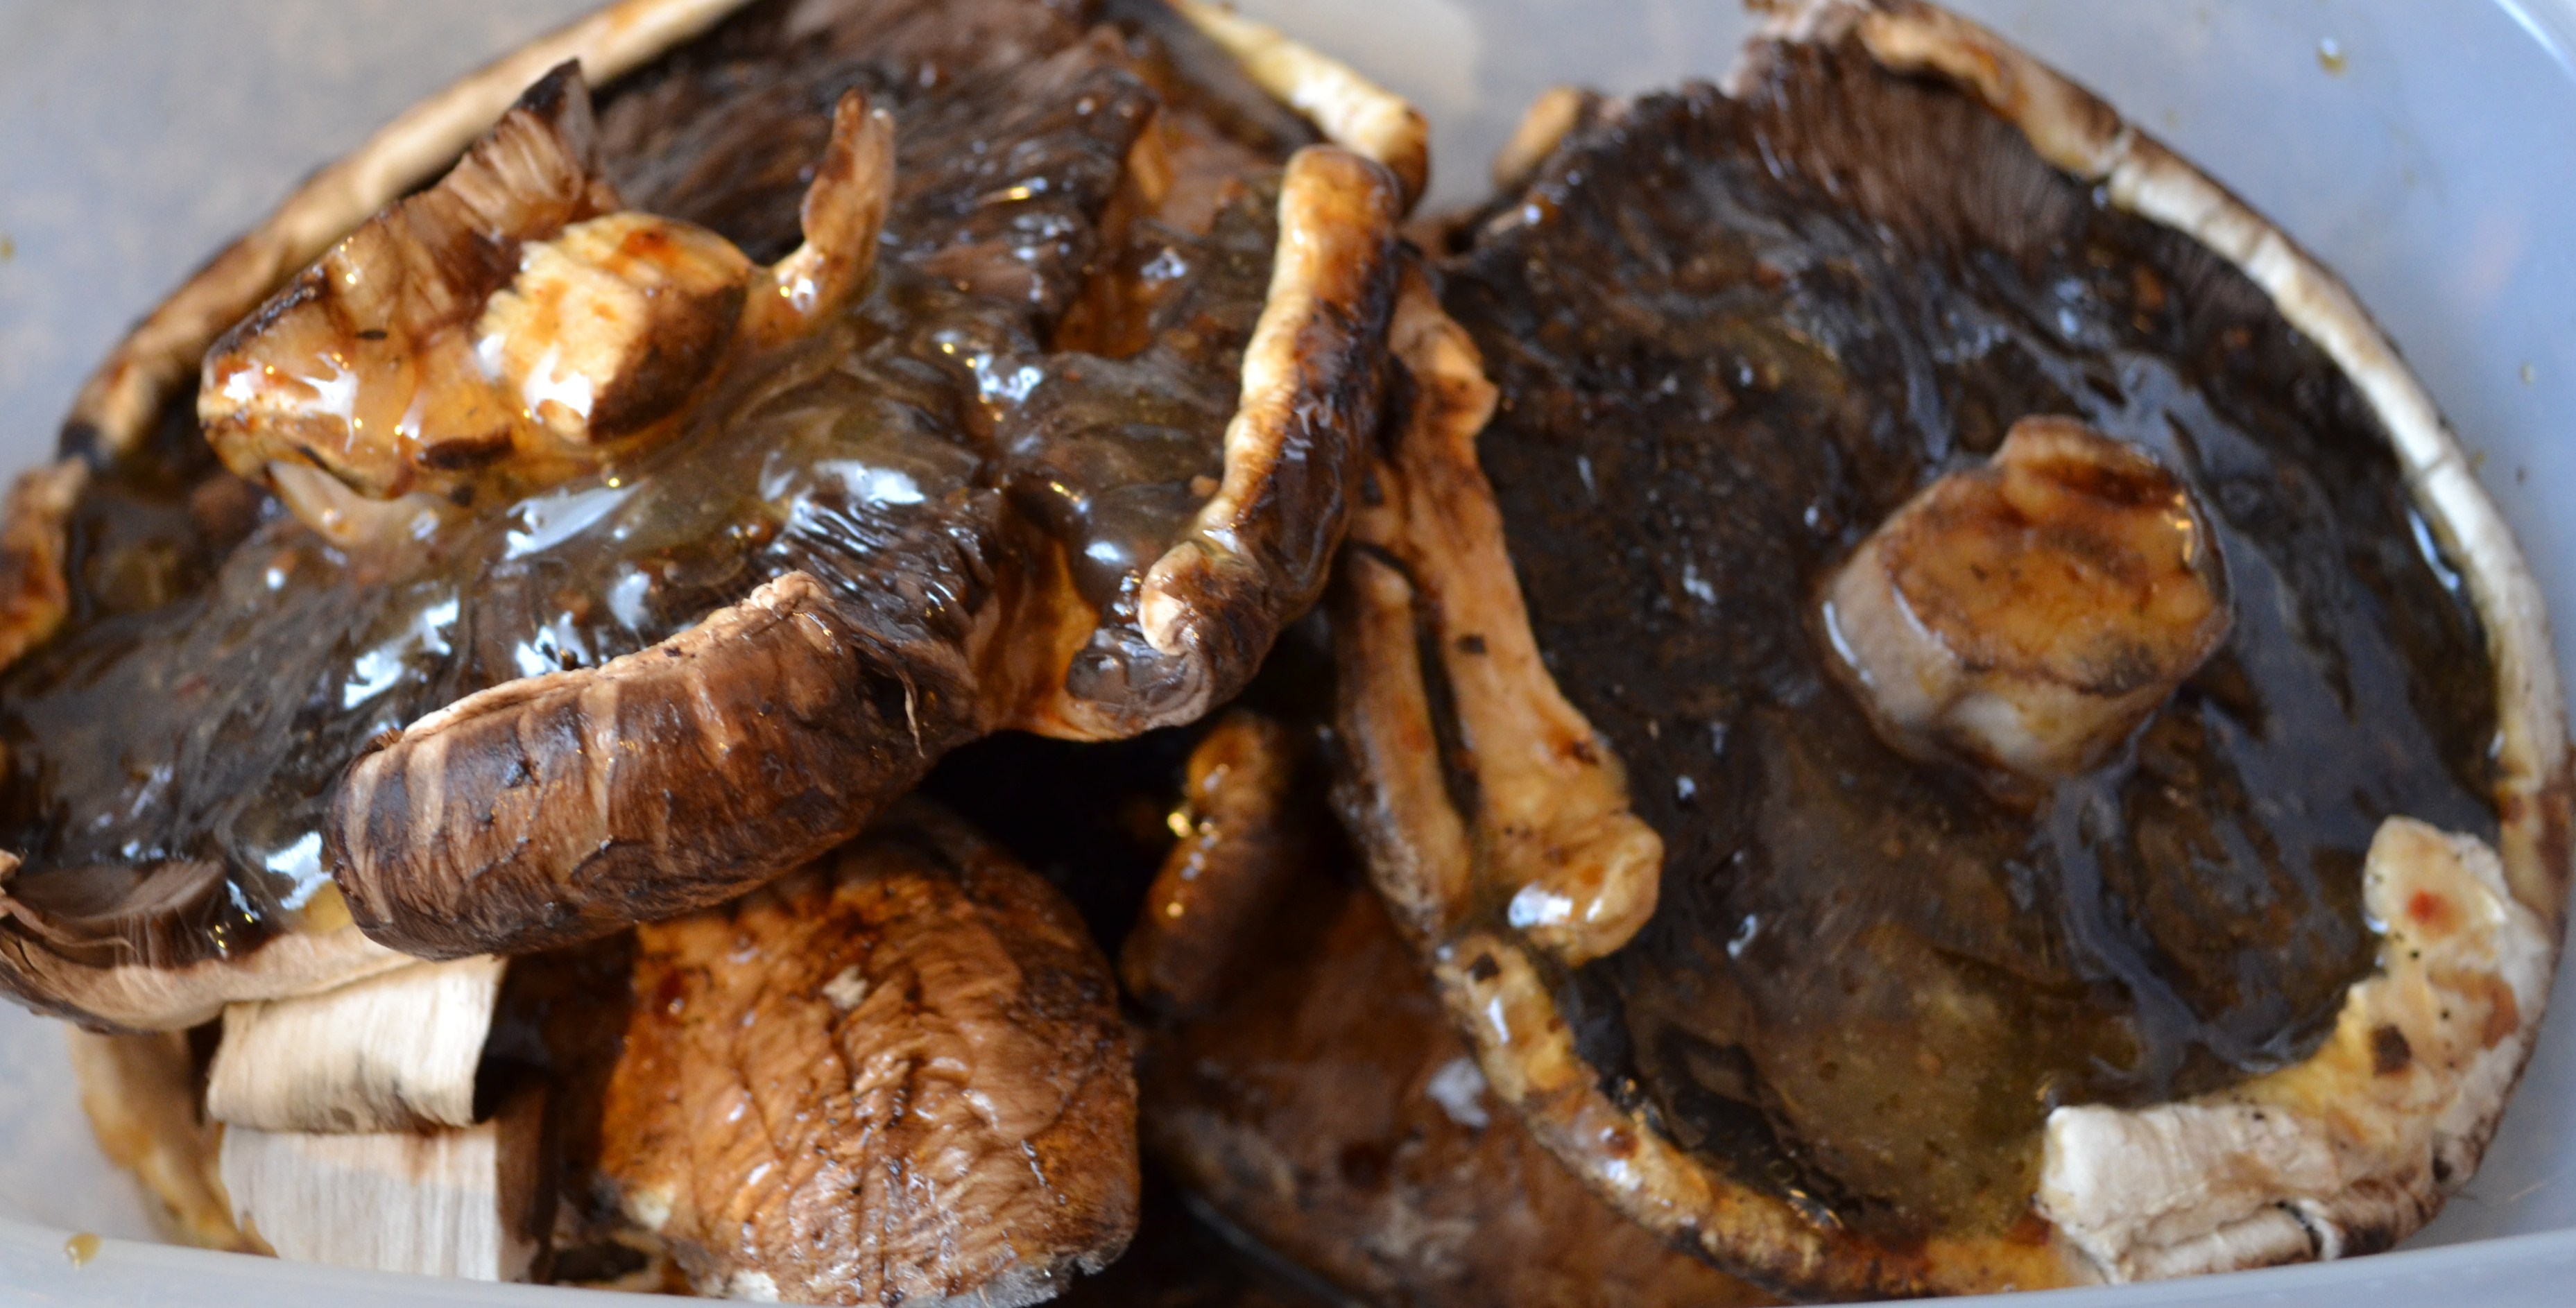
Next, broil or grill the mushroom on both sides until the get grill marks or start to brown. Turn stem side up and carefully cut off the stem. (I chopped the stem and added it to marinara.) Place a generous spoonful of chunky marinara sauce on the mushrooms (about 1/4 cup each) then sprinkle each with a tablespoon of mozzarella and Parmesan. Finally top with pepperoni. Bake or Broil (about 6 inches from heat) until cheese is melted and pizzas are heated through. Now THAT’S amore!
Double Chocolate Berry Nut Muffins
Posted: January 6, 2013 Filed under: Breads, Breakfast Foods, Desserts, Uncategorized, Vegetarian | Tags: berries, black berries, blueberries, chocolate chips, cocoa, coconut oil, double chocolate muffins, Greek yogurt, nuts, pecans, raspberries, strawberries, yogurt Leave a comment
(Becky, the Mama.)
Food memoirist Alyssa Shelasky described her mother as being a strict health-nut (who’d never eat anything that would “tick off Michael Pollan”), before being green and organic was cool. Alyssa’s school lunches were healthy leftovers like chicken salad and fruit, with notes of hand-written inspiration tucked into the brown bag. Nary a Dorito or Slim Jim in site. And yet, even this Whole Foods Mama had a daily vice. Every morning alongside with her cup of milky white tea, she ate a chocolate packaged snack cake filled with goopy marshmallow cream. Yes, she ate a Devil Dog.
In her defense she ate one and only one. Every single day. For sixty years. Without guilt.
Later in the day, Alyssa’s mom would walk to the Farmer’s Market, loaded down with fresh veggies, enjoying every antioxidant-filled bite.
Now that Hostess has gone out of business, a box of Devil Dogs can be found on the internet for about $35.00 a box. “Freshness guaranteed.” (Presumably because they are so rich in chemicals, they are guaranteed to last forever.)
Though I draw the line at Twinkies and Devil Dogs for breakfast (even if I could afford such luxuries), I’m all in favor of making Chocolate a breakfast food.
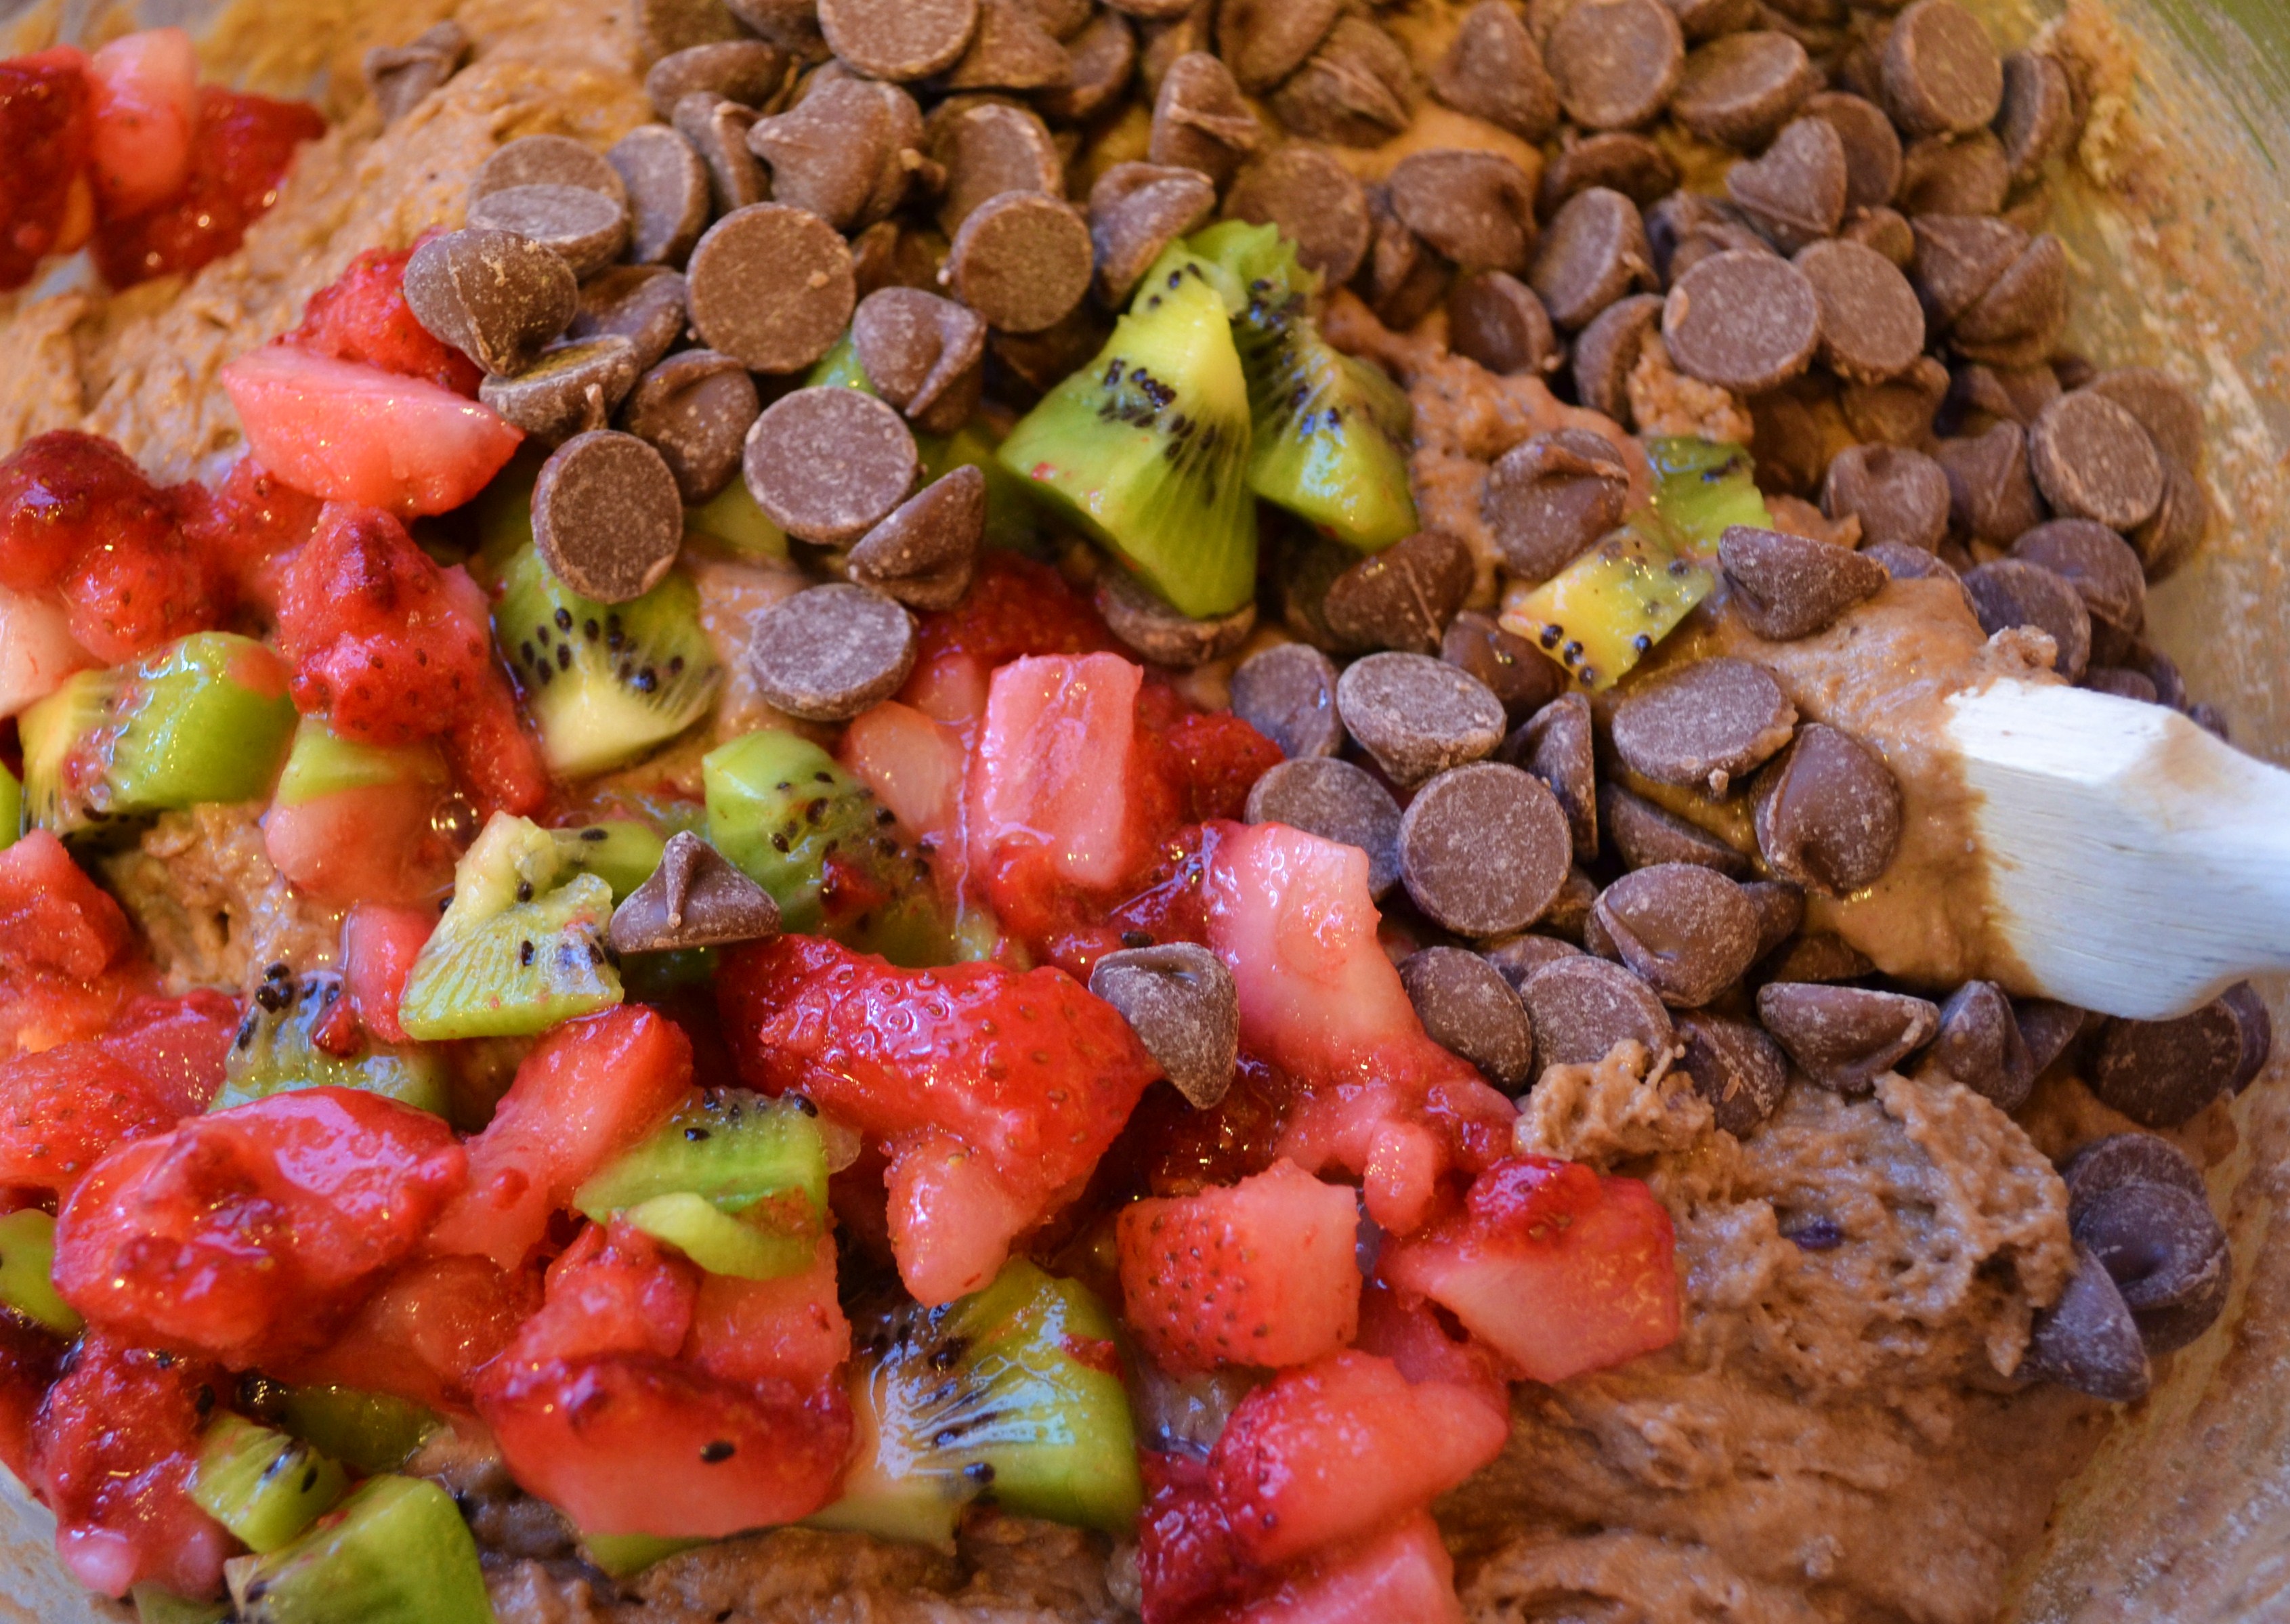
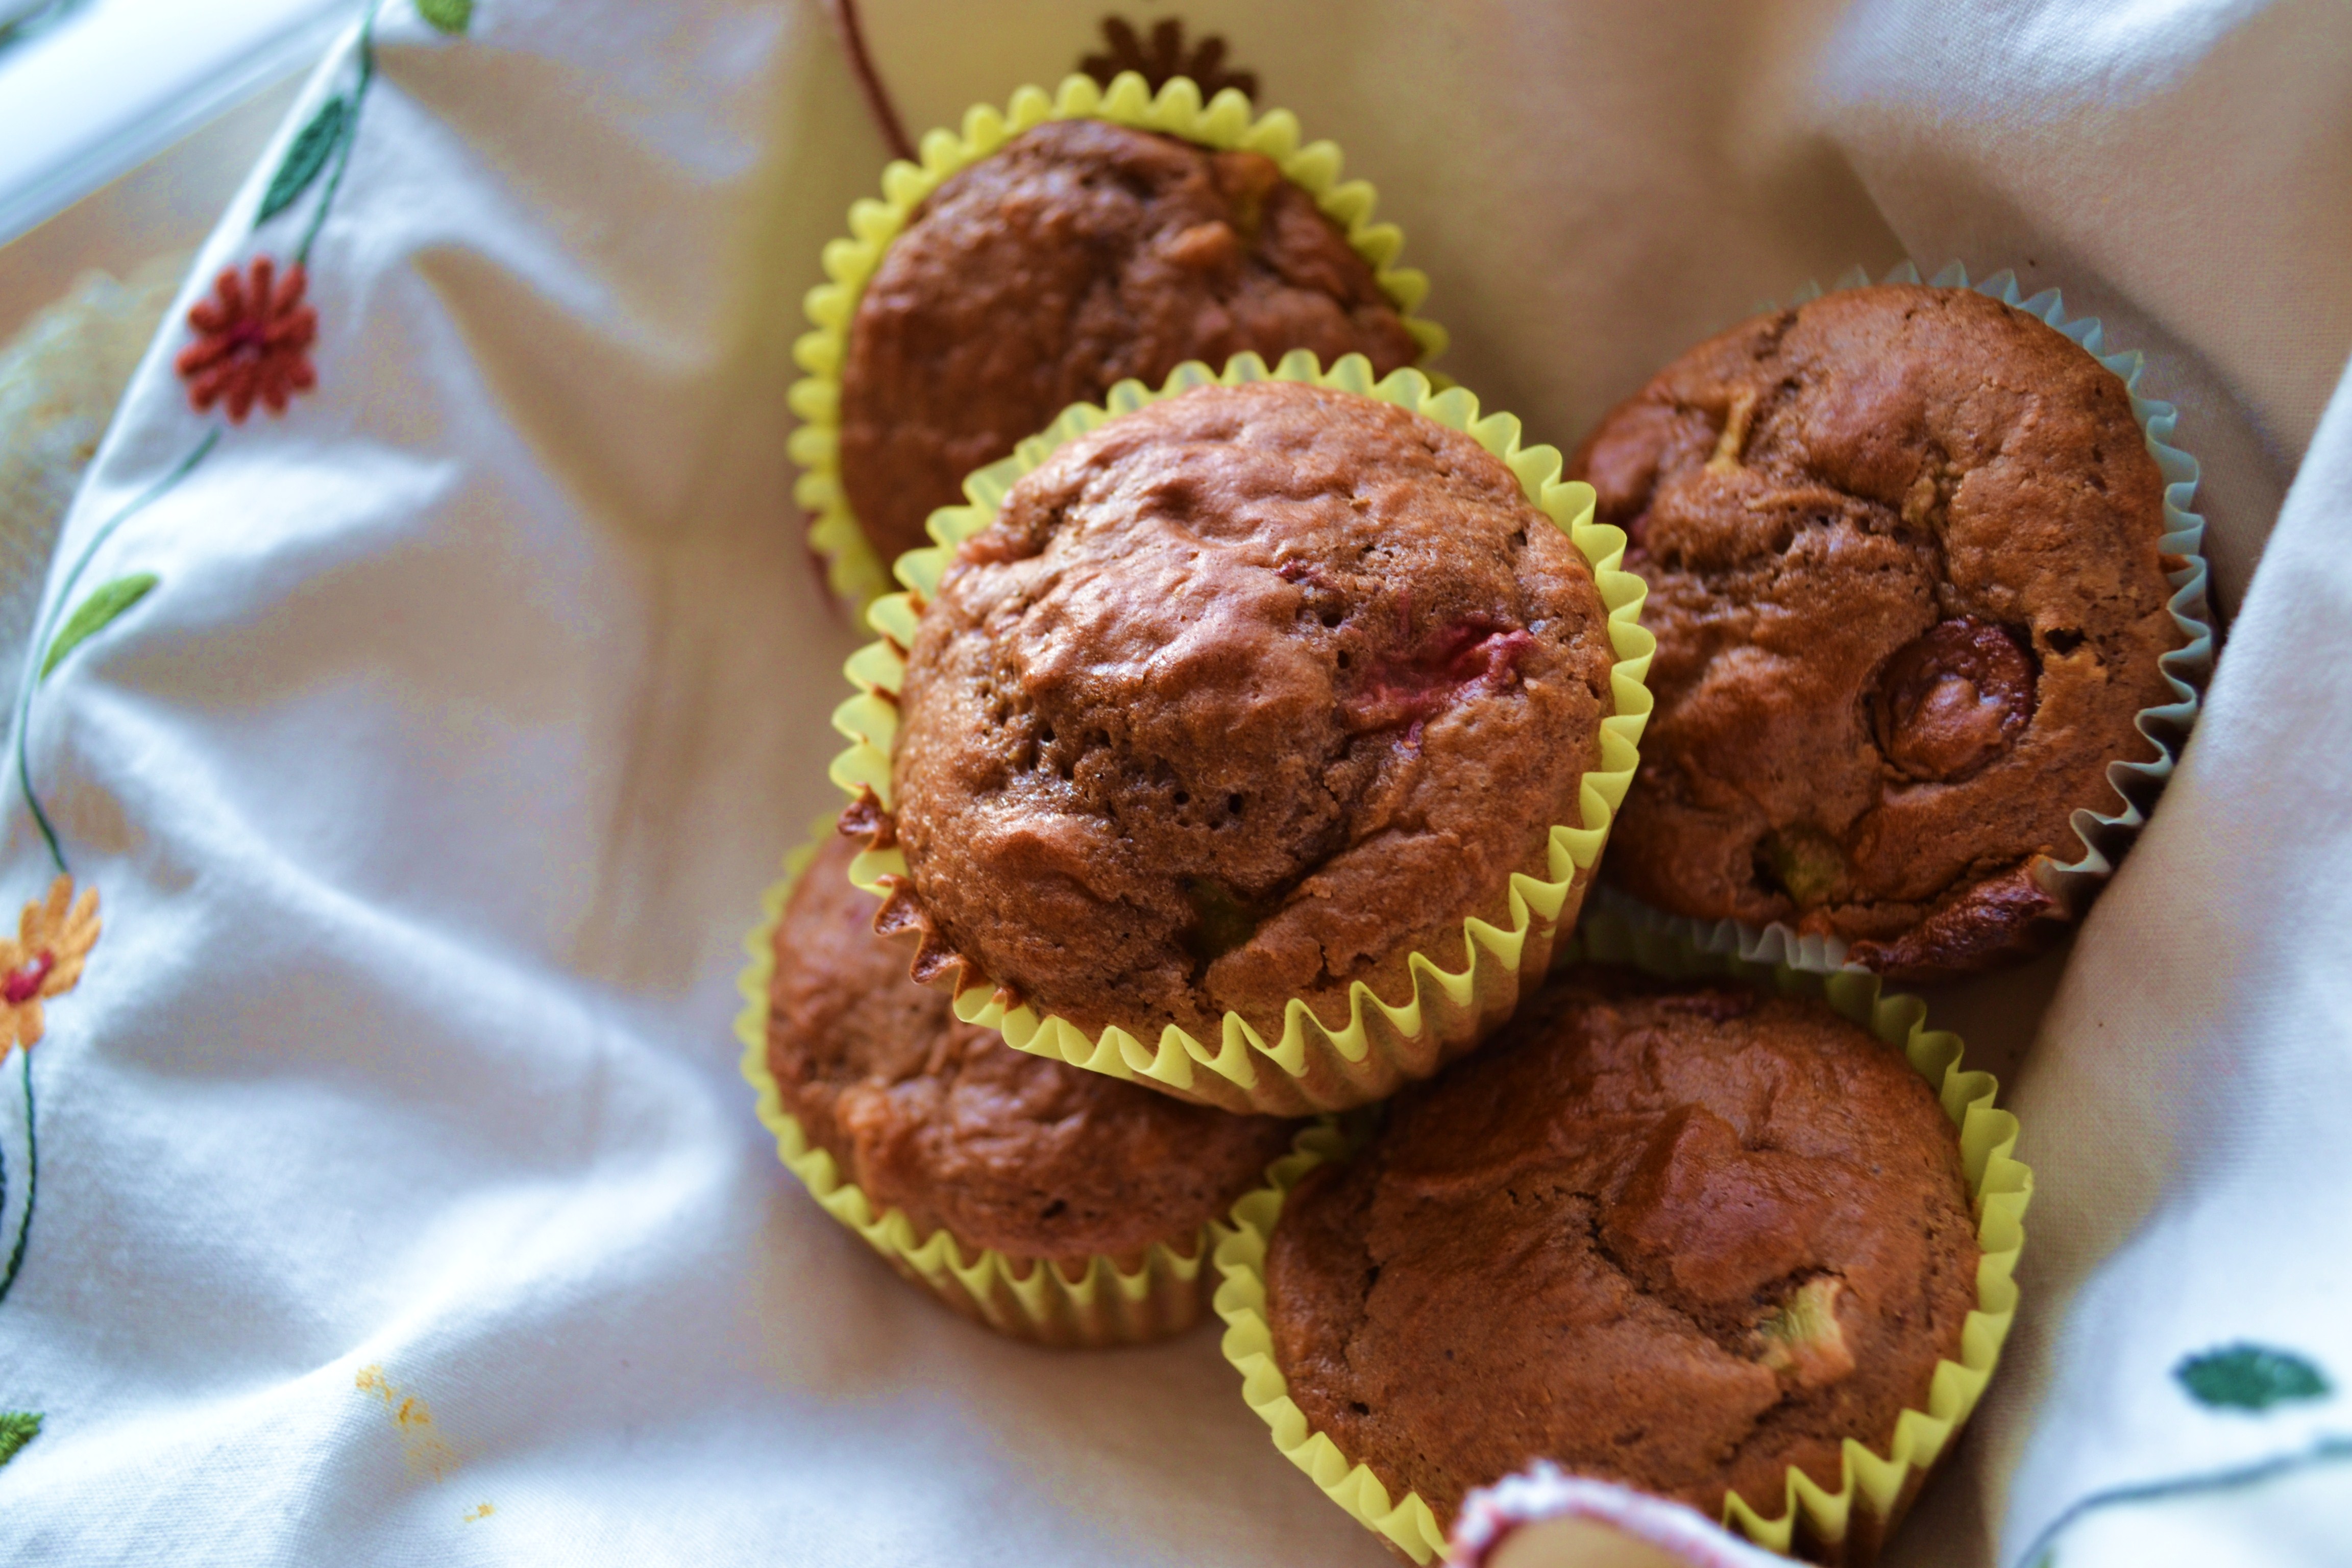
To that end, I offer you this recipe for Double Chocolate Berry Nut Muffins. If I’d had blueberries or dark cherries on hand, I would have used those in this muffin. What I did have on hand was strawberries and kiwis, so improviser that I am… into the bowl they went. I’ve never let lack of correct ingredients stop me from whipping up a recipe. I once made a carrot cake without any carrots, subbing zucchini and crushed pineapple. It was delicious.
The result of my experiment was a just-right sweet muffin made moist from the coconut oil, Greek yogurt and fruit, chocolaty from cocoa and chocolate chips, with a nice crunch from chopped pecans. I used white whole wheat flour (which has the same nutritional value as whole wheat flour, but is made from white instead of red wheat); and organic unprocessed sugar to ease my conscience even more.
So, okay, I’m not ready to declare these chocolate muffins a “health food.” But hey, they are no Devil Dogs.
Double Chocolate Berry Muffins
Makes 2 dozen regular muffins, and one pan of miniature muffins
Preheat oven to 400 degrees.
Ingredients
2 ¼ c whole wheat white flour ( I used King Arthur brand)
1 ¼ c. organic sugar
½ c. unsweetened cocoa powder (if you like extra dark chocolate use dark chocolate cocoa)
2 t. baking power
1 t. baking soda
¾ t. salt
1 cup Greek Yogurt, plain
½ cup milk or almond milk
1/3 cup coconut oil, melted if it is solidified
2 eggs
1 t. vanilla or almond extract
1 cup berries (blueberries don’t need chopped, but strawberries, cherries, raspberries or blackberries will need to be diced into about ¼ inch pieces.)
1 cup chocolate chips
½ c. to 1 c. chopped nuts
Directions
Sift and stir together the flour, sugar, cocoa powder, baking powder, baking soda, and salt in a separate large bowl, and make a well in the center; set aside.
Whisk together the yogurt, milk, coconut oil, eggs, and almond or vanilla extract in a bowl until evenly blended. Pour the yogurt mixture into the well, then stir in the flour mixture until just combined. Fold in the berries, nuts, and chocolate chips. Spoon into prepared muffin cups, filling half full. (I used cupcake liners.)
Bake until a toothpick inserted into centers comes out clean, about 20 minutes.
Try with a little smear of Nutella; or a slice of banana and peanut butter, or a spoon of cherry or strawberry preserves. Heaven….

This was printed from: We Laugh, We Cry, We Cook
The site URL: http://welaughwecrywecook.com
The Title:Double Chocolate Berry Muffins
The URL: http://wp.me/p1UwM9-RT
This was printed from: We Laugh, We Cry, We Cook
Marinated, MOIST, Grilled Turkey Tenderloins
Posted: December 31, 2012 Filed under: Chicken, Main Dishes, Turkey, Uncategorized | Tags: dijon mustard, grilled, marinated, moist, red wine vinegar, savory, terikyaki, turkey tenderloins, Worcestershire Sauce 7 Comments
(Becky, the Mama.)
This Grilled Turkey Loin Recipe is our MOST popular recipe on this site! Thanks so much for making it so! Be sure to also check out a new and awesome recipe for juicy, marinated grilled Pineapple Teriyaki flank steak. Also melt-in-your-mouth delicious.
“What is Sue making for dinner?” I asked Greg on the way to our friend’s home for a patio supper.
“I think she said turkey tenderloins,” Greg answered.
I must admit, though I knew our friend Sue to be a fabulous cook, I prepared myself for the dry, tasteless poultry that turkey breast has always been in my previous experience. (Obviously, I’ve not yet perfected the art of a moist Thanksgiving bird yet!)
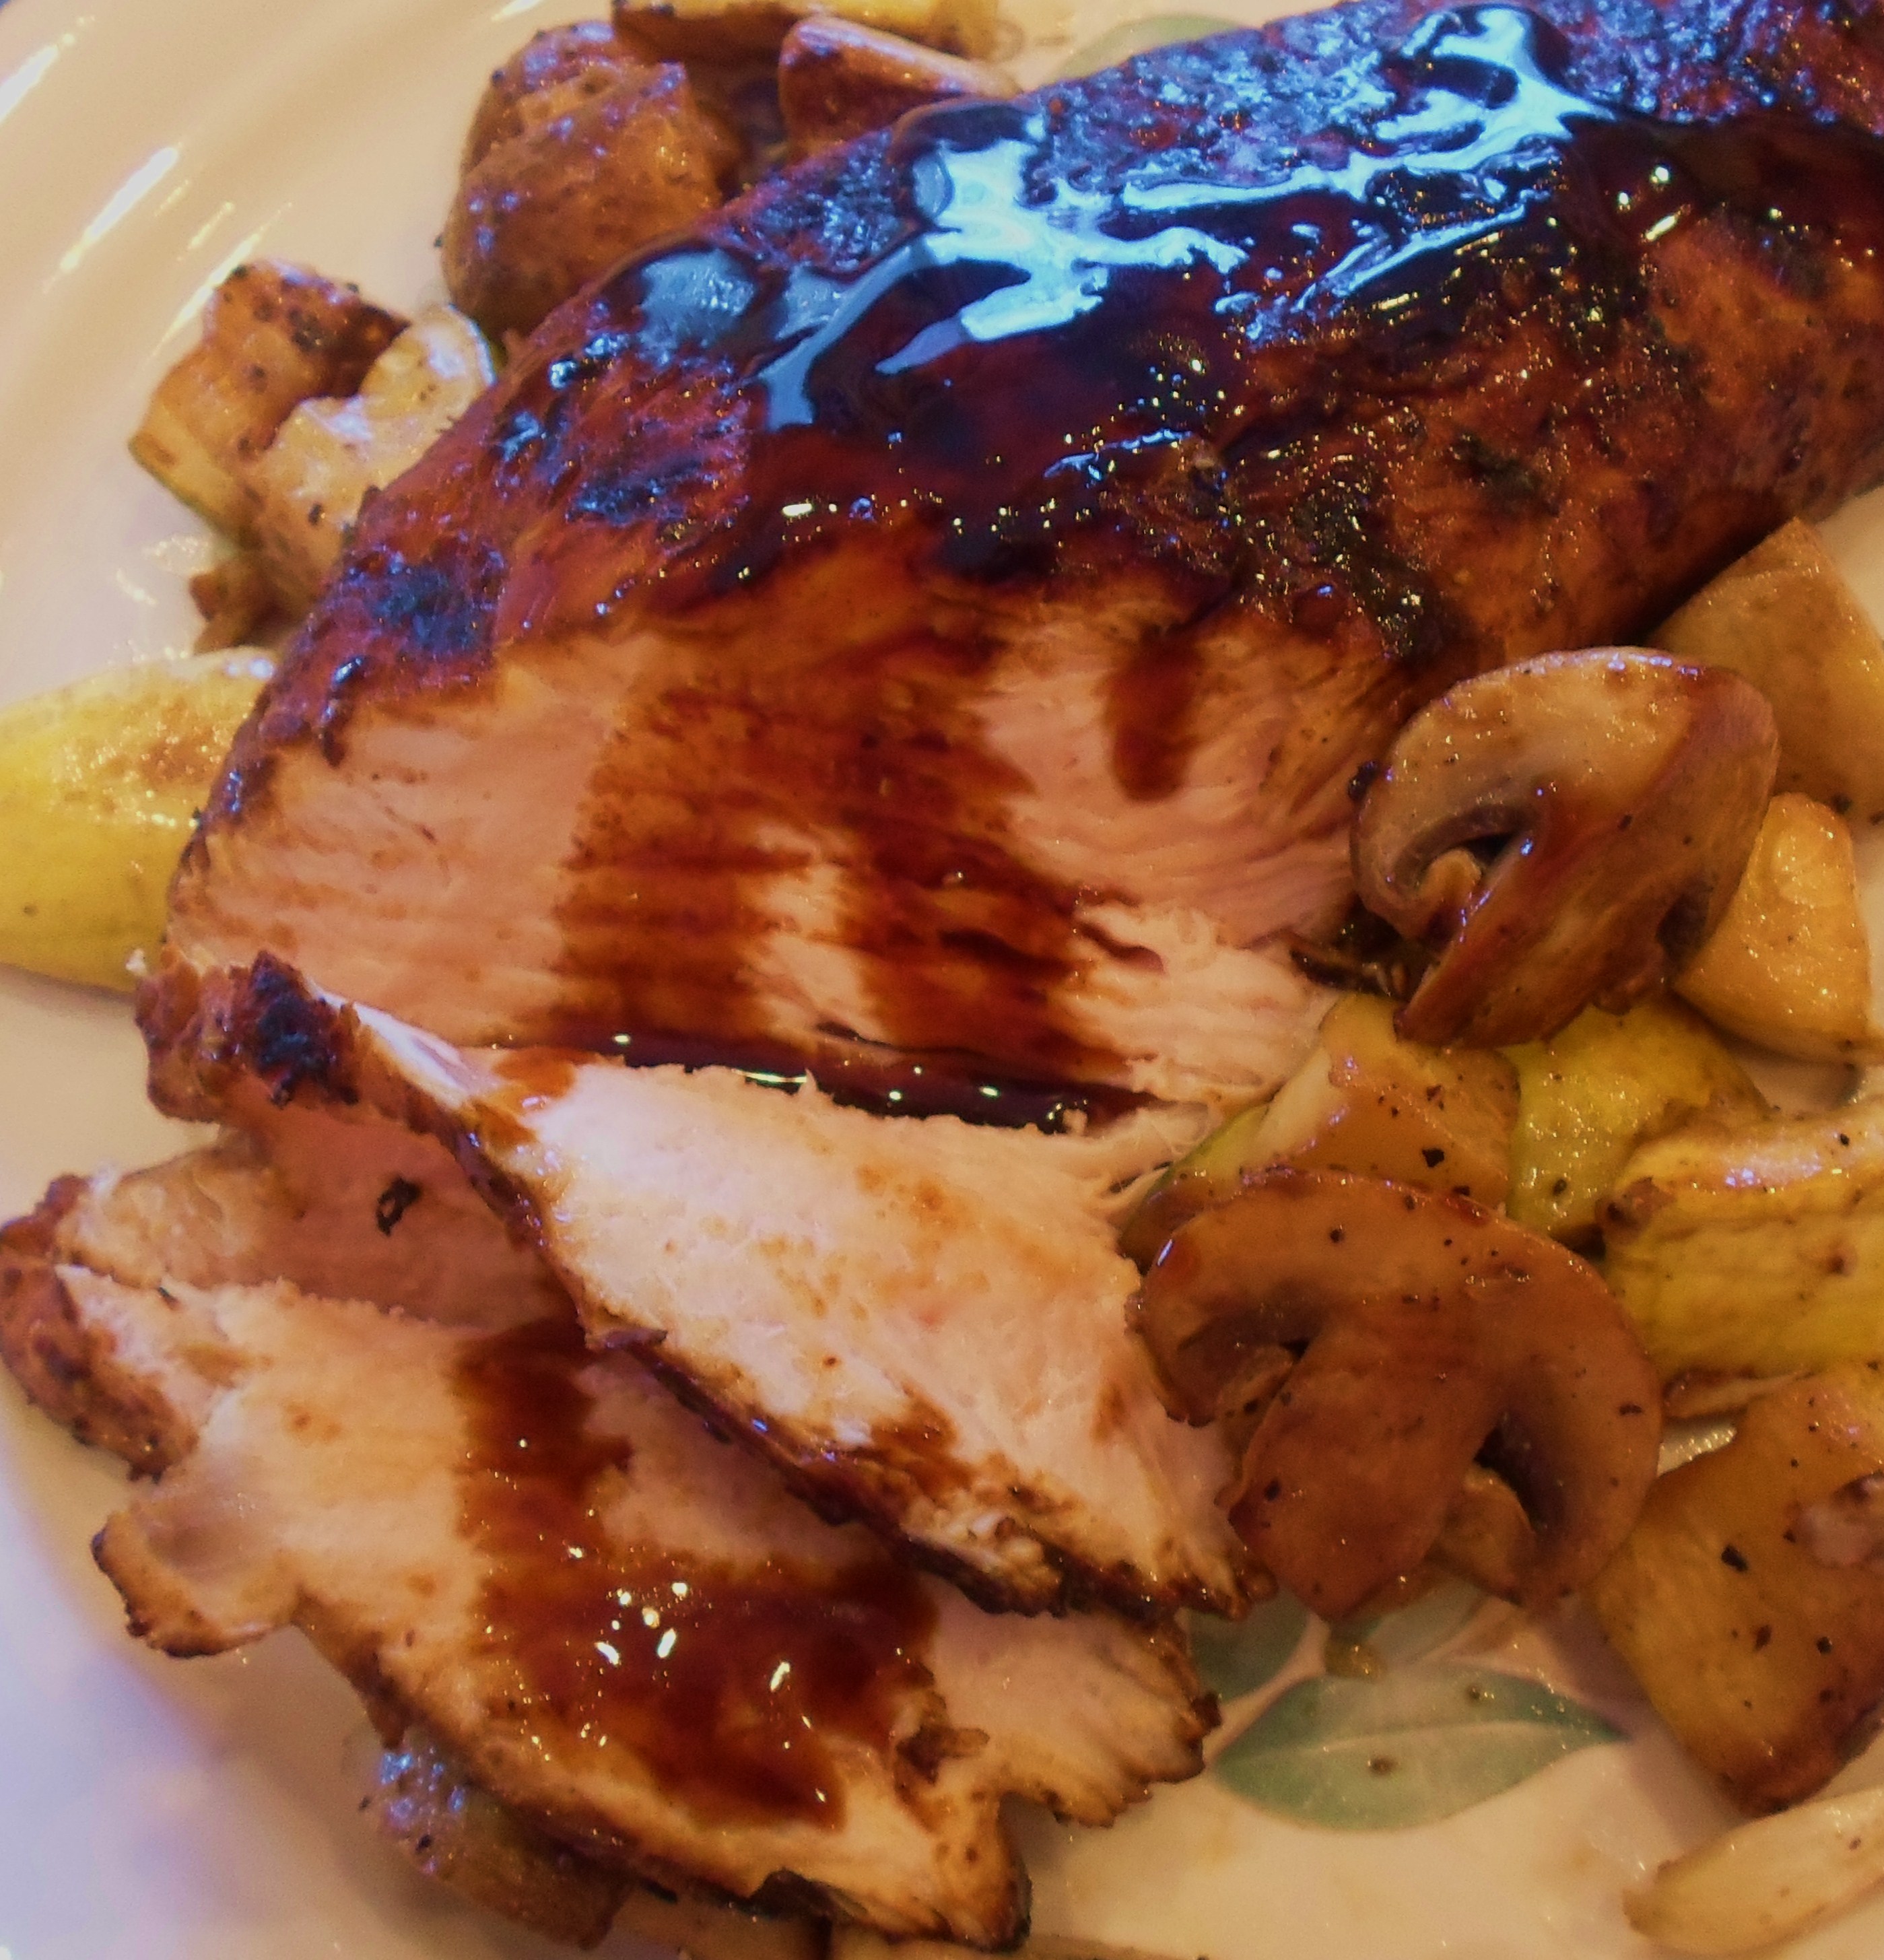
So when Sue and her husband Jason served us a beautiful piece of grilled, moist turkey tenderloin, loaded with flavor, I was in awe. Then I asked for seconds. And then I woke up thinking about it the next day – the sign of truly memorable meal.
“Okay, Sue, how did you turn turkey breast into meat butter?”
She sent me a recipe for a marinade with lots of ingredients, but all of them were in my pantry. The tenderloins are best if you can marinate them for a few hours or overnight. Sue recommends using a digital meat thermometer to eliminate guesswork and avoid overcooking.
Turkey tenderloins typically come two to a package and are a little smaller than pork loins. In fact, they look a lot like chicken breasts, if the hen was named Dolly Parton. Two other benefits: this turkey is moist as can be, but has very little fat and is a great low-cal source of high quality protein. In addition, it is very affordable and the leftovers make fabulous sandwiches. (Try turkey, whipped cream cheese, green onions and cranberry sauce sandwiches!)

Don’t be too daunted by the list of ingredients: use what you have on hand and just substitute something similar if you are missing an ingredient or two. I have made a couple of tweaks to Sue’s recipe, and you can feel free to do the same and make it your own. Marinades are awfully forgiving. As long as you have something salty (salt, soy) something a little sweet (teriyaki, sweet chili sauce, brown sugar, honey, maple syrup), something garlicky (fresh or powdered) and acidic (wine, vinegar, citrus juice) in the mix, it is probably going to be yummy!
Most of us are ready to get our health and our waistlines back in shape after the holidays, and this is a great recipe (under 170 calories in 3 oz serving) to put in your New Year file! I served these tenderloins pictured using the second grilling method in the recipe below. I roasted chunks of zucchini, yellow squash, mushrooms and garlic with a little olive oil, salt, and balsamic vinegar for a side dish. Lip-smacking good meal!
Grilled Turkey Tenderloins
- 2 turkey breast tenderloins
- 1/4 cup olive oil
- 1/4 cup reduced-sodium soy sauce
- 1/4 cup teriyaki sauce
- 1 t. hot sauce such as Tabasco
- 1 T. maple syrup
- 2 tablespoons red wine vinegar
- 2 T. Worchestershire sauce
- 1 tablespoon spicy brown or Dijon mustard
- 3 garlic cloves, minced
- ½ cup wine, beer or cola
- Grill or Steak Seasoning (enough to sprinkle both sides of tenderloins)
Directions
Sprinkle all sides of turkey will steak or grill seasoning (or salt and pepper.) In a 2-cup measuring cup or bowl with pourable “spout” – whisk all the ingredients for marinade. Pour 2/3 cup into a Ziplock bag; add turkey. Seal bag and turn to coat; refrigerate for 4 hours to overnight, turning at least once more during that time. Cover and refrigerate remaining marinade.
When ready to cook, discard marinade that is in the bag with the tenderloins, then proceed to cook using one of the following methods.
Outdoor Grill: Using long-handled tongs, moisten a paper towel with cooking oil or a heat resistant basting brush and lightly coat the grill rack. Grill, covered, over medium heat for about 7-9 minutes on each side or until a thermometer reads 170°, basting frequently with reserved marinade.
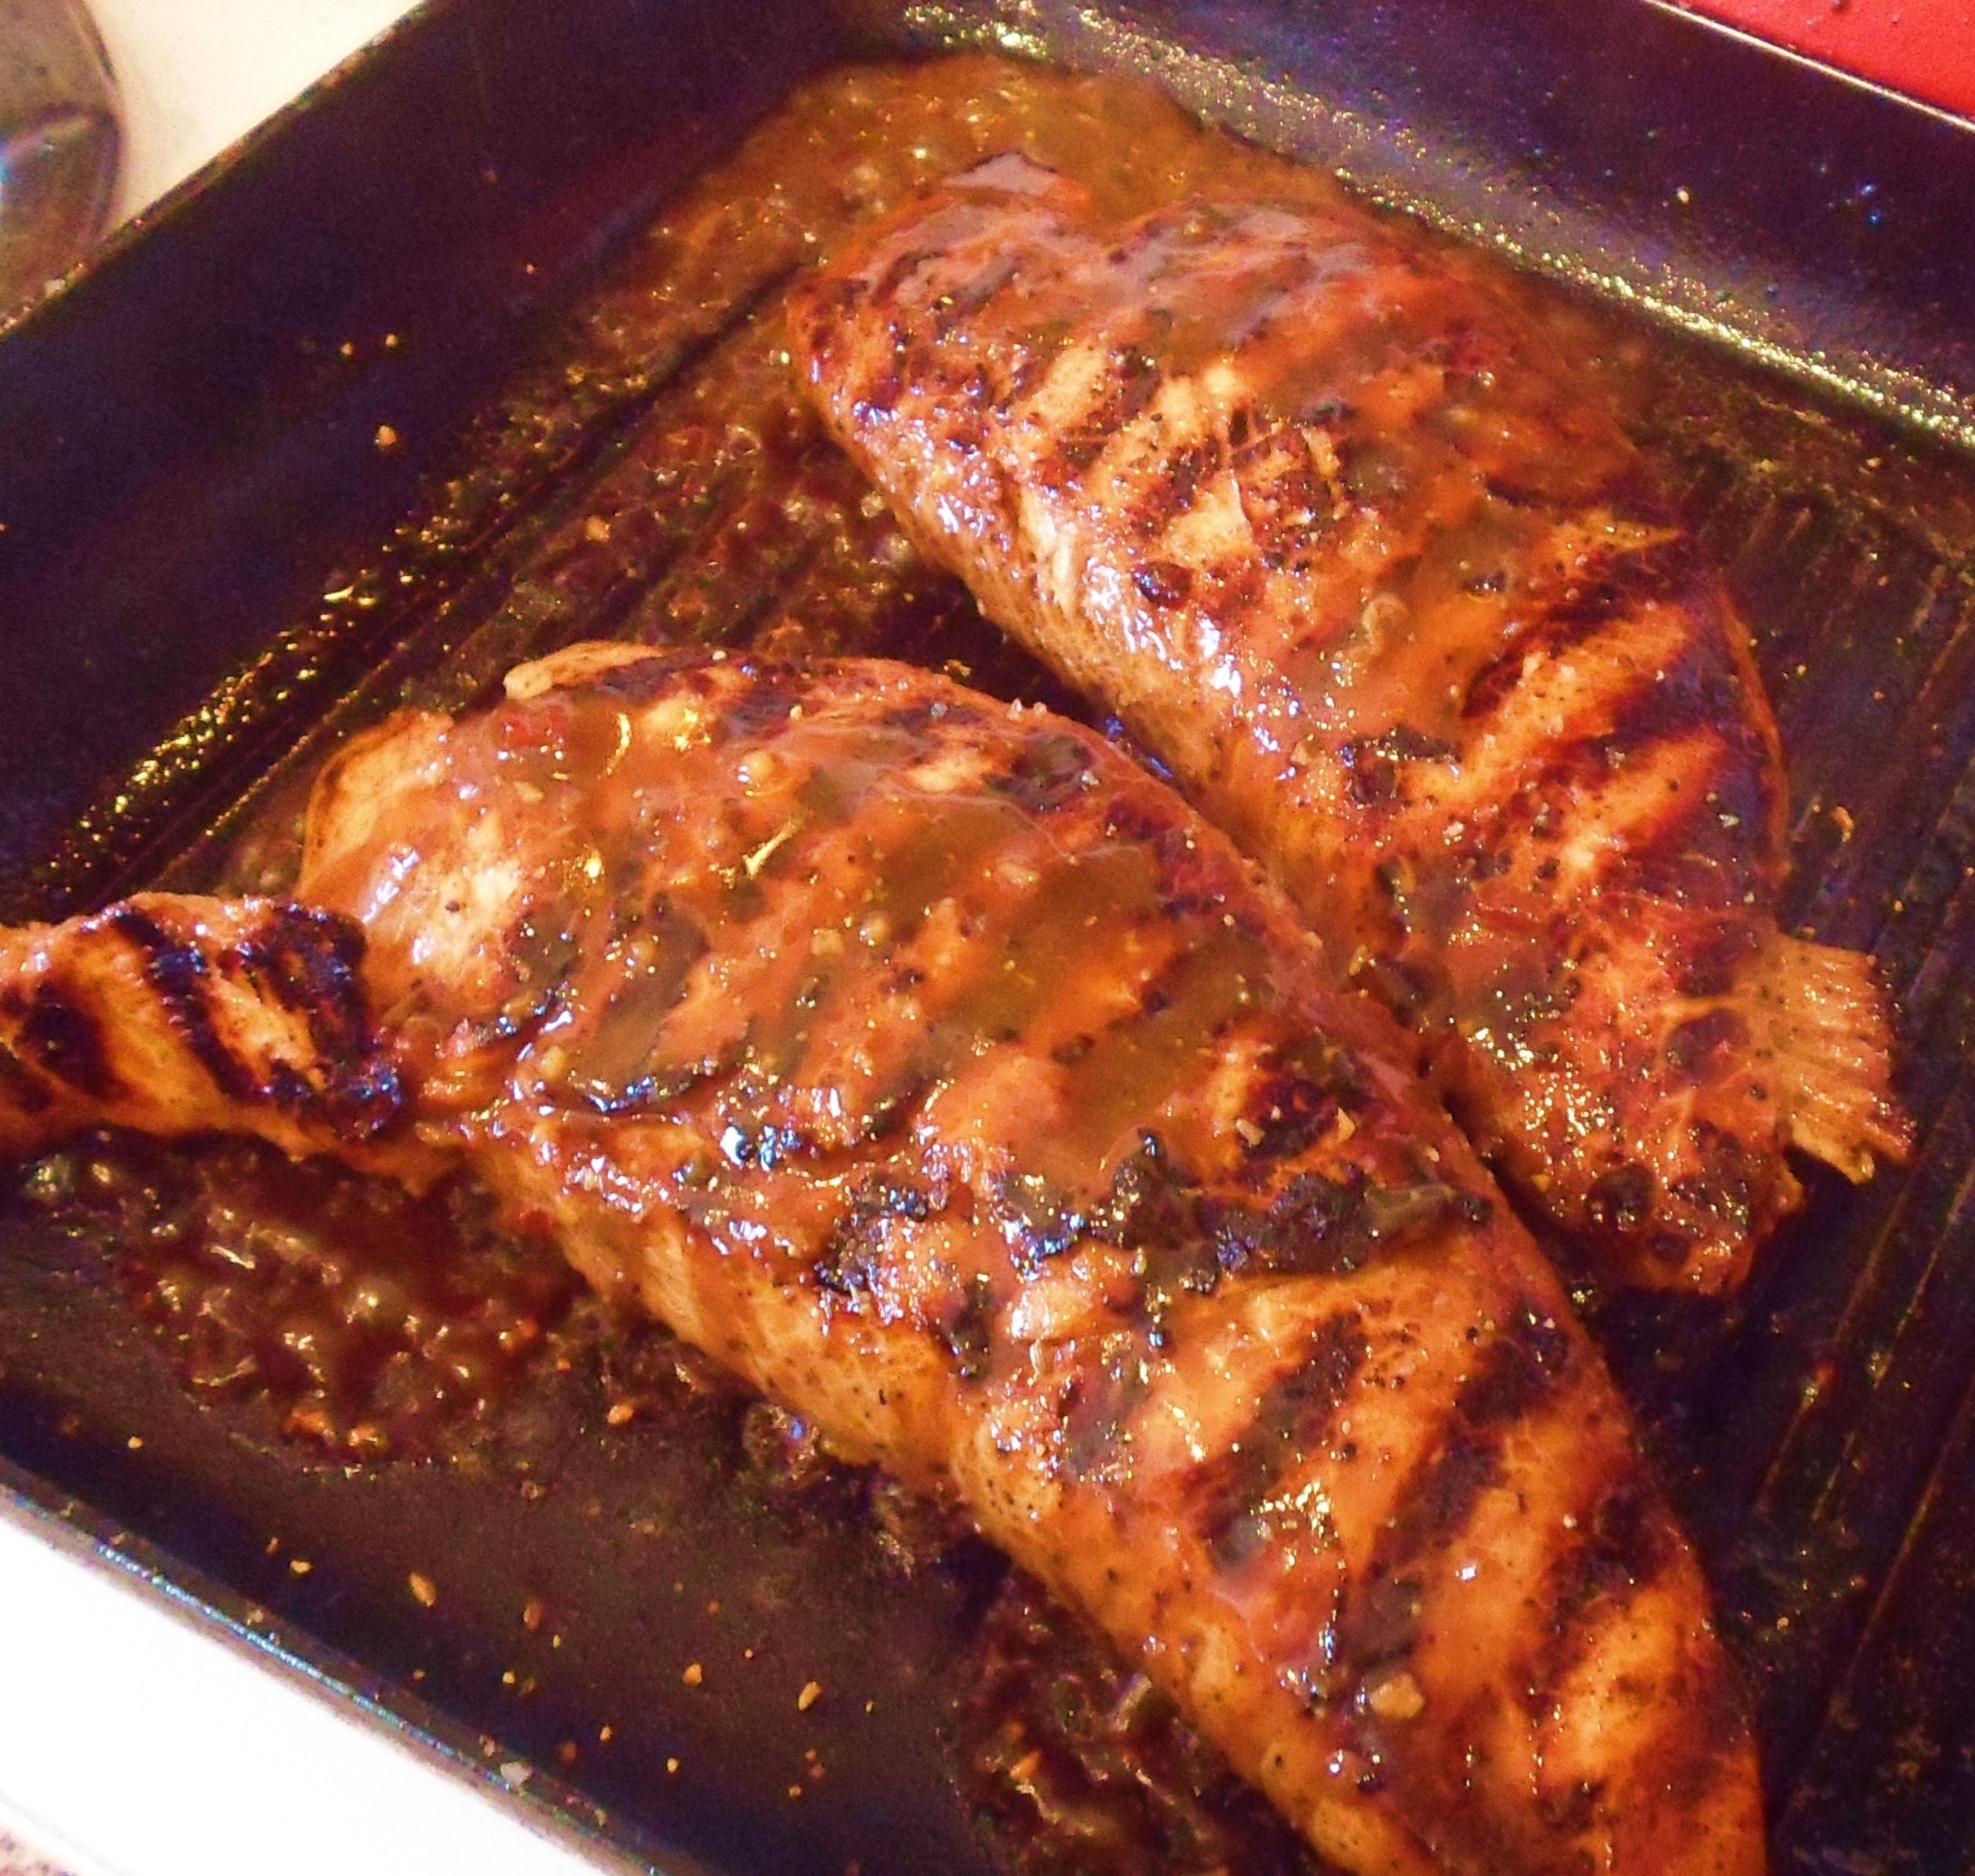
Alternative Indoor Method: Use a nonstick or iron skillet grill pan that has been generously coated with olive oil and grill tenderloins on both sides until dark golden brown grill marks appear. Put in a preheated 350 degree oven and cook about 10 more minutes or until internal temp reaches 170 degrees.
Remove from oven or grill and immediately cover with foil to let juices redistribute before slicing. Heat reserved marinade to boiling in a small sauce pan and drizzle over the tenderloins.
This was printed from: We Laugh, We Cry, We Cook
The site URL: http://welaughwecrywecook.com
The Title:Marinated, Moist, Grilled Turkey Tenderloins
The URL: http://wp.me/p1UwM9-Rg
This was printed from: We Laugh, We Cry, We Cook
Disclosure: This post contains affiliate links.
Roasted Eggplant & Red Pepper Tapenade (Or “That Yummy Stuff”)
Posted: December 26, 2012 Filed under: Appetizers, Italian, Sauces and Dressings, Sides, Snacks, Uncategorized, Vegan, Vegetarian, Veggies | Tags: capers, eggplant, garlic, greek, italian, Mediterranean, Naan, New Year's Eve Appetizers, olives, onion, Party Appetizers, pepperoncinis, peppers, Pita, red onion, roasted, Room Temperature Appetizers, taenade, tomato paste Leave a comment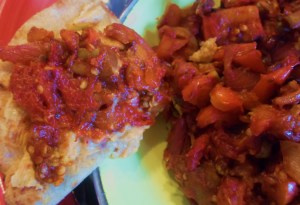
(Becky, the Mama.)
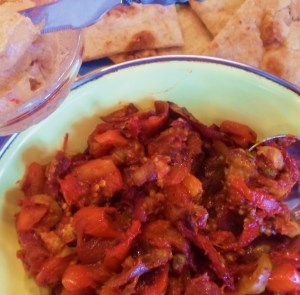
The first time I created and served this recipe for a patio party, guests kept saying, “Oh my goodness, what IS this yummy stuff?” I struggled to describe what is was, because, as is so often the case, I just put whatever sounded good to me into a pan and crossed my fingers. This recipe began with a pan of diced roasted Greek veggies that becomes a colorful, intensely flavored Mediterranean topping for wedges of hot grilled Naan bread, alongside hummus and a lemon-zest ricotta. If I were to be asked to create a “perfect bite” on some sort of home cook’s competition, I’d serve this Roasted Eggplant and Red Pepper Tapenade on top of, well, just about anything.
This hearty appetizer is perfect with a glass of good wine, either on a hot summer day or a cold winter evening. It is wonderful at just about any temperature but probably best served a room temp which makes it a great no-fuss appetizer for parties. (Also perfect for New Year Celebrations coming up.)
I must confess, I am a little sad when there is not a container of “Yummy Stuff” in the fridge somewhere. It’s become my favorite condiment on top of fresh grilled Naan or Pita,burgers or sandwiches, or as a topping to punch up flavor in everyday spaghetti. If you are vegan, it’s especially nice to keep on hand to add a quick burst of color and flavor to lentils, beans, brown rice or quinoa.
Roasted Eggplant & Red Pepper Tapenade
(Or “That Yummy Stuff”)
* Recipe of Roasted Veggies below,cooked, cooled and diced to desired “chunkiness” for spreading
1 T. olive oil
2 T. tomato paste
1 T. red wine vinegar
1 ½ t. sugar
Couple of shakes hot pepper sauce (like Tabasco) to taste
1 T. capers or 1 T. finely chopped pepperoncini peppers
5 large green stuffed olives, sliced (may use black olives if you prefer)
1/3 c. chopped dried tomatoes
1 to 2 T. water, if needed
Salt and pepper, if needed
Directions:
In medium to large skillet, heat olive oil. Add diced roasted Garlic Greek Veggies. Add tomato paste, vinegar, sugar, capers or pepperoncinis, sundried tomatoes, and olives. Stir and cook in skillet until sauce is thick, well-blended and hot and some of the “vinegary” smell and taste is cooked out, about 2 minutes.
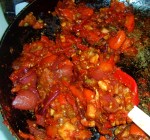
Add water if needed, but keep the tempenade thick. Serve warm, room temperature or even cold if you like. It is amazing on grilled Naan or pita bread atop hummus, fabulous as a thick relish-like topping for a Greek-style burger or any sandwich.

Mediterranean Garlic Roasted Veggies
Preheat oven to 350 degrees
Ingredients:
1 eggplant, peeled and diced about 1 inch cubes
1 red pepper, seeded, stemmed and rough chopped in big chunks
3 big cloves garlic (or 4 smaller ones)
1 red onion, peeled and rough chopped in large chunks
3 T. olive oil
1 T. balsamic vinegar
Fresh ground sea salt and pepper (light sprinkling over all)
Directions:
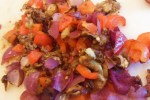
On a large baking sheet sprinkle olive oil and balsamic vinegar. Place chopped eggplant, red pepper and red onion on pan. Using clean hands mix the veggies with the oil and vinegar and then give the whole thing a light sprinkling of fresh sea salt and pepper. Put whole garlic cloves somewhere on pan either wrapped in foil or parchment with a little olive oil; or use a small clay garlic roaster.
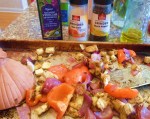
Roast veggies for about 20 to 30 minutes or until veggies just begin to get soft and brown-blackish in spots. Smash soft roasted garlic into a paste with flat edge of knife or fork, and toss with veggies.
This was printed from: We Laugh, We Cry, We Cook
The site URL: http://welaughwecrywecook.com
The Title: Roasted Eggplant & Red Pepper Tapenade
The URL: http://wp.me/p1UwM9-QX
This was printed from: We Laugh, We Cry, We Cook
Cinnamon Crisps (Easy to Make with Kids)
Posted: December 17, 2012 Filed under: Cooking with Love, Desserts, Kids Cooking, Snacks, Vegan, Vegetarian | Tags: after school snacks, baking, Christmas cookie alternatives, cinnamon, coconut oil, cookie cutters, cookies, crisps, healthy snacks, healthy snacks for kids, sugar, tortillas 1 Comment
(Becky, the Mama. It is the small things you do with small people that you and they will look back on and cherish. I hope and pray you get a little bonding time in the kitchen with young ones this week. Here’s a recipe that will make it easy during a time when many feel perpetually overwhelmed. Love and Merry Christmas to all our Blog Readers and thank you so much for sharing our love of cooking and passing it along to others.)
There is, of course, the Martha Stewart way to make Christmas cookies with your kids when they are home from school this coming week for Christmas break. It looks homey and fun, easy and bonding. Especially when using child actors on a TV set.
What it is, in reality, is a long process involving antsy children, along with lots of sugar, clouds of flour, rolling pins and sticky dough (that will take a jack hammer to remove after it is dry), food coloring stains, and sometimes tears of frustration (from either children or parent). The experience almost always ends with the kids giving up the thrill of “making Christmas cookie memories together,” after half-heartedly decorating one, maybe two, cookies. Then they start begging to go play outside, watch cartoons or play a video game. So Mom ends up finishing up the decorating, cleaning up the mess, and downing about six cookies she doesn’t really need or want that taste like thick sweet cardboard with green and red sugar paste on top.
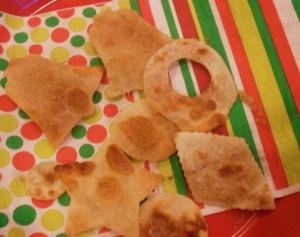
I’m here to give you Becky Johnson’s (alias “Nonny”) Easier Way Out. (Merry Christmas!) It takes about five to ten minutes to make these “Christmas Cinnamon Crisps” with your children, start to finish. If you use whole wheat tortillas and dust them with organic coconut or date sugar, you can even claim them to be almost downright healthy. A cold glass of diary or almond milk will help balance the sugar with a bit of protein and keep your children off the ceiling from a pure sugar high. Also, these crisps are so light and crunchy, they will not end up feeling like a sugar dough ball in their stomachs. (Or yours.)
We made these for Christmas, but you can use any holiday or seasonal cookie cutters to make this an easy-to-make treat year round.
Cinnamon Crisps
Ingredients:
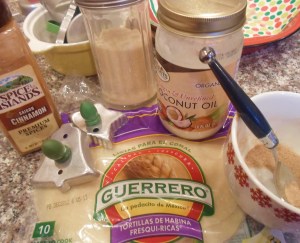
2 large flour tortillas, whole wheat or white (I prefer to use the raw tortillas, such as Tortilla Land or Guerrero Brands because they puff up like little sopapillas, but pre-cooked ones will also work)
1 to 2 T. coconut oil or other healthy oil
Cinnamon & Sugar Mix (1/4 c. sugar to 1 T. cinnamon)
Directions:
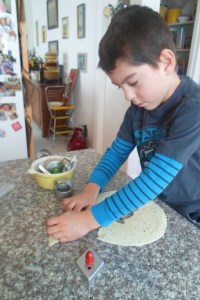
Using good sharp edged cookies cutters, let the kids cut out cookies from the tortilla.
In the meantime, melt 1 T. coconut oil in a medium skillet on medium high heat. Drop tortilla “cookies” into hot oil (obviously an adult will need to do this part).

Then gently roll them in a bowl of the cinnamon and sugar, coating both sides.

Let them cool a bit, but best eaten while warm and fresh! (You made need to add more coconut oil as you cook the crisps.) Cut up left over “scraps” of tortillas into “crazy shape” pieces to cook, coat and eat last!
Variations:
There are so many ways you can jazz up this basic idea. You can coat them with coconut or date sugar, and use whole wheat tortillas (or even flat bread). You can make a quick vanilla or chocolate glaze and dip one side in (like a donut) and then dip again in crushed nuts or seeds or sprinkles or coconut, like thin tiny donuts. You can skip the cinnamon and sugar and dip in a honey-butter or peanut-butter and honey mixture. Have fun with this!

The site URL: http://welaughwecrywecook.com
The Title: Cinnamon Crisps
The URL: http://wp.me/p1UwM9-Qw
This was printed from: We Laugh, We Cry, We Cook
Clementine & Cheese Stick “Palm Tree” Snack for Kids
Posted: December 9, 2012 Filed under: Fruit Dishes, Kids Cooking, Snacks, Vegetarian | Tags: cheese sticks, clementine, kid snacks healthy, palm trees, string cheese Leave a comment
(Becky, the Mama)
Sometimes the easiest recipes are the ones we use the most. My grandson Georgie bellies up to the kitchen bar at least once or twice a day and asks for a “Palm Tree,” in the same way a character on the TV show “Cheers” would order their favorite drink.
I walked to his little school the other day to pick him up (it is only a few blocks away!) and on the way out the door, tucked a piece of string cheese in one pocket and a Clementine orange in the other. When he walked out of his Kindergarten class I produced the “goods” and made him a Palm Tree right there on the spot. His eyes lit up with joy and admiration. It takes so little to make a child happy. The orange quenches the thirst that comes from the saltiness of the cheese, so it makes a great all-in-one treat I feel good about giving him.

George on his first day of Kindergarten, here in Colorado, last week!

Clementine & Cheese Stick “Palm Tree” Snack for Kids
Ingredients:
Stick of Cheese (String cheese works fine, too)
Clementine orange, peeled
Directions:
Fan out the orange a little bit on one end and plop it atop a cheese stick. Serve to your favorite little one, with a wink and a smile.
‘
This was printed from: We Laugh, We Cry, We Cook
The site URL: http://welaughwecrywecook.com
The Title: Clementine & Cheese Stick “Palm Tree” Snack for Kids
The URL: http://wp.me/p1UwM9-Q4
This was printed from: We Laugh, We Cry, We Cook
Oat Nut Fruit Gems
Posted: December 4, 2012 Filed under: Breads, Breakfast Foods, Desserts, Fruit Dishes, Gluten Free, Kids Cooking, Snacks, Uncategorized, Vegan, Vegetarian | Tags: bananas, cherries, coconut, cookies, cranberries, dates, dried fruit, energy bars, granola bars, healthy breakfasts, healthy lunch box treats, muffins, nuts, oatmeal gems, oats, seeds, trail mix 2 Comments
(Becky, the Mama)
My mother, Ruthie, went from loving her sugary desserts (a la last week’s Honey Slice cookie recipe) to a diet almost completely without sugar a couple of decades ago. A health crisis with her blood pressure and heart, meant major changes in her daily diet – all for the better. Out went everything white: sugar, white flour and white rice… and in came the brown and fiber-filled replacements. But, we are not the sort of women to suffer deprivation in our family. Being the creative and resourceful cook, Mother found several ways to satisfy her sweet tooth while also getting healthier, sporting an adorably slim figure, and having more energy than women decades younger than she!
This is one of my all-time favorite sweet, healthy, satisfying treats that she baked. She served them in a pretty cloth-lined basket at a family supper and they disappeared in what seemed like minutes. Everyone from kids to adults raved about them.
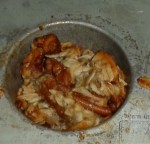
The basic ingredients are so simple: oats, mashed bananas and grated apples. From there you can throw in the kitchen sink: any nuts, seeds, flavorings or dried fruit that you like. Another bonus is that you can serve this recipe to most of the people in your family (or friends) on special diets. The recipe is naturally vegan, and if you use gluten-free oats, it is gluten-free and can easily be adapted to use less sugar or made sugar-free. Kids not only love them, but as you can see from my little helper below, they also love to help make them.

My grandson Georgie, furiously mashing the bananas with a potato masher.
If you want to create warm memories of baking with little ones this Christmas, but prefer not to send them into a Sugar Orbit in the process: this is the perfect mom and child, or grandma and grandchild project, to whip up together.
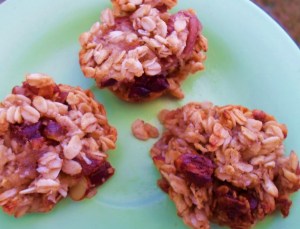
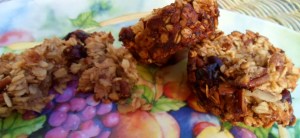
The texture is somewhere between a muffin, an oatmeal cookie, trail mix, and baked oatmeal. Made with sugar they get a nice crunch on the outside but are moist and slighty chewy on the inside. Perfect for quick breakfasts-to-go, they also make great snacks for school lunch boxes and any outdoor enthusiasts in your family. Wrapped in foil they are wonderful sources of energy when hiking, camping or snow-boarding.
This recipe makes 2 dozen. Best stored in fridge and then heated for a few seconds in microwave.
Oat Nut Fruit Gems
Preheat Oven to 350 degrees
Ingredients
2 large bananas, mashed (use 3 if bananas are small)
2 large peeled apples, grated (use 3 if apples are small)
3 cups oats (I like Old Fashioned Oats for the chewier texture)
½ t. sea salt
1/3 c. raw organic sugar (or use other sweeteners such as brown sugar or coconut sugar or even Stevia, according to taste )
½ c. dried chopped fruit (I used dates and dried cranberries. Coconut also works well in this recipe.)
1/2 nuts and/or seeds (I used walnuts and pecans)
2 t. vanilla
Directions
Mix all of the above together in a large mixing bowl. Spray or oil muffin pans. Fill them about 2/3 full and gently press down with back of spoon. if you want them to look more muffin-like you can mound them a bit in the middle, as they won’t rise. (No leavening or eggs.)
Bake for 20 to 30 minutes or until just golden brown around edges and top.
When cool to touch, gently remove from pan. If not eaten in a day, store in fridge in a sealed bag or plasticware and zap for a few seconds in microwave to warm.
This was printed from: We Laugh, We Cry, We Cook
The site URL: http://welaughwecrywecook.com
The Title: Oat Nut Fruit Gems
The URL: http://wp.me/p1UwM9-Pz
This was printed from: We Laugh, We Cry, We Cook
Granny’s Chewy Honey Nut Sliced Cookies
Posted: November 30, 2012 Filed under: Desserts, Uncategorized | Tags: Bars, Chewy, honey, Nut, Pecan, Slice and Bake Cookies, Sliced Cookies 1 Comment
(Becky, the Mama.)
My daughter Rachel and I need T-Shirts saying, “We Survived Thanksgiving Camp Week.” But for now this picture of us in our aprons from last week will have to do. (Yes, mine is on backwards. Wore it unknowingly that way ALL Thanksgiving Day.)

Together we made umpteen meals for 8 to 14 people (including vegan alternatives) over an 8 day period. We chased Baby Jackson (and I DO mean CHASE… that baby can run now!) and entertained his 5 year old cousin Georgie. (Who flew here from Seattle all by himself! )

These two cousins were perfect playmates for each other!
It was glorious chaos and though our bodies ached, the good memories will last a lifetime.
We Laughed, We Cried, We Cooked. But alas, We Did Not Blog.
But now we’re baaaack, and not just cooking, but writing again.
Today’s cookie recipe began with an email to request to my mom, who my kids call Granny.

My mother “Granny” and my sister with Jackson, Thanksgiving 2011
“Mother, do you have the recipe for Honey Slices that you used to make many years ago? Want to do an unusual nostalgic cookie for Christmas season and I’ve got a hankering for this blast from my past! Love, Becky”
“Dear Becky, I got it! Did you ever make these cookies or watch me do it? It’s a little complicated procedure and different from almost any cookie I’ve ever made or seen, but worth it! I did not have a detailed recipe since I got the recipe from the bakery where I worked when I was in Jr High in Sweetwater, Texas, so I hope this one makes sense! Love, Mother”
“Wonderful! I looked in all my classic cookbooks and online for it, and it was no where to be found. Nothing even similar to it. And I DO remember watching you make them so I think I can do it. Do you have any more memories that go with this recipe? Love, Becky”
“Dearest Daughter, As for the honey slices, about the only story I know about them is one people might not believe. (Becky’s note: this is because my mom hasn’t eaten sugar for years and has a reputation for healthy eating!) When I worked in the bakery where they were made, I went to work on Saturday morning and literally ATE donuts, brownies, date bars and HONEY SLICES all day long. Really. All day long. I weighed 15 pounds more at age 13 than I do now! And, of course, that is probably where I began to develop a physical intolerance for sugar, and now my tummy says plainly, ‘No, thank you. Do not send any sugar down here!’”
This recipe is a rare treasure and my mother may have had the only copy left on earth! Until now, that is. And I’m sharing it with you. (Merry Christmas!)
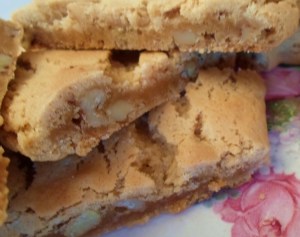
You may be able to jostle ingredients and up-size the healthy factor, but I wanted the exact same cookie I remember Mother baking when I was a kid so I didn’t mess with it. The cookies cool off to create a chewy moist middle, chocked with nuts. In fact, if you love pecans, feel free to toss in an extra handful to this recipe.
Another note: this recipe makes a BUNCH. (50 to 60 cookies, depending on how thin you slice them.) But you can freeze the logs and use another time; or better yet, share a plate or two with a neighbor or friend. (Or cut the recipe in half.) This time of year the bigger the cookie batches, the better.
Granny’s Honey Nut Sliced Cookies (“Honey Slices”)
Preheat Oven to 350 degrees.
Ingredients:
4 c. flour
1 t. baking soda
1 t. salt
2 c. sugar
1 c. Crisco shortening
3 eggs
1/2 c. honey
1 c. chopped pecans
1 t. vanilla
Directions:
Sift together the first 3 ingredients; set aside.
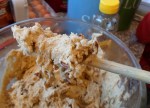
Cream together sugar, Crisco, 3 eggs and honey.

Georgie, my helper, adding honey to the batter
Gradually stir in flour mixture to form batter, then add pecans and vanilla.
The batter needs to be chilled and divided into about 6 lumps:

Then each lump formed into one long, round roll a bit over an inch in diameter. Put the rolls lengthwise onto a greased cookie sheet, leaving room for a second roll beside it and about 4 inches away from the first roll.

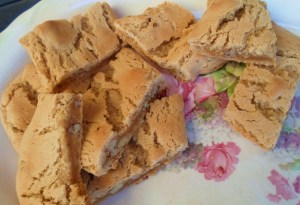
Ta DAH Two one inch diameter “worms” — ready for the oven
Bake at 350 degrees for about 20 minutes. They should be firm but not very browned.

Continue preparing the rest of the rolls in the same manner. When the rolls are cooled, make slightly diagonal slices across the rolls about every 1 and 1/2 inch to form cookie bars.

This was printed from: We Laugh, We Cry, We Cook
The site URL: http://welaughwecrywecook.com
The Title: Granny’s Chewy Honey Nut Sliced Cookies
The URL: http://wp.me/p1UwM9-P9
This was printed from: We Laugh, We Cry, We Cook


